

Key Takeaways
An MG air filter change is straightforward when the replacement part, airflow direction, and housing location are confirmed first. Engine and cabin filters serve different jobs, so treat them as separate maintenance tasks.
- Confirm the filter type and part number for the exact vehicle.
- Work with the engine switched off and the car parked securely.
- Keep dirt away from the open engine intake and cabin fan area.
- Match the new filter’s orientation to the old one.
- Record the replacement date and inspect filters between services.
Identify the right MG air filter for your model
Before opening anything, establish whether you are changing the engine air filter, the cabin filter, or both. Model year, engine, body style, and market can alter the part number and access route. A quick check now prevents a frustrating half-finished job later.
Engine air filter versus cabin air filter
The engine filter cleans air entering the engine, while the cabin or pollen filter cleans air supplied through the ventilation system. They may look similar from a distance, but their shapes, materials, and mounting arrangements are not interchangeable. The engine filter is usually in a housing in the engine bay; the cabin filter is commonly behind a glovebox, lower dashboard panel, or cowl area.
MG models and filter location differences
Older and newer models can place the filter housing in very different parts of the car, and some access panels require more patience than others. For an MG HS, a dedicated cabin air filter guide can help confirm the intended fit and ventilation location. Older examples also vary: guides covering the MG TF air filter, MG ZT air filter, and MGF air filter replacement illustrate why a generic sequence should not replace model-specific instructions.
How to confirm the correct replacement part
Use the vehicle identification number, registration details, owner’s handbook, or a reliable parts catalog to verify the filter. Compare the old filter’s length, width, depth, frame, and seal with the new one before removing the housing for good. A precise fit matters because a filter that looks close can still leave an unfiltered route around its edge.
When to replace each type of filter
Replacement timing depends on the service schedule and the conditions in which the car is driven. Dusty roads, construction areas, heavy traffic, smoke, and frequent short trips can load filters faster than clean, open-road driving. A clean engine filter also belongs in a wider maintenance routine; see these fuel-saving maintenance tips for the broader connection between servicing and economy.
| Filter | Main job | Check for | Replacement cue |
|---|---|---|---|
| Engine air filter | Clean intake air | Dust, leaves, oil, damage | Service interval or contamination |
| Cabin or pollen filter | Clean ventilation air | Dust, odor, dampness | Reduced airflow or scheduled service |
| Activated-carbon cabin filter | Reduce selected odors and particles | Saturation, moisture, damage | Manufacturer interval or odor return |
The table is a starting point, not a substitute for the handbook. If the filter is wet, torn, collapsed, or heavily contaminated, replace it sooner and investigate why the condition occurred.
Prepare for an MG air filter change
Good preparation makes the job cleaner and reduces the chance of dropping grit into an open housing. Gather the replacement parts and check the access route before disturbing clips or trim. The same careful habit applies to other maintenance documents, including checking a shipment reference guide when accuracy matters in a completely different setting.

Tools and replacement supplies
Most jobs need the correct replacement filter, a clean cloth, a small screwdriver or trim tool, and possibly a socket or driver set. A flashlight, disposable gloves, and a small container for fasteners are useful additions. Avoid planning to wash or oil a disposable paper filter unless the manufacturer specifically says it is serviceable.
Safety steps before opening the filter housing
Park on a stable, level surface, switch off the engine, apply the parking brake, and allow hot components to cool. Keep keys away from the ignition while panels are open, and do not force clips that may conceal a screw. If working near electrical connectors or a fan, follow the vehicle’s safety guidance and keep loose tools clear.
Choosing an appropriate work area
A covered, well-lit area is preferable, especially for cabin-filter work where small pieces of trim can disappear under a seat. Avoid windy conditions that can blow dust into the housing or carry the old filter’s debris across the interior. Lay out parts in removal order so reassembly is less of a memory test.
Signs that the existing filter needs extra attention
A filter that is unusually dirty deserves more than a quick swap. Look for dampness, oil traces, rodent nesting, leaves, broken pleats, or debris below the filter. If the cabin filter has caused fan noise after replacement, stop and inspect the fan area carefully; debris can fall through during access, as the pollen-filter warning illustrates.
Replace the engine air filter
The engine-filter procedure varies, but the basic principle is consistent: open the housing without contaminating the intake, inspect the sealing surfaces, and close it evenly. Take a photo before removal if the ducting or clips are unfamiliar. Never leave the intake exposed longer than necessary.
Locate the air filter housing
With the hood open, trace the intake duct from the front of the engine bay toward its airbox. The housing is usually a plastic box with a removable cover, clips, or screws. Do not assume the most visible plastic cover is the airbox; identify where the intake duct actually joins the filter housing.
Remove the housing cover and old filter
Release clips or fasteners in a controlled order and lift the cover gently. If a duct or electrical connector restricts movement, do not pull on the wiring; create only the access specified for your model. Lift the old filter straight out where possible and keep its dirty side away from the open intake.
Inspect the housing, intake, and sealing surfaces
Use a clean, dry cloth or a vacuum held away from delicate components to remove loose debris from the empty housing. Check that the airbox is not cracked and that the gasket or sealing lip is clean, even, and undamaged. A leaf or grain of grit on the sealing surface can matter more than a small amount of dust on the old filter.
Install and secure the new filter
Compare the new filter with the old one, then seat it fully in the molded groove or retaining frame. Follow any airflow arrow or marked orientation, and make sure no pleat is folded over the edge. Before tightening anything, run a finger around the perimeter to confirm the seal is continuous.
Check the engine after the replacement
Refit the cover, reconnect any ducting, and secure every clip or screw without excessive force. Start the engine and listen for an intake hiss, loose cover, or unusual vibration. A short visual check around the housing can catch a pinched seal before the car returns to normal use.
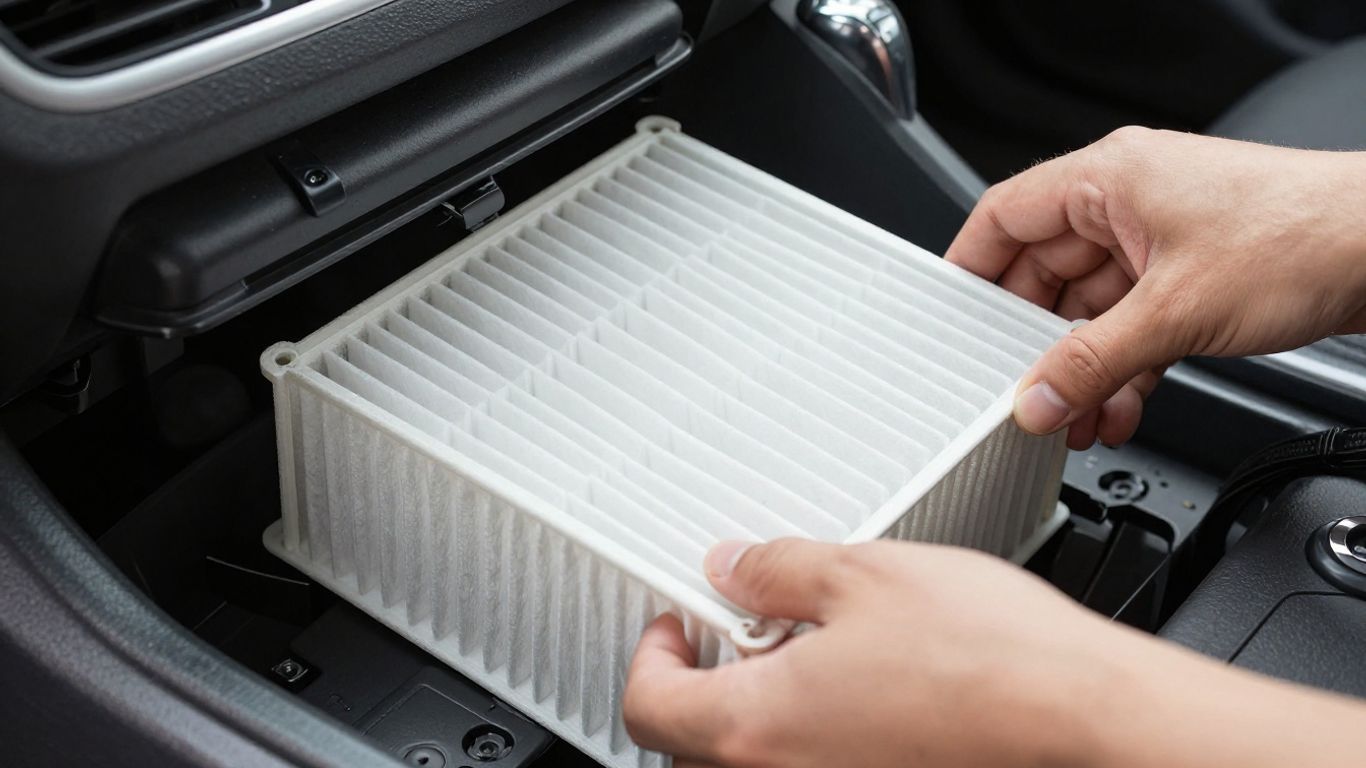
Change the cabin or pollen filter
Cabin-filter access is often less obvious than engine-bay access, and the work may involve a glovebox, footwell panel, or cowl cover. Protect the trim and keep the old filter’s dust from falling into the fan. The goal is not just to insert a new filter, but to preserve the clean airflow path around it.
Find the cabin filter compartment
Check the owner’s handbook or model-specific repair information for the compartment location. Look behind the glovebox, below the dashboard, or beneath a removable cowl panel, depending on the vehicle. Before removing trim, move the seat back and use a light so you can see every fastener.
Remove trim panels or access covers safely
Release visible screws and clips gradually, supporting the panel as it comes free. Use a plastic trim tool rather than a sharp metal edge where possible, and do not yank a panel that may still have a lamp or sensor connector attached. Put each fastener in a labeled place instead of mixing different lengths.
Compare the old and new filter orientation
Note the airflow arrow, pleat direction, and any frame shape before pulling the old filter out. If the old filter is too dirty to read, check the housing markings or the installation diagram for the replacement. A cabin filter can be flexible, but bending it sharply may deform the seal.
Install the filter without damaging it
Compress a flexible filter only as much as needed to pass the opening, then allow it to expand into its guides. Push evenly across the frame rather than pressing one corner deep into the slot. Stop if it catches; a wrongly sized filter can buckle, tear, or sit outside the retaining rails.
Reassemble the compartment and test airflow
Replace the cover and trim in reverse order, ensuring that tabs engage before clips are pressed home. Turn on the blower at several speeds and check for normal airflow, rattling, or a new fan noise. If a sound appears immediately, switch the blower off and inspect for displaced debris or a loose panel rather than accepting it as normal.
A visual tutorial can be useful for recognizing the access panel and filter direction, but the vehicle’s own instructions should control the exact fastener and safety details. Watch first if the layout is unfamiliar, then work slowly beside the car.
Avoid common MG air filter change mistakes
Most filter-change problems come from small oversights rather than complicated mechanical faults. A filter can be new and still fail to do its job if it is reversed, poorly sealed, or installed in the wrong compartment. A deliberate final check is faster than reopening the housing later.
Fitting the filter in the wrong direction
Arrows usually indicate airflow direction, not simply which side faces upward. Match the marking to the housing and verify that the filter sits naturally in its guides. If there is no arrow, use the old filter and the housing shape as references, while checking the supplied instructions.
Leaving gaps around the filter seal
Look around the entire perimeter after installation, including corners that are difficult to see. A folded edge, trapped cable, or displaced gasket can create a bypass route. Close the housing only after the filter remains seated when you release it.
Overtightening clips, screws, or trim fasteners
Fasteners need to hold the cover or panel securely, not crush the plastic. Tighten screws until they are snug and stop when resistance rises sharply. Broken clips and distorted covers can make the next service harder and may create rattles.
Using the wrong filter type or size
Do not substitute an engine filter for a cabin filter or rely on a part that is merely close in dimension. Check the application, frame, seal, and airflow marking together. Returning an unopened incorrect part is easier than trying to make it fit.
Forgetting to clear debris from the filter housing
Leaves, sand, and fragments from the old filter should be removed before the new one goes in. Use a clean method that does not push dirt farther down the intake or into the blower. Once clean, inspect the housing one more time before closing it.
Maintain filter performance after replacement
A replacement filter works best when the surrounding intake and ventilation system remain clean and intact. Keep the service date, mileage, and part details with the vehicle records. That simple record helps you adjust the next check to real driving conditions rather than guessing.
Set a replacement schedule for driving conditions
Start with the interval in the maintenance schedule, then shorten it when the car regularly travels on dusty roads, through traffic, or near construction. Cabin filters may also load quickly in areas with seasonal pollen or frequent smoke. Treat the interval as a guide and let inspection decide when conditions are unusually harsh.
Inspect filters between service intervals
At routine servicing, look at the engine filter’s outer surface and check the cabin filter for dampness, odor, or collapsed pleats. Do not repeatedly shake a disposable filter clean, since that can damage the media or fail to remove embedded contamination. Replace it when inspection shows that cleaning will not restore its condition.
Recognize symptoms of restricted airflow
A restricted engine filter may accompany sluggish response or a change in running behavior, although other faults can cause the same symptoms. A restricted cabin filter is more likely to show as weak blower output, poor demisting, or persistent stale odors. For air-conditioning odor concerns, read about deep-clean warning signs rather than assuming a filter alone is responsible.
Keep service records for future maintenance
Write down the date, mileage, filter type, and any unusual contamination. Note whether the filter was replaced early because of dust, moisture, or odor. These details make future diagnosis easier and give the next owner a useful maintenance trail.
Know when professional help is worthwhile
Ask for help when access requires removing safety-critical components, when the housing or duct is damaged, or when a warning light appears after the work. Professional inspection is also sensible if repeated moisture, oil, rodent debris, or unexplained fan noise returns. A filter replacement should leave the car quieter and properly sealed, not create a new mystery.
Conclusion
A careful MG air filter change comes down to selecting the correct part, keeping the work area clean, respecting the filter’s orientation, and checking the seal before driving away. Treat the engine and cabin filters as separate jobs, follow model-specific instructions, and record what you have done so the next service is easier.
Frequently Asked Questions
How often should an engine air filter be changed?
Follow the vehicle’s maintenance schedule as the baseline, then inspect it sooner if you drive on dusty roads, near construction, or in heavy traffic. Severe conditions can make early replacement sensible.
How often should a cabin air filter be changed?
Many drivers check it annually or at the scheduled service, but the right interval depends on climate, pollen, dust, smoke, and blower use. Replace it sooner when airflow or odor changes.
Can I clean and reuse a disposable air filter?
A disposable paper filter is generally replaced rather than washed or aggressively blown out. Cleaning can damage the filter media and may not remove embedded contamination.
Which way does a cabin filter go in?
Use the airflow arrow or the housing markings. If neither is clear, compare the old filter’s orientation with the installation instructions before inserting the new one.
What happens if an air filter is installed incorrectly?
It may restrict airflow, fail to seal, or allow unfiltered air and debris to bypass the filter. A poor fit can also create rattles or blower noise.
Why does the ventilation system still smell after a new filter?
Odor can come from moisture, the evaporator, ducting, or debris near the blower rather than the filter alone. Further cleaning or professional diagnosis may be needed.
Should I replace both filters at the same time?
Not necessarily. They have different service needs, so inspect each one and follow its appropriate schedule. Replacing both together is convenient only when both are due or contaminated.