

Key Takeaways
A careful MG brake fluid flush is a safety service, not simply a matter of topping up the reservoir. Use the correct fluid, keep air and dirt out, and verify the pedal before driving.
- Confirm the MG model, year, brake layout, and fluid specification first.
- Inspect for leaks or damaged hydraulic parts before flushing.
- Use clean equipment and never allow the reservoir to run dry.
- Bleed each wheel until the old, discolored fluid is replaced.
- Stop and seek professional help if the pedal remains soft or a fitting is damaged.
Why an MG brake fluid flush matters
Brake fluid operates in a sealed hydraulic system, but it is not isolated from the atmosphere. Over time, moisture and debris can reduce the fluid’s performance and may affect components throughout the system. A proper MG brake fluid flush removes more of the old fluid than a simple reservoir refill. The job is worthwhile only when it is done methodically and with the correct specification.
How brake fluid absorbs moisture over time
Most conventional brake fluids are hygroscopic, meaning they gradually take in moisture through microscopic openings in seals, hoses, and the reservoir vent. Repeated heat cycles and long periods of storage can add to the problem. Water lowers the fluid’s boiling point, so hard braking can create vapor and a less consistent pedal. Older cars deserve particular attention because their hoses, seals, and reservoir assemblies may have had many years of exposure.
A useful starting point for classic systems is this guide to classic MG hydraulics, which discusses fluid types, specifications, identification, and service life. It is still necessary to match the information to the exact vehicle and any components that have since been replaced.
Signs of contaminated or degraded fluid
Fluid that has turned dark, cloudy, or visibly dirty deserves investigation, although color alone does not establish its condition. A low level, dampness around a fitting, or a pedal that feels different from normal can indicate a leak or another fault rather than a need for flushing alone. Check around the master cylinder, flexible hoses, calipers, wheel cylinders, and the inside of each wheel. Never treat unexplained fluid loss as routine maintenance.
Risks of delaying brake fluid maintenance
Moisture can encourage internal corrosion, while old contaminants may circulate through narrow passages and working seals. The result can be sticking, leakage, or reduced braking consistency. A flush cannot restore a damaged hose or cylinder, and continuing to drive while the pedal is sinking is unsafe. Brake performance comes first: if the system shows a fault, repair it before replacing its fluid.
How flushing differs from simple fluid replacement
Replacing fluid in the reservoir changes only the fluid that can be reached at the top. A flush draws fresh fluid through the lines and outlets until each circuit is visibly clean, carrying out much more of the old fluid. The process also gives you a chance to check for leaks and air. Guidance on periodic flushing stresses removing as much old fluid as practical before adding fresh fluid, especially when contamination is visible.
Check your MG before starting the flush
The safest service begins with identification, not with opening a bleed screw. Different MG models and production years can use different layouts, fittings, and fluid requirements. Gather the vehicle information, inspect the complete system, and decide whether a flush is actually the next repair. This short assessment can prevent a small maintenance job from becoming a failed brake repair.
Identifying the MG model, year, and brake system
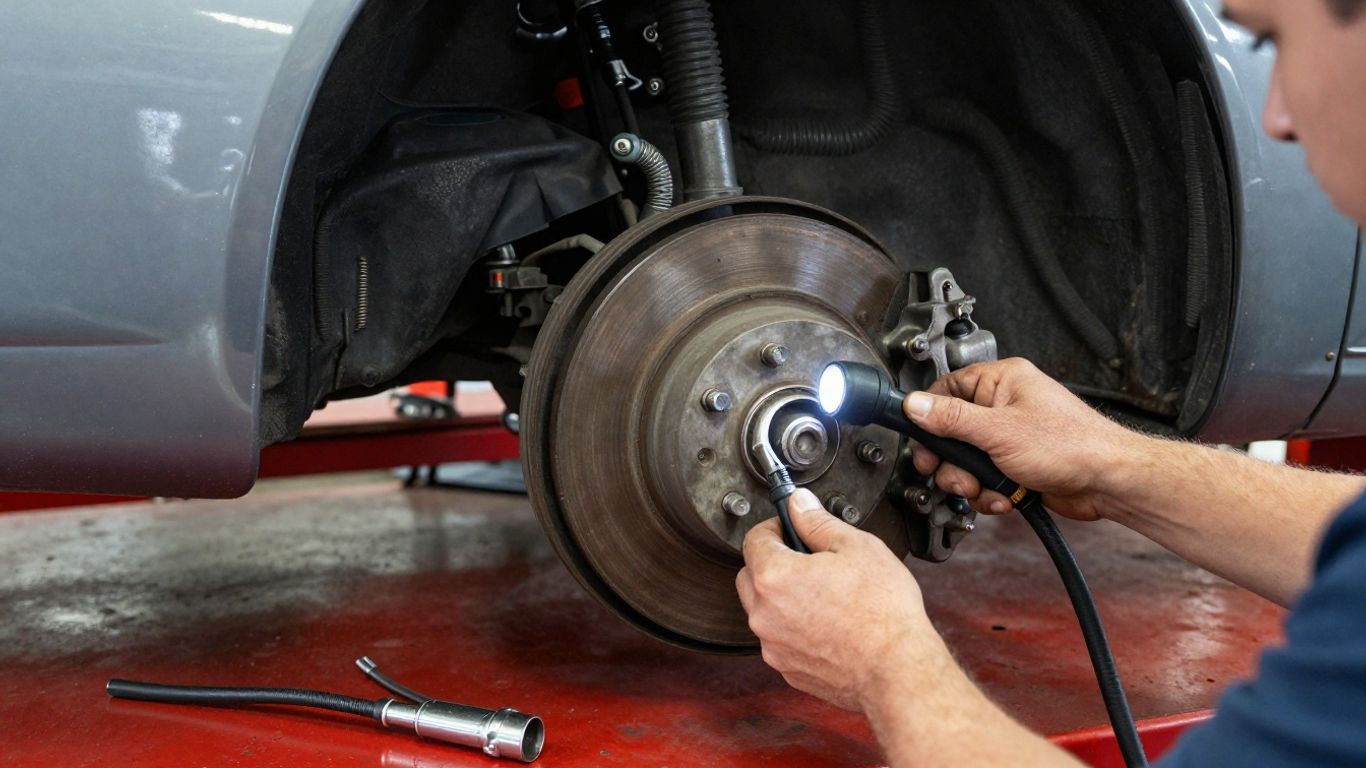
Record the model, year, engine or powertrain variant, and whether the car has a single or dual hydraulic circuit. Look at the master cylinder, pipe routing, and each wheel end rather than relying on a generic online procedure. On an older car, previous owners may have changed hoses, calipers, cylinders, or the master cylinder. Those changes can affect the fittings and bleeding arrangement.
Confirming the recommended fluid specification
Use the owner’s manual, service information, reservoir marking, or component manufacturer’s documentation to identify the required fluid. Do not choose by color, price, or whatever is already on the shelf. If the system’s history is unknown, changing between fluid types may require complete disassembly and cleaning of hydraulic components and replacement of compatible hoses and seals. The brake fluid reference is useful background, but it does not replace the specification for your particular car.
The following comparison helps organize the decision without treating the categories as interchangeable:
| Fluid choice or situation | What to confirm | Why it matters |
|---|---|---|
| Existing conventional fluid | Required DOT specification | Boiling point and seal compatibility depend on the specification |
| Unknown fluid history | Type in the reservoir and service records | Mixing incompatible fluids can damage seals or create contamination |
| Silicone fluid conversion | Full system compatibility | A conversion may require disassembly, cleaning, and component changes |
| Opened or old container | Storage condition and age | Brake fluid absorbs moisture after exposure to air |
Once the specification is confirmed, buy enough fluid to complete the flush without stretching the process or leaving the reservoir nearly empty. Keep the container sealed until it is needed.
Inspecting hoses, lines, calipers, and wheel cylinders
Clean dust from suspected areas and look for wetness, cracked rubber, bulges, rust, chafing, and damaged pipe unions. Inspect the bleed screws before beginning; a rounded or seized screw can stop the job before it starts. Check the reservoir cap and diaphragm as well. Any component that is leaking or structurally compromised needs attention before fresh fluid is sent through the system.
Deciding whether the system needs repairs first
Repair first if the pedal sinks under steady pressure, the fluid level keeps falling, a hose is swollen, or a cylinder is wet. Also postpone flushing if a bleed screw cannot be safely loosened or if the master cylinder shows signs of internal failure. A forum brake fluid replacement discussion illustrates why seized bleed screws and master-cylinder seal concerns deserve planning on older cars. Online advice can suggest methods, but it cannot inspect the vehicle in front of you.
Gather the right tools and supplies
A clean, controlled setup makes brake work less stressful. You need the specified new fluid, a way to move it through the system, and protection for both the car and yourself. Prepare everything before opening the reservoir so the hydraulic circuit is exposed for as little time as possible. If you are working alone, choose a method you can monitor without losing sight of the fluid level or pedal.
Choosing compatible brake fluid
Buy fluid from an unopened container that clearly matches the required specification. Have more than the exact reservoir capacity because flushing uses fluid to push the old material through the lines. Do not return unused fluid to a container that has been open for an extended period. If the car’s history is uncertain, confirm compatibility with a qualified technician before mixing or converting fluid types.
Selecting a pressure, vacuum, or manual bleeding method
A pressure bleeder can provide a steady supply at the reservoir, while a vacuum bleeder draws fluid through a wheel outlet. Manual two-person bleeding uses pedal pressure and a coordinated open-close sequence at each bleed screw. Each method can work when the fittings are sound and the operator can prevent air from entering. Follow the tool maker’s instructions and the vehicle’s service procedure rather than assuming every MG circuit bleeds identically.
Preparing tubing, containers, wrenches, and protective equipment
Use clear, snug tubing and a stable waste container so you can see the fluid change. A correctly sized flare or box wrench is less likely to damage a bleed screw than an adjustable wrench. Keep gloves, eye protection, shop towels, water for accidental cleanup, and a flashlight close by. The core kit is modest:
- Fresh brake fluid in the specified type and quantity.
- Clear bleed tubing and a labeled waste container.
- A correctly sized bleed-screw wrench and basic hand tools.
- Jack stands or a lift rated for the vehicle, plus wheel chocks.
- Gloves, eye protection, towels, and paint protection.
After laying out the equipment, test the tubing on a spare fitting or hold it against the bleed screw to check the seal. A loose tube can spray fluid and draw air, making the result difficult to judge.
Protecting paintwork and managing old fluid
Brake fluid can damage painted surfaces, so cover nearby bodywork and wipe spills immediately with plenty of water. Keep containers upright and never pour used fluid into a drain, onto soil, or into household trash. Store the waste in a sealed, labeled container until it can be taken to a suitable automotive-fluid collection point. Good cleanup is part of the repair, not an afterthought.
Prepare the MG for brake fluid service
Preparation determines whether the flush is controlled or hurried. Work on a level surface with adequate lighting, enough room to reach every wheel, and a plan for keeping the car supported. Cleanliness matters because even a small amount of grit can enter the reservoir or a disconnected fitting. Before you begin, read the complete procedure once so the bleeding sequence and fluid checks are familiar.

Positioning the vehicle safely
Park on firm, level ground, select the appropriate transmission setting, apply the parking brake where suitable, and chock the wheels that remain on the ground. If the wheels must be removed, use a properly rated lift or jack stands at the prescribed support points. Never rely on a jack alone. Keep the ignition off unless the vehicle-specific procedure says otherwise, and take extra care around any high-voltage equipment on an electrified model.
Accessing and cleaning the master cylinder reservoir
Remove loose dirt from around the cap before opening it. Wipe the area with a clean, lint-free cloth and inspect the reservoir with a light. If heavy sludge is present, stop and investigate rather than pushing it into the hydraulic system. Remove only as much old fluid as the procedure permits, using a clean suction tool that will not be reused for other fluids.
Preventing dirt from entering the hydraulic system
Keep the cap, tools, tubing, and new-fluid container clean. Do not leave the reservoir open while fetching equipment, and do not touch a fitting with greasy gloves. Avoid compressing the brake pedal repeatedly without a reason, since uncontrolled movement can introduce air or stress older seals. Cap or cover any open container during pauses.
Planning the correct wheel bleeding sequence
Use the service instructions for the specific circuit and vehicle rather than applying a universal wheel order. Some systems begin with the outlet farthest from the master cylinder, while others require a different sequence or a separate procedure for multiple circuits. Mark each wheel position if needed and make sure the tubing and container can reach it safely. A written sequence prevents guesswork once fluid begins to move.
How to perform an MG brake fluid flush
With the vehicle secure and the equipment ready, work slowly from the reservoir through each hydraulic outlet. The aim is to replace the old fluid while keeping the circuit full and free of air. Watch the fluid, the pedal, and the fittings throughout the process. If anything behaves unexpectedly, close the bleed screw and diagnose the problem before continuing.
Remove the old fluid from the reservoir
Open the reservoir carefully and remove the accessible old fluid with a clean suction tool, leaving enough to avoid exposing internal ports if the procedure requires it. Wipe away contamination only with suitable lint-free material and refill with fresh fluid from the sealed container. Do not allow the suction tool to contact dirt or other chemicals. This first step reduces the amount of old fluid that must be pushed through the lines.
Bleed each brake until clean fluid appears
Attach the clear tube firmly to the first bleed screw and place its other end in the waste container. Open the screw only as far as needed, then use the selected pressure, vacuum, or manual method. Watch for bubbles, cloudiness, and a change to clean fluid; close the screw before removing the tube. Repeat at the remaining outlets in the prescribed order, using a flare wrench and gentle force.
Keep the reservoir from running dry
Check the reservoir after every short bleeding cycle, not merely after each wheel. If it empties, air can enter the master cylinder and lines, turning a routine flush into a more involved bleeding job. Top up with the same specified fluid and keep the cap nearby without contaminating it. Fresh fluid should be visible at the reservoir throughout the operation.
Check for leaks and maintain steady pedal pressure
During manual bleeding, have the assistant press the pedal smoothly and hold it only when instructed; the operator opens and closes the screw in a consistent rhythm. Never release the pedal while the screw is open unless the procedure specifically calls for it. Inspect every connection for wetness as you go. A fixed-price MG service quote can be a practical option when access, equipment, or the condition of the fittings makes home service uncertain.
When the final outlet runs clean and bubble-free, close it securely without overtightening. Recheck the reservoir level, refit the cap, and clean any residue before moving to the verification stage.
Troubleshoot common flushing problems
A flush should end with a firm, consistent pedal and dry fittings. If it does not, do not compensate by driving cautiously or simply adding more fluid. Air, leakage, damaged components, and incorrect bleeding order all need different solutions. Close the system, preserve the evidence, and work through one possible cause at a time.
What to do when the brake pedal remains spongy
A soft pedal usually means air remains in the hydraulic circuit, but it can also indicate a leak, flexible hose expansion, worn components, or master-cylinder trouble. Recheck the fluid level and inspect every connection before bleeding again. Confirm that the tubing is sealed and that the wheel sequence matches the vehicle procedure. If the pedal still feels wrong after careful bleeding, stop driving and arrange a professional inspection.
How to handle a stuck bleed screw
Do not force a seized screw until it rounds off or snaps. Use penetrating treatment where appropriate, a correctly sized flare wrench, and controlled force; avoid heating a component that still contains brake fluid unless a qualified technician has assessed the risk. If the screw will not move, the wheel-end component may need repair or replacement. A stuck fitting is a sound reason to hand the job to a shop.
Diagnosing air entering the system
Air may enter through a loose tube, a poor seal at the bleed screw, a low reservoir, or a hydraulic leak. Small bubbles in the tube can sometimes be drawn around the screw threads during vacuum bleeding rather than coming from inside the circuit, so inspect the setup before assuming the system is still full of air. Compare the fluid level before and after each cycle and look for dampness. Correct the source, then bleed again using a controlled sequence.
When a pressure bleeder or professional service is safer
A pressure bleeder may make the job easier when pedal bleeding is awkward, but it still requires the correct adapter and pressure setting. Professional service is safer when the car has a complex circuit, inaccessible outlets, severe contamination, damaged fittings, or a pedal that will not become firm. It is also the sensible choice if you cannot support the vehicle securely or dispose of fluid properly. Brake work is not a good place to improvise around a tool limitation.
Verify the repair and maintain the brake system
Finishing the flush means proving that the system works, not merely seeing new fluid in the reservoir. Refit all caps, wipe the fittings, and inspect the work area before lowering the vehicle. The brake pedal should be checked while stationary, then the vehicle should be tested in a controlled location. Keep a record of the date, fluid specification, and any parts that were repaired or replaced.
Test pedal firmness before driving
With the engine or vehicle system in the appropriate state for the model, press the pedal several times as directed by the service information. It should feel firm and should not continue sinking under steady pressure. Check the fluid level and examine the master cylinder, hoses, lines, and wheel ends for fresh wetness. If the pedal is soft, the level changes, or a warning appears, do not drive on public roads.
Perform a controlled road test
Begin in a quiet, low-speed area away from traffic, pedestrians, and obstacles. Test gentle stops first, checking that the vehicle slows straight and the pedal remains consistent. Gradually confirm normal braking response without making an emergency stop unless necessary. Return immediately if the car pulls, the pedal changes, a warning light appears, or any unusual noise or vibration develops.
Dispose of used brake fluid responsibly
Keep the collected fluid in a sealed container clearly marked as used brake fluid. Take it to a municipal household hazardous-waste facility, an automotive recycling center, or another approved collection point that accepts it. Never mix it with engine oil or other chemicals unless the facility specifically instructs you to do so. Wipe tools and containers safely before storing them.
Set a future flush interval for your MG
Record the service date and review the owner’s schedule for the next interval. If no clear interval is available, ask a qualified technician to recommend one based on the vehicle, fluid type, storage pattern, climate, and condition of the hydraulic parts. Inspect the level and visible condition during routine maintenance, but remember that topping up is not a substitute for finding a leak or replacing aged fluid. Consistent records make the next MG brake fluid flush easier to plan.
Conclusion
A brake fluid flush is manageable when the vehicle is identified correctly, the system is inspected first, and every step is performed with clean tools and steady attention. Use the specified fluid, keep the reservoir full, and treat a soft pedal or seized fitting as a fault that deserves professional help rather than a reason to hurry.
Frequently Asked Questions
How often should brake fluid be flushed?
Follow the vehicle manufacturer’s schedule and adjust for storage, climate, mileage, and fluid condition. If the schedule is unclear, a qualified technician can recommend an interval after inspecting the system.
Can I just add new brake fluid to the reservoir?
Adding fluid may restore the level temporarily, but it does not remove old fluid from the lines. A falling level should also prompt a leak and component inspection.
What color should clean brake fluid be?
Color varies by fluid type and age, so it is not a reliable condition test by itself. Cloudiness, debris, a very dark appearance, or an unusual pedal should lead to further inspection.
Can different brake fluid types be mixed?
Do not mix types unless the vehicle and fluid manufacturers explicitly confirm compatibility. A change in fluid type may require system disassembly, cleaning, and replacement of incompatible components.
Why is my brake pedal still soft after bleeding?
Air may remain in the system, or there may be a leak, damaged hose, incorrect bleeding sequence, or master-cylinder fault. Do not drive until the cause has been found and the pedal is firm.
Is a pressure bleeder better than manual bleeding?
Neither method is universally better. A pressure bleeder can provide consistent flow, while manual bleeding can work with basic equipment; the correct adapter, procedure, and careful fluid-level control matter most.
Where should used brake fluid be disposed of?
Take it in a sealed container to an approved hazardous-waste, automotive-recycling, or fluid-collection facility. Never pour it into a drain, onto the ground, or into ordinary household waste.