

Key Takeaways
A sound repair starts with finding the full extent of the damage, not just the rust or dent you can see. Work methodically, protect the surrounding car, and pause when the metal or alignment calls for specialist attention.
- Check seams, edges, mounting points, and the underside for hidden corrosion.
- Confirm the exact MG model before sourcing a replacement lid or repair panel.
- Remove all weakened metal before patching; filler cannot restore strength.
- Refit the lid carefully and check its gaps, latch, seals, and clearance.
- Protect repaired metal from moisture and keep drain paths open.
Assess the boot lid and identify the damage
MG boot lids vary across models, so begin by looking at the panel as part of the whole car rather than as an isolated piece of metal. Clean off dirt and loose debris, then inspect the top, underside, seams, edges, hinges, and latch area in good light. A careful first assessment helps distinguish a cosmetic job from one that involves weakened metal or a distorted mounting area.
Check for rust around seams, edges, and mounting points
Water and debris can linger where the outer skin folds around the lid frame, making the lower lip and seams worth a close look. Check around hinge bolts, the latch, badge holes, and any trim fasteners as well. Blistered paint, swelling at a folded edge, or rust-colored staining may point to corrosion that extends beneath the visible surface. If access is limited, use a mirror and a light to inspect the underside without scraping away sound paint unnecessarily.
Distinguish surface corrosion from perforation
Surface rust may leave the steel intact; perforation means the metal has rusted through and lost continuity. Carefully brushing away loose scale can help reveal whether the remaining metal is firm, but avoid probing aggressively and enlarging a small opening. The difference matters because a coating or rust treatment cannot replace missing steel. Use a simple comparison as a guide, not a substitute for looking closely at the panel itself:
| What you find | Likely condition | Practical next step |
|---|---|---|
| Light rust staining with firm metal beneath | Surface corrosion | Clean back and assess the bare metal |
| Blisters or flaky edges around a seam | Corrosion beneath the finish | Open the area enough to judge its extent |
| A pinhole or visible opening | Perforation | Plan a sound metal repair or replacement |
| Soft, distorted metal near a hinge or latch | Structural weakening | Get an experienced panel repairer to assess it |
After cleaning, inspect the whole affected area again; the visible spot can be smaller than the corroded section underneath. If you are uncertain whether steel is still sound, do not cover it with filler or paint and assume the problem is solved.
Look for dents, cracks, and previous repairs
View the lid from several angles, since a shallow dent can disappear in direct light and show up clearly as a warped reflection. Look for cracking near sharp folds, uneven panel contours, and thick or poorly feathered filler that may hide older damage. A magnet can help identify areas with substantial non-metallic filler, although its result is only a clue and varies with the panel and magnet. For an example of hidden corrosion and repair decisions on an MG lid, see this MG Midget restoration; its details are a reference, not a specification for every MG model.
Compare the lid’s shape and gaps with the body
Before loosening anything, take photographs of the lid closed and open, including its gaps at the sides and rear edge. Compare how the panel sits against the surrounding bodywork and whether one corner appears high, low, or twisted. A poor fit may come from a damaged lid, but hinges, mounting points, seals, or an earlier repair can also be responsible. Record what you find so that refitting has a clear starting point.
Prepare for a safe, practical repair
Once you know what needs attention, decide whether the repair is within your tools and experience. Protect the car before sanding, cutting, or welding, and confirm parts against the specific model rather than relying on a broad description such as “MG boot lid.” Older cars may have received replacement panels or previous repairs, so measurements and mounting details matter as much as a part listing. A little preparation can prevent damage to nearby paint and save time during reassembly.
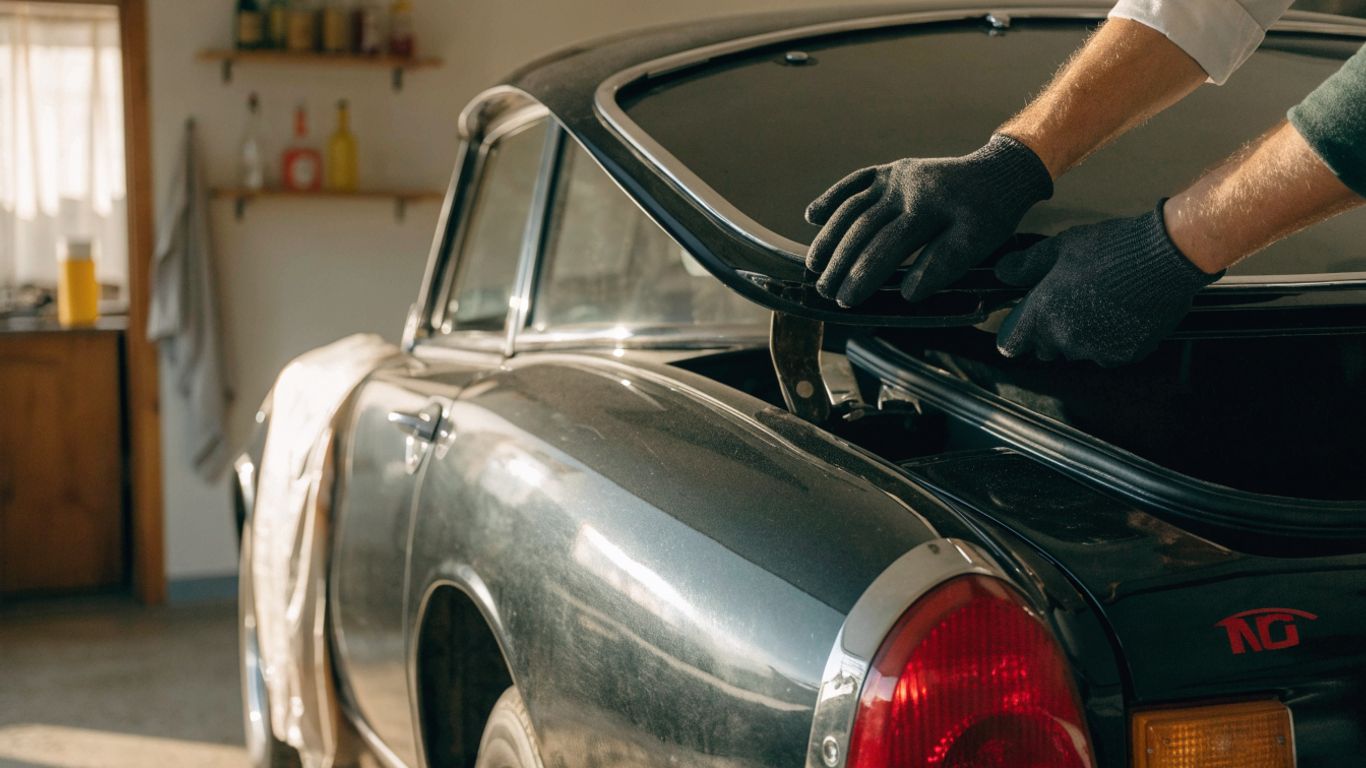
Confirm the MG model and source suitable parts
Identify the model, year, and any relevant body style or production details before ordering a lid, skin, hinge, or patch. Compare the part’s shape, mounting points, latch arrangement, and trim openings with your existing panel; ask for dimensions or photographs if the listing leaves those details unclear. Online searches can drift into unrelated categories, so keep the job’s details close at hand: pages about Karma Hill Photography, Maui destination wedding ideas, a Dubai dermatology clinic, a full body MOT health check, or outdoor furniture in NZ do not establish whether a part fits your MG. For a model-specific boot-floor edge reference, a classic Mini repair panel is not an MG boot-lid part, so verify the application before buying anything.
Gather basic metalworking and rust-repair tools
For assessment and light preparation, a work light, inspection mirror, scraper, hand wire brush, sanding blocks, and suitable abrasives are useful starting points. More involved metal repairs may require cutting, shaping, welding, and finishing equipment; choose tools only when you know how to use them safely. A compact setup can make the job more orderly:
- Use eye protection, gloves suited to the task, and hearing protection when needed.
- Keep a fire extinguisher nearby if grinding, cutting, or welding.
- Have masking materials and clean cloths ready to protect and wipe down adjacent areas.
- Use a suitable dust mask or respirator for the materials and work being done.
Keep abrasive dust and sparks away from fuel, wiring, glass, and paint. If welding equipment or the necessary skills are not available, plan to have a qualified repairer handle the metalwork rather than improvising.
Protect glass, paint, trim, and nearby components
Remove loose trim only when you understand how it is attached, and cover nearby glass and painted panels before sanding or grinding. Masking should stay secure around edges where dust and sparks could travel; move it as the work area changes. If the boot is open, protect the interior and check what lies directly beneath the section being cut or drilled. Clean up dust and metal fragments promptly, since they can scratch paint or start rust if left in place.
Decide whether the lid should be removed
A lid that needs only light surface preparation may be easier to repair while fitted, especially if its position is already correct. Removal can make underside and edge repairs more accessible, but the lid can be awkward to handle and its alignment will need to be reset. If you take it off, mark hinge positions, support the panel securely, and ask another person to help lift it. Consider removal when access is essential or when the repair involves hinges, the underside, or extensive metalwork.
Repair rust and weakened metal
Rust repair should restore sound metal and protect it from returning, not simply make the surface look smooth. Work in small stages, checking how far corrosion reaches as coatings and scale come away. A local repair may be practical when the surrounding metal is solid; extensive rust at folded seams, supports, or mounting points can change the scope considerably. If a repair involves cutting or welding, plan the sequence and protect the car before starting.
Clean back corrosion to sound metal
Remove loose paint, flaky rust, and contamination until the repair boundary reaches firm material. Use abrasives appropriate to the area and avoid thinning good steel while chasing every mark. Folded seams may conceal corrosion between layers, so the visible face alone does not always tell the whole story. Once the area is clean, inspect the metal in good light and reassess whether a patch or further disassembly is needed.
Treat minor surface rust without hiding damage
When the steel remains intact, clean it thoroughly and use a rust-treatment product according to its instructions. The surface must be free of loose scale and contamination for the treatment and later coatings to work as intended. Do not use a converter or primer as a shortcut over flaking metal, pinholes, or a soft seam. The treatment only helps when the underlying panel is still a suitable basis for finishing.
Cut out perforated areas and fit repair patches
Perforation calls for removing the compromised section and restoring the missing metal with a properly shaped repair. The surrounding area should be sound, and the patch needs to follow the lid’s curve and support structure rather than sit as a flat cover over a hole. Cutting and welding can distort thin panels, so a repairer may work in short stages and check the contour as the patch is joined. This short visual reference can help set expectations for a hands-on repair process, though it is not a model-specific instruction:
After welding, inspect the repaired area for sound joins and a smooth transition before applying finishing materials. A patch should restore the panel, not conceal untreated rust left around its edges.
Seal seams and protect the underside
Once metal repairs and surface preparation are complete, use suitable seam sealer where the original construction and repair require it. Apply coatings compatible with the chosen primer and paint system, including protection on the underside and inside accessible cavities. Do not seal over dirt, trapped moisture, or active corrosion. On a folded lip, careful coverage matters because water can sit unseen between layers.
Correct dents and panel damage
A dent can be a simple cosmetic problem or evidence that the lid has been stretched, creased, or forced out of shape. Check the panel’s contour and its relationship to the hinges and latch before deciding how to correct it. The aim is to restore the shape with minimal disturbance to sound paint and metal. Deep creases, sharp folds, or damage around a mounting point may call for a panel specialist.
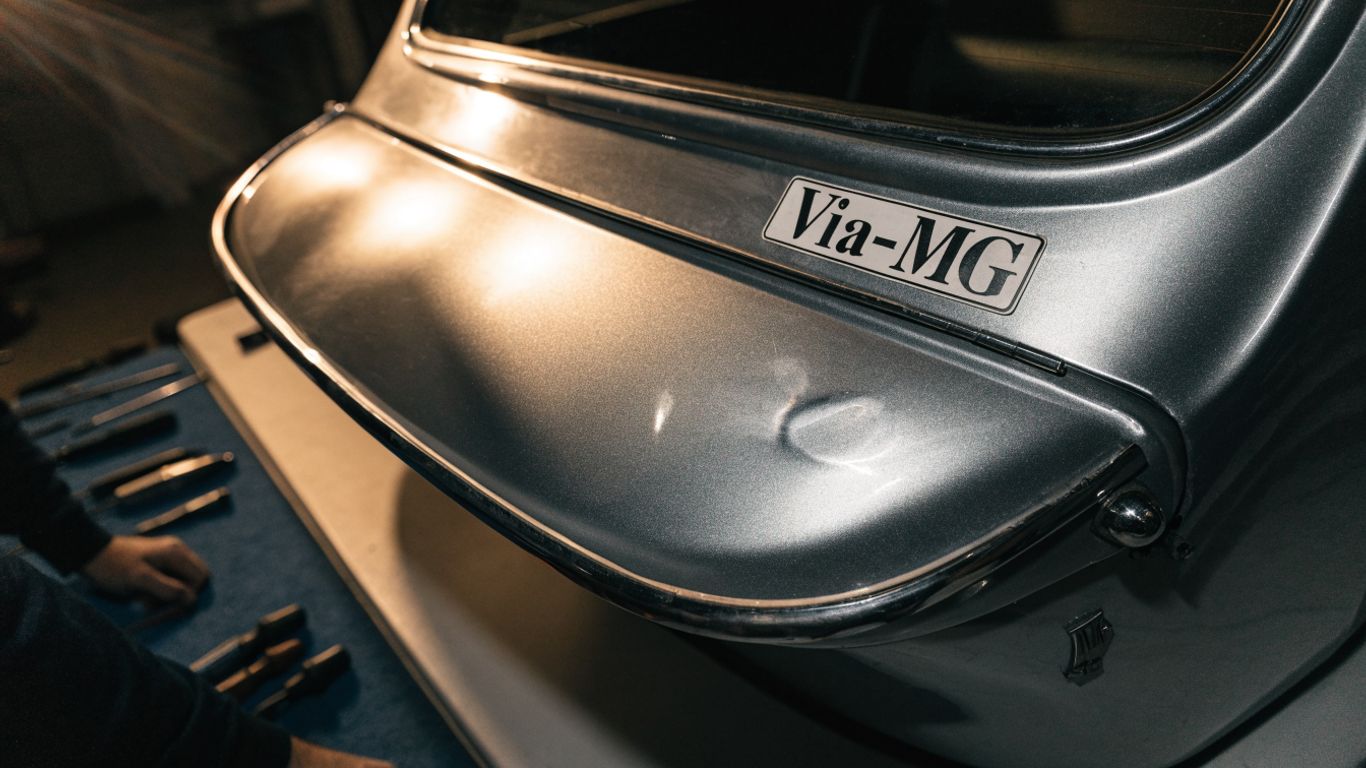
Choose between paintless dent repair and reshaping
Paintless dent repair may suit a shallow dent where the paint remains intact and the back of the panel is accessible. A sharp crease, cracked finish, or dent at a folded edge is less likely to respond well to that approach. Conventional reshaping may involve access from behind the panel or controlled work from the outer face, followed by refinishing. The condition of the paint and the location of the dent help determine which route makes sense.
Work gradually to avoid stretching the metal
Thin body panels can stretch if struck or pulled too forcefully, leaving a high spot that is difficult to correct. Use controlled, incremental movements and check the panel frequently under changing light. Avoid repeated heavy blows in one area; progress is easier to judge when the contour is reassessed after each small adjustment. If the metal starts to oil-can or flex unpredictably, stop and reassess the repair method.
Use filler sparingly over a stable surface
Body filler is for refining a stable, repaired panel, not bridging holes or covering rust. Apply it to a clean, prepared surface in thin layers, following the product instructions, and shape it only after it has cured. If the repair needs a thick layer to hide a dent, revisit the metalwork underneath. A sound contour and a modest skim make a more dependable base for primer and paint.
Know when a damaged lid is better replaced
Replacement may be the more sensible option when corrosion is extensive, the frame is badly distorted, or earlier repairs have left too little sound metal for a reliable fix. Compare the condition and fit of an available replacement with the time and specialist work needed to save the original. Rarity, model-specific details, and the owner’s restoration goals can all affect that decision. An inexpensive panel that needs extensive correction may not be the simpler route.
Refit and align the boot lid
Refitting is part of the repair, not just the last mechanical step. A lid can look straight on the bench yet sit poorly once the hinges, seals, and latch are back in place. Work slowly and keep the panel supported while fasteners are loose. Check the fit before final tightening or paint correction, since small changes at the hinges can alter the gaps noticeably.
Inspect hinges, fasteners, and mounting points
Check for worn hinge joints, bent brackets, damaged threads, and rust or distortion around the mounting points. Replace damaged fasteners with suitable parts rather than forcing a poor fit. Look for evidence that a hinge has shifted or that a mounting hole has been enlarged by previous adjustment. Repairing a weak mounting area first gives the lid a stable base for alignment.
Adjust the lid for even gaps and flush edges
Begin with the hinge bolts loose enough to allow careful movement, then adjust the panel in small increments. Compare the gaps along both sides and across the rear edge, and check whether the outer surface sits flush with the surrounding body. Do not judge alignment from one corner alone; changing one position can affect another. When the fit looks consistent, tighten the fasteners and recheck it.
Check the latch and striker for reliable closure
The latch should engage cleanly without needing the lid to be slammed or pushed hard. Check that the striker meets the latch squarely and that any adjustment does not pull the panel out of alignment. If the lid sits high or low when closed, inspect both the latch setting and the hinge position before changing either. Close it gently several times and confirm that it releases as expected.
Test clearance around seals and body panels
Check that the lid clears adjacent paint, trim, and body panels through its full opening and closing movement. Seals should contact evenly without being pinched, folded, or displaced. Look for signs of rubbing and make sure the panel does not bind near the hinges or latch. After a final adjustment, repeat the gap and closure checks rather than assuming the first setting held.
Finish and protect the repaired lid
A well-prepared repair can still fail early if coatings are applied over dust, moisture, or poorly sealed metal. Follow the instructions for each product in the paint system, allowing appropriate preparation and curing time between stages. Before finishing, check the whole lid in good light for missed corrosion, uneven filler, and sanding marks. Then protect repaired areas on both the visible face and the underside where practical.
Prepare the surface for primer and paint
Remove sanding dust, wipe the surface with a compatible cleaner, and ensure it is fully dry before priming. Feather the edges of existing paint where needed and follow the primer maker’s instructions for application and preparation. Keep the work area clean between coats; dust trapped under a finish can spoil the result and make later correction harder. Do not rush into paint if the panel still needs shaping or corrosion assessment.
Match the finish to the rest of the car
Paint color can vary with age, fading, and previous refinishing, so a code alone may not guarantee a perfect visual match. Compare a properly prepared sample with the car in natural light and from several angles. A professional paint shop can advise on blending or refinishing the full panel when the difference would be obvious. Allow the finish to cure as specified before fitting trim or handling the surface extensively.
Apply cavity protection and maintain drain paths
Once the finish has cured, protect accessible internal areas with a suitable cavity product, following its application directions. Keep factory drain openings clear and check that sealant or coating has not blocked a path intended to let water escape. Inspect the lower edges and seams after the first wet weather or wash. Periodic checks can catch a small issue before it spreads under the paint.
Estimate repair costs and know when to call a specialist
Cost depends on how much metal is affected, whether the lid must come off, the availability of a suitable panel, and the amount of finishing needed. Ask for an assessment that separates metal repair, alignment, and paintwork so you can compare the scope rather than just a headline figure. Get professional help for extensive perforation, welding near vulnerable components, severe distortion, or work that affects secure closure. Choose a car parts supplier that can help confirm the application and details of a candidate panel; the listing itself still needs to match your MG. The right choice depends on the condition of your lid and the quality of the available replacement, not simply on which route seems quicker.
Conclusion
A successful MG boot lid repair begins with a patient inspection and a clear distinction between surface rust, perforation, and damage to the panel’s shape or mounting points. Restore only sound metal, protect the repaired areas, and take time to align the lid so it closes cleanly without rubbing. When corrosion is extensive or the fit remains uncertain, a specialist assessment can prevent a cosmetic repair from becoming a recurring problem.
Frequently Asked Questions
Can I repair a rusty MG boot lid without removing it?
Minor surface preparation may be possible with the lid in place if the affected area is accessible and the surrounding car is properly protected. Removal can be useful when the underside, seams, or mounting areas need more thorough work.
How can I tell if rust has gone through the metal?
After loose scale is carefully removed, look for pinholes, openings, or metal that is soft and weakened. If the condition is unclear, have the panel assessed before covering it with primer or filler.
Is a rust converter enough for a boot lid?
It may be suitable for some minor surface corrosion when the metal remains intact and the product is used as directed. It cannot replace perforated steel or make a weakened panel structurally sound.
Can a dent be repaired without repainting?
A shallow dent may be a candidate for paintless dent repair if the paint is intact and the panel can be accessed. Creases, cracked paint, and damage near folded edges may need reshaping and refinishing instead.
Why does a repaired boot lid still sit unevenly?
The cause may be hinge wear, shifted mounting points, panel distortion, seal interference, or latch adjustment. Check these areas together because changing one can affect the others.
Should I replace a badly rusted boot lid?
Replacement may be worth considering when corrosion is widespread, the frame is distorted, or little sound metal remains for repair. Compare the condition and fit of a replacement with the work needed to restore the existing lid.
How do I stop rust returning after a repair?
Remove corrosion fully, prepare and coat the metal correctly, protect accessible cavities, and keep drain paths clear. Periodic inspection of seams and lower edges can reveal new problems early.