

Key Takeaways
A well-fitted bonnet starts with careful diagnosis, patient adjustment, and a latch that works freely. Because MG bonnet designs vary, check model-specific details before moving fasteners.
- Record the original hinge positions before loosening anything.
- Support the bonnet securely and protect painted edges.
- Make small hinge adjustments, then compare the gaps again.
- Set the catch and bump stops only after the panels align.
- Confirm the latch engages securely before driving.
Understand how the bonnet and hinges are fitted
Bonnet alignment depends on how the hinges, bonnet, wings, and front panels meet as a system. A small movement at a hinge can change more than one gap, so it helps to understand the likely effect before loosening fasteners. MG bonnet designs differ, and the available adjustment can vary with the model and the parts fitted. Treat this guide as a careful approach to the work, not a substitute for model-specific instructions.
How hinge position affects bonnet height and gaps
The hinge position controls where the rear of the bonnet sits and can influence its height relative to the wings. Depending on the mounting arrangement, moving a hinge may also alter the bonnet’s position from side to side or front to back. That is why the first adjustment rarely solves every mismatch at once. Watch the whole panel line, not only the corner nearest the hinge.
Differences among MG models and bonnet designs
Some MG bonnets use different panel arrangements and hinge hardware from others, and not every design provides the same range of movement. Look for slotted mounting holes, locating marks, and any model-specific fitting details before assuming that a familiar adjustment will apply. A useful reference for comparing hinge movement and panel gaps is this bonnet fitting guide. If you are searching broadly, keep unrelated results in their lane: a search may also turn up appliance repair, packing services, human judgment, search visibility, or a Super King quilt. Match any fitting advice to the car and bonnet design in front of you.
When hinge adjustment may not solve the problem
Hinge movement has limits. If the bonnet sits unevenly despite careful adjustments, the cause may be a worn hinge, a bent bracket, damaged threads, or a panel that has been distorted or repaired. A bonnet that is too far forward to latch may also have reached the limit of its existing slots; an MGB and GT discussion illustrates why that kind of fit problem can call for closer inspection rather than more force. Don’t enlarge holes or alter brackets without confirming the correct procedure for the model.
Prepare the car and diagnose the misalignment
A careful inspection before adjustment saves time and helps prevent paint damage. Start with the bonnet shut but not forced into place, and note where the gaps narrow, widen, or change height. Establish a clear baseline on level ground so you can tell whether an adjustment actually improved the fit. If the bonnet is heavy or awkward to handle, ask another person to help.

Park on level ground and protect the paint
Park on a firm, level surface, switch off the engine, and allow hot components to cool before working near the engine bay. Protect the edges of the wings and bonnet with clean, secure padding that will not slip into a hinge or latch. Keep tools and loose fasteners away from painted surfaces. If the bonnet must be raised or repositioned, have a helper steady it rather than relying on an improvised prop.
Check bonnet gaps, height, and contact points
Before touching the hinges, look along both sides and across the front. Note whether the gaps are consistently narrow or wide, whether one corner sits high, and whether the bonnet touches a wing or front panel. A quick written record helps distinguish a broad alignment issue from a single high or low spot. Use the same reference points for each comparison, and avoid judging the fit from one angle alone.
Inspect hinges, fasteners, and surrounding panels
Check for loose or missing fasteners, visible hinge wear, cracked paint around mounting points, and signs that a panel or bracket has been bent. Look for rubbing marks that reveal where the bonnet contacts nearby metal. The pattern can help separate a hinge-position issue from a local obstruction or worn part. When the parts look sound, make a simple comparison of the symptoms and likely next check:
| What you notice | First area to inspect | Useful next check |
|---|---|---|
| Rear edge sits high or low | Hinge mounting points | Compare both hinge positions |
| Gap narrows along one side | Hinge position or panel edge | Check for contact and rubbing marks |
| Bonnet will not reach the catch | Front-to-back position | Check available slot movement |
| One corner springs upward | Stop or panel contact | Inspect the contact point and stop |
These observations are clues, not diagnoses by themselves. If a panel appears distorted or a hinge is visibly worn, correct that underlying problem before trying to compensate by shifting the bonnet elsewhere.
Loosen and adjust the hinges
Once you understand the current fit, work gradually and keep the bonnet supported. Hinge fasteners may allow only a small movement, and a change at one point can affect the opposite side. Have a helper hold the bonnet steady while you work, especially when fasteners are loosened. Keep adjustments reversible until the fit and operation are both satisfactory.
Mark the original hinge positions
Use removable tape or a fine marker to outline the hinge position and note where each fastener sits. Take a photo from a consistent angle if that will help you return to the original position. Mark both hinges separately rather than assuming they are identical. These references provide a useful fallback if the first adjustment makes the fit worse.
Support the bonnet before loosening fasteners
The bonnet must not be left to shift or drop when its fasteners are loose. Use a helper to support it at a stable point, keeping hands clear of pinch areas and moving hinge parts. A suitable padded support can help, but it should not place pressure on a fragile panel edge. Avoid loosening all fasteners at once; retain enough control to prevent the bonnet from moving unexpectedly.
Make small adjustments and retighten evenly
Move one hinge only a small amount, then secure the fasteners enough to hold the bonnet while you check the result. If you need a repeatable sequence, keep it simple:
- Loosen the fasteners just enough for controlled movement.
- Shift the bonnet or hinge a small distance in the needed direction.
- Bring the fasteners snug without fully tightening them.
- Lower the bonnet carefully and compare the gaps again.
This measured approach makes it easier to see which movement changed the fit. When the position is close, tighten the fasteners evenly and recheck that the bonnet has not shifted as they were secured.
Align the bonnet with the surrounding panels
The goal is an even, workable fit rather than perfect symmetry achieved by forcing a panel. Compare the bonnet with the wings and front panels from several angles, then make only the adjustment that addresses the observed mismatch. Hinge movement may improve one edge while changing another, so each correction needs a fresh check. Keep the catch out of the equation until the bonnet itself sits correctly.
Compare the gaps along the sides and front
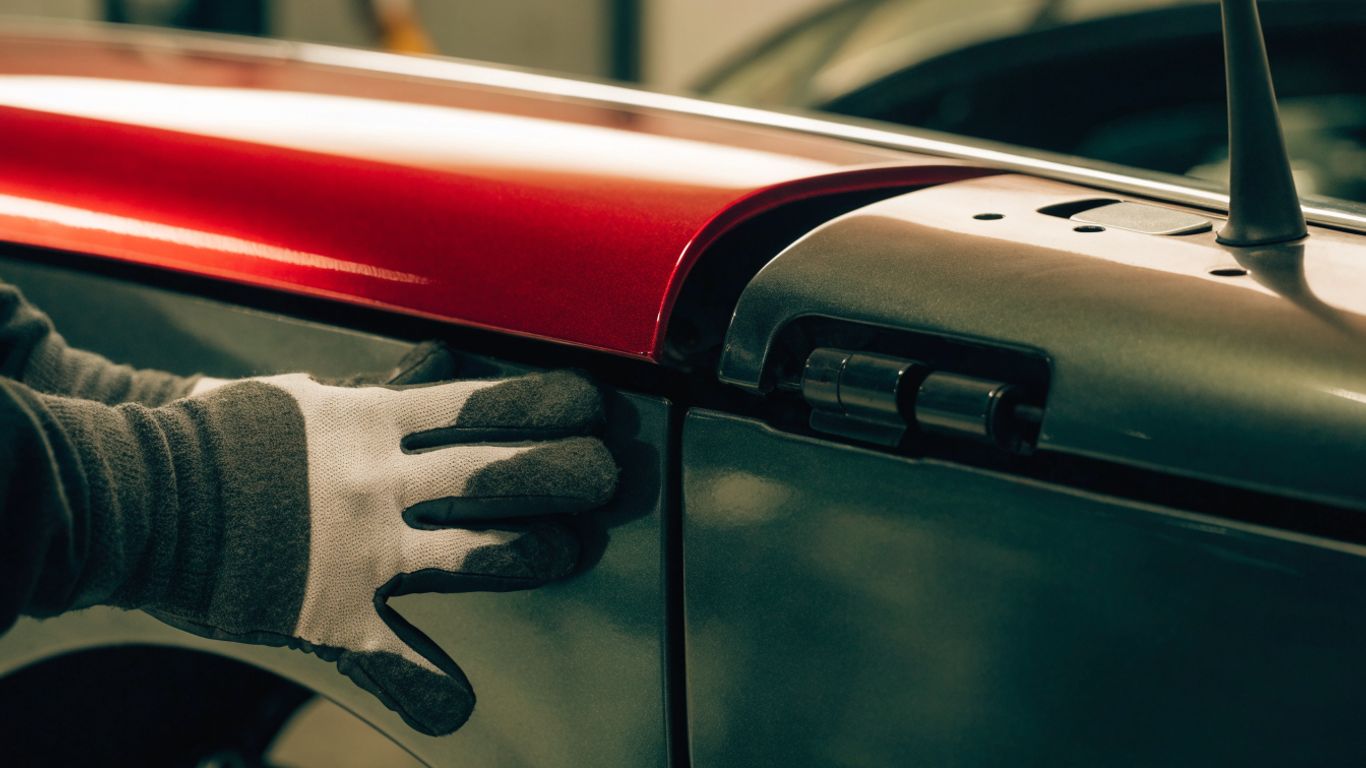
Compare the left and right gaps along the bonnet sides, then check the front edge against the surrounding panels. Look for a gap that changes gradually as well as a sharp difference at one corner. The gradual pattern may point toward the overall position, while a local difference can suggest contact, panel shape, or hinge wear. Avoid using the latch to pull an out-of-position bonnet into place.
Check bonnet height against the wings
Stand back and compare the bonnet’s outer surface with both wings. Run your eye along the panel line at the rear and front; a corner that sits proud or low can be easier to see from a shallow angle. If it is safe to do so, check for contact marks without pressing down on the bonnet. A height mismatch that remains after small hinge changes may need inspection for a bent bracket or panel rather than further movement.
Recheck alignment after each adjustment
After every small change, lower the bonnet gently and compare the same reference points you noted earlier. If the gap improves on one side but worsens on the other, pause and decide whether a different direction or a separate fault is involved. A short demonstration can help illustrate the visual checks involved in this process.
Use the markings and notes to track what changed, and reverse an adjustment if it creates a new mismatch. Don’t slam the bonnet to test alignment; a controlled lowering is easier on the panels and makes binding easier to notice.
Set the bonnet catch and stops
The catch and bump stops control how the bonnet rests when closed, but they cannot correct poor hinge alignment. Once the bonnet sits evenly and clears its surrounding panels, check that the catch meets its receiver without dragging or pulling the bonnet sideways. Make any catch or stop adjustment in small increments. Test the result gently at each stage.
Adjust the catch only after the bonnet sits correctly
With the bonnet positioned properly, observe whether the catch lines up naturally with its receiver. If it does not, check the catch components and their mounting before changing their position. The bonnet should not need to be shoved down or sideways to engage. On a bonnet whose catch is sticking, consult model-specific instructions; this Magnette catch guide discusses a jammed catch and the need for repeated checks after refitting.
Position the bump stops to prevent rattles
Bump stops should meet their contact points without lifting the bonnet out of alignment. Adjust them evenly where the design allows, then lower the bonnet gently and check that it rests without rocking. If one stop lifts a corner, back it off and reassess rather than compensating by pulling down on the bonnet. The right setting helps prevent movement and rattling while allowing the latch to engage normally.
Confirm the bonnet opens and closes without binding
Open and close the bonnet carefully several times, watching for rubbing at the hinges, edges, and catch. It should move freely and settle into position without an abrupt stop or a need to force it. Check that any support mechanism clears surrounding parts throughout its movement. If the bonnet binds at any point, stop and identify the contact before continuing.
Troubleshoot fit and verify the final adjustment
A bonnet can look aligned while still catching, rattling, or sitting unevenly when closed. Treat appearance and operation as separate checks, and revisit the underlying cause if one is not right. A final inspection should cover the gaps, the latch, the fasteners, and any rubbing points. Don’t take the car on the road until the bonnet is securely latched.
Correct uneven gaps that persist after hinge movement
If a gap remains uneven after small, controlled adjustments, return to the original marks and inspect the area where the mismatch is greatest. Check for trapped padding, a displaced stop, an obstruction, or signs that a panel edge has changed shape. An adjustment at one hinge can mask rather than solve a problem elsewhere. If you cannot identify the cause, seek help from someone familiar with the specific MG model rather than making irreversible changes.
Check for worn hinges, distorted panels, or damaged threads
Look for hinge play, elongated or cracked mounting areas, bent brackets, and fasteners that will not tighten securely. Distortion in a bonnet or adjacent panel can leave the gaps uneven even when the hinges are correctly positioned. Damaged threads should be repaired properly, not held in place by excessive force. These faults call for repair before final alignment, since a loose or weakened mount can shift again.
Test the latch securely before driving
With the bonnet closed, confirm that the primary catch engages fully and that any secondary safety catch also works as designed. Gently check that the bonnet is retained; do not rely on its weight or the appearance of a closed panel. Open it again and inspect for fresh contact marks, then repeat the closure test. If the latch feels uncertain, do not drive until the fault has been resolved.
Conclusion
A successful MG bonnet hinge adjustment is a patient process: record the starting position, diagnose the whole panel fit, make small changes, and set the catch only after the bonnet rests correctly. Careful checks at each stage help protect the paint and reveal when the real issue is worn hardware or panel damage rather than hinge position.
Frequently Asked Questions
How do I know whether my MG bonnet needs hinge adjustment?
Look for uneven gaps, a bonnet that sits high or low relative to the wings, rubbing marks, or a catch that does not meet cleanly. Inspect the hinges and nearby panels before deciding that adjustment is the answer.
Should I adjust the bonnet catch before the hinges?
No. First position the bonnet so it sits correctly against the surrounding panels. Then check whether the catch meets its receiver naturally and adjust it only if necessary.
Can I adjust the bonnet by myself?
A helper is strongly advisable because a bonnet can be heavy and may shift when fasteners are loosened. Have someone support it while you make and check small adjustments.
How much should I move a hinge at a time?
Make only a small, controlled movement, then lower the bonnet gently and compare the same gaps again. The suitable amount depends on the hinge design and the problem you are correcting.
What if the bonnet still will not latch after adjustment?
Check whether it reaches the catch without being forced, then inspect the hinge movement available, the catch alignment, and any signs of worn or distorted parts. Do not enlarge mounting holes or alter brackets without model-specific guidance.
Why is one bonnet corner higher than the other?
Possible causes include uneven hinge positions, a misplaced bump stop, hinge wear, or a distorted panel or bracket. Check for contact points and compare both sides before making another adjustment.
Is it safe to drive if the bonnet catch seems loose?
No. Do not drive until the primary latch and any secondary safety catch engage securely. If either is unreliable, have the problem corrected before using the car.