

Key Takeaways
A sound MG exhaust system depends on correct fitment, careful installation, and regular inspection. The right replacement is not always the loudest or most expensive option.
- Identify the exact MG model, year, engine, and body style before ordering.
- Treat pipes, silencers, gaskets, clamps, hangers, and brackets as one system.
- Compare original-style, stainless steel, and performance options according to intended use.
- Diagnose leaks and rattles before assuming the entire exhaust needs replacement.
- Check clearances, mounting points, and corrosion regularly to extend service life.
Understanding how MG exhaust systems work
MG exhaust systems carry combustion gases away from the engine, reduce noise, and discharge the remaining gases behind the car. Although the layout is mechanically simple, each joint and support affects how well the system performs. A replacement should therefore be considered as a connected group of MG exhaust system parts rather than a collection of unrelated tubes.
The path exhaust gases take from the engine to the tailpipe
Exhaust gases leave the engine through the exhaust ports and enter the manifold or header. From there, they pass into the downpipe, travel through one or more silencing chambers, and exit through the tailpipe. The exact route varies with the engine bay, chassis, body style, and position of the rear silencer.
The system must move gases without contacting the floor, driveshaft, suspension, brake lines, or body panels. A pipe that is technically the right length can still be wrong if its bends place it too close to a heat-sensitive component. That is why visual comparison with the original routing matters during both diagnosis and installation.
How the manifold, downpipe, silencer, and tailpipe work together
The manifold gathers exhaust flow from the cylinders, while the downpipe creates the first connection between the engine and the rest of the system. The silencer, sometimes called a muffler, uses chambers, perforated tubes, or packing to reduce pressure pulses and sound. The tailpipe then carries the treated flow clear of the body.
Each part has a different job, but none works in isolation. A damaged manifold flange can create a leak before the silencer, while a poorly positioned tailpipe can transmit vibration into the body. On an older MG, even a sound silencer may become troublesome if the connecting pipe or bracket has weakened.
The role of gaskets, clamps, hangers, and mounting hardware
Small hardware often determines whether a newly fitted system stays quiet. Gaskets seal flanged joints, clamps compress slip connections, and hangers hold the exhaust at its intended height. Rubber mounts allow limited movement while isolating vibration from the chassis.
Before ordering, check whether a replacement includes its required clamps, gaskets, brackets, and rubber pieces. A system can appear complete in a photograph while still requiring several installation items. Correct joint sealing matters because a tiny opening can grow as heat cycles repeatedly expand and contract the metal.
How exhaust design affects sound, emissions, and engine performance
Pipe diameter, silencer construction, and the number of bends all influence sound and flow. A larger pipe is not automatically better: if it does not suit the engine and layout, it may add noise without delivering a useful benefit. Excessive restriction can also affect engine response, especially when a silencer has collapsed internally.
Emissions equipment must be handled according to the car’s specification and local requirements. Older MGs may have a simpler arrangement than later vehicles, while a converted or modified car may no longer match its original catalog description. Sound should be judged from inside the cabin as well as from outside, since a system that sounds appealing at idle may drone badly at cruising speed.
Identifying MG exhaust system parts by model
The phrase “MG exhaust” covers several generations of cars with notably different chassis and body layouts. A part that fits an MGB may be entirely unsuitable for an MG TD, even if both use four-cylinder engines. Start with identification, then compare measurements and mounting points before comparing prices.

The MGB exhaust parts category is a useful example of why catalogs should be searched by model rather than by a generic exhaust term. Other reference pages, such as MGB mounting parts, can help separate the main pipes from the brackets and supports that are easy to overlook.
Key differences between MGB, MGB GT, and MGB roadster systems
The MGB roadster and MGB GT share much of their mechanical foundation, but their body shapes and rear packaging can affect exhaust routing and tailpipe position. Market, year, engine changes, and previous modifications may introduce further differences. Do not assume that a roadster system will transfer directly to a GT simply because the engine is the same.
Inspect the rear section especially closely. The available space around the axle, rear valance, and spare-wheel area can influence the silencer shape and final outlet. A catalog photograph is helpful for recognition, but the vehicle’s existing pipe path remains the better reference when a car has been repaired or modified before.
Exhaust configurations used on MG TC, TD, and TF models
The MG TC, TD, and TF belong to an earlier family of cars with different chassis construction and exhaust arrangements from the MGB. Their systems may use distinctive external routing, period-style silencers, and mounting details that are not shared with later MG models. Restoration work should preserve both clearance and the intended visual character.
A page covering MG TC, TD, and TF parts illustrates the need to check availability and delivery status as well as fitment. Some classic components may be special-order or temporarily unavailable, so it is wise to confirm the complete build plan before dismantling the car.
How model year and engine specification affect fitment
Model year can change flange dimensions, pipe routing, silencer placement, and emissions-related hardware. Engine swaps make identification still harder because the chassis may retain one generation of mounting points while the power unit uses another manifold or downpipe. Record what is physically installed instead of relying only on a registration description.
Measure the outside diameter of accessible pipes, note the number and position of hangers, and photograph every joint before removal. Also record whether connections are flanged, clamped, or welded. These details often reveal why a seemingly correct replacement needs an adapter or a different front section.
Using original part numbers, diagrams, and vehicle measurements
Original part numbers can narrow the search, but they should be checked against a parts diagram and the actual car. Diagrams show how components relate to one another, while measurements expose substitutions made during previous repairs. Keep the old part until the new one has been test-fitted; it may still be the clearest template available.
A practical identification record includes the model, body style, engine, year, pipe diameter, joint type, silencer shape, and hanger locations. That information makes conversations with a supplier more precise and reduces the chance of ordering a visually similar but incompatible assembly.
Choosing the right replacement exhaust components
Replacement decisions usually involve a compromise between originality, durability, sound, cost, and ease of installation. There is no universally correct material or layout for every MG. A car used for occasional shows may have different priorities from one driven regularly on wet roads.
Comparing original-style, stainless steel, and performance systems
Original-style systems are often the simplest choice for a restoration because they preserve familiar routing, appearance, and sound. Stainless steel can offer better resistance to corrosion, although its cost and the quality of its welds, bends, and mounting points still deserve attention. Performance-oriented systems may change pipe size or silencer design, so their effect should be considered as a complete package.
Ask what the system is intended to reproduce or change. “Stainless” describes material, not necessarily an exact factory layout, and “performance” does not specify how much louder the car will be. A clear supplier description should identify the included sections and the model range rather than relying on a broad product title.
Matching pipe diameter and layout to the intended use
Pipe diameter should suit the engine, manifold, silencer, and intended driving. Retaining a standard layout generally makes installation easier and keeps the risk of interference low. A modified layout may be worthwhile, but it should be checked against ground clearance and the location of fuel, brake, and electrical components.
For a road car, comfortable cruising and predictable clearance often matter more than maximum flow. A track-oriented or heavily modified car may justify a different arrangement, but changes should be evaluated alongside carburetion, ignition, and heat management. The exhaust cannot compensate for an engine tune that is otherwise incorrect.
Deciding between a complete system and individual replacement parts
A complete system is attractive when several sections are thin, corroded, or distorted. It gives the installer a chance to reset the routing and renew all the joints at once. Replacing one silencer or a short pipe can be more economical when the remaining sections are straight, sound, and compatible with the new part.
Use the condition of the existing system as the deciding evidence. Individual parts make sense when cutting or welding will not be needed and the old connections can be separated cleanly. A complete kit is usually the less frustrating route when multiple clamps are seized, hangers are missing, or previous repairs have altered the layout.
Checking supplier descriptions for compatibility and included hardware
Read the fitment notes line by line. Confirm the model range, body style, engine, year span, material, pipe diameter, and whether gaskets or mounting hardware are included. If the description is vague, ask for a dimensional drawing or a photograph of the actual kit before placing the order.
The following quick check keeps a purchase from being reduced to a part number alone:
- Match the system to the exact model and body style.
- Confirm the front connection and rear outlet positions.
- Check whether clamps, gaskets, brackets, and rubber mounts are supplied.
- Compare shipping timing with the planned repair date.
That final check is especially useful for older cars, where a missing rubber mount or unusual flange can stop an otherwise correct installation. A discussion of MGB exhaust system options can also provide useful background on how pipe sizes and silencer choices affect sound, though the car’s own measurements should remain decisive.
Diagnosing common MG exhaust problems
Exhaust faults often announce themselves through sound, smell, vibration, or visible movement before a part fails completely. Diagnosis is easier when the car is inspected cold first and then, where safe, observed as it warms. Avoid touching any component until it has cooled, since exhaust metal remains hot well after the engine is switched off.
Recognizing symptoms of leaks, cracks, and loose connections
A leak near the manifold may produce a sharp ticking noise, especially during cold start. Leaks farther back can create a puffing sound, dark soot marks around a joint, or an exhaust smell near the cabin. Loose clamps and cracked flanges may allow the pipe to move when gently checked after cooling.
Never rely on sound alone. Look for black deposits, damaged gasket edges, and gaps at flanges. If fumes enter the passenger compartment, stop driving until the source is corrected and the cabin is properly ventilated; exhaust gases can contain dangerous substances.
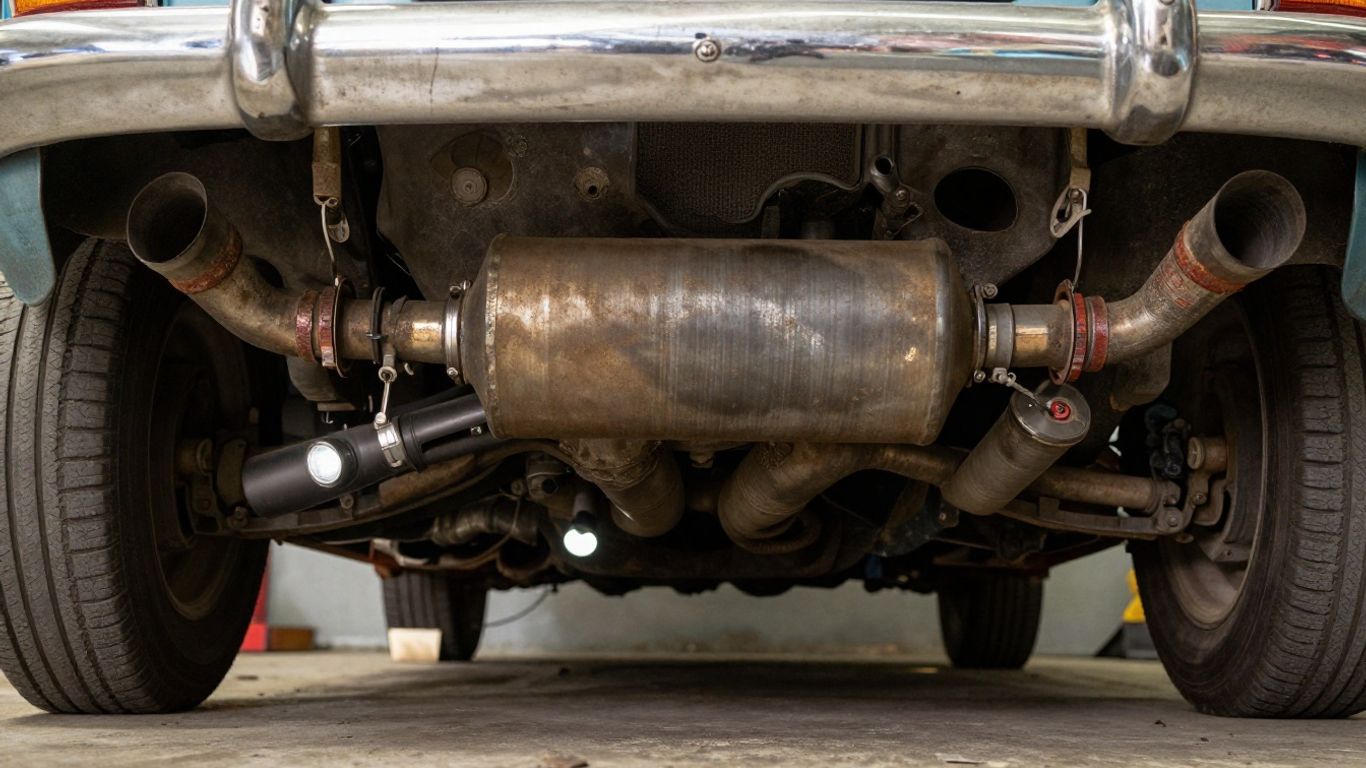
Finding the source of rattles, droning, and excessive exhaust noise
A rattle may come from a loose heat shield, broken silencer baffle, or hanger that lets a pipe strike the chassis. Droning usually relates to the system’s resonance and may appear only at a particular engine speed. Excessive volume can result from a failed silencer, an open joint, or a missing section rather than from a deliberate performance modification.
With the engine off and cold, tap the silencer lightly with a rubber-handled tool and listen for loose internal material. Move the tailpipe carefully and watch the hangers as they flex. These simple checks can distinguish an internal silencer failure from a mounting problem before parts are ordered.
Identifying rust, corrosion, and failed mounting points
Surface discoloration is common, but deep pitting, flaking seams, and perforated pipe indicate a structural concern. Pay close attention to low points where condensation collects, welded seams, flange faces, and areas beside clamps. Mounting brackets deserve equal attention because a sound pipe can fail when its support tears away.
Corrosion is often worse on the upper side of a pipe than it appears from below. Use a light and a small inspection mirror, and compare both sides of each hanger. If a bracket is pulling the pipe against the body, repair the cause rather than simply welding the crack closed.
Knowing when poor performance may indicate a blocked silencer or catalytic component
An internally collapsed silencer can restrict flow and cause sluggish acceleration, unusual heat, or a change in exhaust tone. On cars fitted with a catalytic component, blockage there can produce similar symptoms. Poor performance can also come from ignition, fuel, valve, or timing problems, so exhaust replacement should not be the first diagnosis without supporting evidence.
Compare engine behavior under load, inspect for abnormal heat, and seek a pressure or flow test when the fault is unclear. A professional inspection is sensible if the car loses power suddenly or the exhaust glows unusually hot. Changing parts by guesswork may hide the original fault and create a second fitment problem.
Planning an MG exhaust system parts installation
Good installation begins before the first fastener is loosened. Photograph the old route, gather replacement seals and mounts, and make sure the car can remain safely supported for the entire job. Rushing the final alignment is a common reason for later rattles and premature cracks.
Preparing the car and safely supporting the chassis
Work on a level surface with the engine cold. Use a suitable jack only for lifting, then support the chassis with properly positioned stands; never rely on a jack while pulling on a stubborn exhaust. Chock the wheels, disconnect anything that could be damaged by heat or movement, and keep penetrating fluids away from hot surfaces.
Give yourself room to lower sections without bending brake lines or stressing the manifold. An assistant can steady a long silencer while its last hanger is removed. For extensive restoration work, a workshop lift makes access easier, but it does not remove the need to support loose components.
Removing seized fasteners without damaging nearby components
Old exhaust fasteners may be rusted to the point that a normal wrench rounds them. Apply penetrating fluid, allow time for it to work, and use the correct-size socket. Heat can help in suitable workshop conditions, but fuel lines, wiring, paint, and underbody coatings must be protected.
Cutting a clamp may be safer than twisting a fragile flange. Support the pipe before separating the joint so its weight does not load the manifold. If a stud begins to turn in the cylinder head, pause and reassess; replacing an exhaust part is preferable to creating a much larger engine repair.
Aligning pipes, silencers, and hangers for proper clearance
Install sections loosely at first. Set the front connection, establish the silencer’s position, and then work toward the tailpipe while checking clearance around the chassis, axle, suspension, and body. The system should have enough room to move slightly as it heats without touching surrounding metal.
The outlet should sit evenly in the rear opening and should not be forced into position by tightening a clamp. If alignment requires excessive leverage, a pipe may be the wrong length or a hanger may be bent. Correct that mismatch before final tightening rather than asking the rubber mounts to hold the system under constant strain.
Replacing seals, clamps, and rubber mounts during installation
New gaskets are inexpensive insurance when a flange has been opened. Replace stretched clamps and hardened rubber mounts, and inspect brackets before installing them. Reusing a distorted seal or cracked hanger can make a new exhaust appear faulty from the first drive.
Tighten connections progressively, starting at the front and checking the route as each joint becomes secure. Once the system is fully supported, start the engine briefly and listen for leaks, then allow it to cool before a final fastener check. The first road test should be short, followed by another inspection for movement or fresh soot.
Maintaining MG exhaust system parts for longer service life
Maintenance is mostly observation, but it pays off because exhaust damage tends to spread from one weak point. A small leak can enlarge a flange opening, while a broken hanger can overload an otherwise healthy silencer. Inspect the system as part of routine servicing rather than waiting for a dramatic change in sound.
Inspecting vulnerable areas after driving in wet or salty conditions
Water and road salt collect on low sections, clamps, seams, and mounting brackets. After driving in harsh conditions, allow the car to dry and inspect the underside when it is safe to do so. Look for trapped mud around hangers and for new staining near joints.
Cars stored for long periods can also suffer because condensation remains inside the exhaust. Short starts that do not bring the system fully up to temperature may leave moisture behind. A proper drive is generally more useful than repeated brief idling, provided the car is roadworthy and local conditions allow it.
Preventing premature corrosion and moisture buildup
Keep drain paths and gaps around the exhaust clear of packed dirt. Avoid coating hot exhaust surfaces with products not intended for high temperatures, and do not seal over active rust without removing the underlying damage. Stainless components still need clean mounting hardware and sensible routing; dissimilar metals can complicate corrosion around joints.
Storage matters too. A dry, ventilated garage reduces exposure, while a cover that traps damp air can do the opposite. If the vehicle is laid up, inspect the exhaust before returning it to service rather than assuming lack of use has preserved it.
Retightening connections and checking exhaust hangers
Heat cycles gradually settle clamps and gaskets, especially after a new system has been installed. Once the car has completed several drives and cooled fully, check accessible fasteners and examine the rubber mounts for stretching or tears. Do not overtighten a clamp to compensate for a misaligned joint.
A hanger should support the exhaust without pulling it sideways. Check that the tailpipe has not moved closer to the body and that there are no fresh contact marks. These quick checks are more valuable than tightening every fastener indiscriminately.
Evaluating repairs versus full system replacement over time
A small, accessible hole in otherwise thick metal may be repairable, while corrosion across several sections usually makes patching temporary. Consider the age and condition of the silencers, flanges, hangers, and pipes together. Repeated local repairs can cost more in labor and still leave the car with uneven wall thickness and unreliable joints.
Use a simple record of repair dates, replaced sections, and recurring symptoms. If the same area fails twice, investigate vibration, alignment, or moisture rather than repeating the identical repair. For owners arranging transport after a breakdown, even a roadside towing directory may be useful, but recovery should not substitute for finding why the exhaust failed.
Conclusion
Choosing, fitting, and maintaining MG exhaust system parts becomes much easier when the car is identified accurately and the whole route is treated as a system. Measure before ordering, renew the small sealing and mounting items, align everything without force, and inspect the result after the first few drives. Those habits preserve sensible sound, safe clearance, and dependable service without turning every exhaust problem into a full restoration project.
Frequently Asked Questions
How do I identify the correct exhaust for my MG?
Record the model, body style, year, engine, pipe diameter, joint type, silencer shape, and hanger locations. Compare those details with a parts diagram and the physical system already fitted to the car.
Should I choose stainless steel or mild steel?
Stainless steel generally offers stronger corrosion resistance, while an original-style mild-steel system may better suit a period restoration or a tighter budget. Quality, routing, and fitment matter more than material alone.
Can a larger exhaust pipe improve performance?
Not necessarily. Pipe diameter must suit the engine, manifold, silencer, and intended use. An oversized system may increase noise or reduce desirable exhaust-gas velocity without producing useful power.
How can I tell whether my exhaust has a leak?
Listen for ticking or puffing, inspect joints for dark soot, and look for damaged gaskets or cracked flanges. An exhaust smell inside the cabin requires immediate attention and should not be ignored.
Why does my exhaust rattle at certain engine speeds?
The cause may be a loose heat shield, failed hanger, pipe contact, or broken internal silencer material. Inspect the system cold and check whether the noise follows a particular engine-speed range.
How often should exhaust hangers be checked?
Check them during routine servicing and after driving through heavy rain, salt, or rough conditions. They should be inspected immediately if the exhaust begins to move, sag, or touch the body.
Is it better to replace one damaged section or the whole system?
Replace one section when the remaining parts are sound and compatible. A complete system is usually more practical when corrosion, seized joints, damaged hangers, or previous modifications affect several sections.