

Key Takeaways
MG starter motor issues can look like battery, wiring, security, or mechanical faults, so diagnosis should begin with simple electrical checks. Work methodically, protect the car from accidental starts, and confirm the repair under both cold and warm conditions.
- Check battery condition, terminals, grounds, and voltage drop before condemning the starter.
- Use the sound and behavior of the starter to narrow the likely fault.
- Inspect relays, solenoid wiring, immobilizer behavior, and the starter ring gear.
- Choose between connection repair, rebuilding, and replacement based on test results.
- Prevent repeat failures with good charging-system maintenance and sensible cranking habits.
Understanding MG starter motor issues
MG starter motor issues are not always caused by the starter motor itself. A weak battery, corroded earth strap, poor relay contact, or worn ring gear can produce similar symptoms. The safest approach is to separate the starting circuit into its power supply, control side, motor, and mechanical engagement.
What the starter motor does
When the ignition switch calls for starting, the control circuit energizes the solenoid. The solenoid moves the drive gear into engagement with the flywheel or starter ring gear and connects high current to the motor. The motor then turns the engine fast enough for it to begin running under its own power.
A starter therefore has two jobs that can fail independently: engaging with the engine and turning it. A click without rotation points toward the control or high-current side, while a free-spinning sound suggests that engagement has not occurred.
Common symptoms of starter failure
The most useful first clue is what happens when the key is turned. A single heavy click, repeated rapid clicks, silence, slow cranking, or a harsh grinding noise each directs testing toward a different part of the system. Do not keep holding the key if the starter grinds or continues running after the engine starts.
Intermittent faults deserve attention even when the car eventually starts. A starter that works after several attempts may have worn brushes, a failing solenoid contact, a loose cable, or a heat-sensitive connection.
How starter problems differ from battery faults
A battery fault commonly causes dimming lights, repeated clicking, or a gradual drop in cranking speed. A starter fault may leave the lights apparently normal but produce one solid click, no crank, or an occasional failure that changes with temperature. These are clues, not proof, because a poor cable can imitate either condition.
Test the battery at rest and again while attempting to crank. If voltage collapses under load, charge and test the battery before replacing anything else. If the battery remains strong but the starter receives inadequate voltage, follow the cables and grounds.
MG models and systems affected
The exact starter arrangement varies with the MG model, engine, year, and whether the car uses an inertia or pre-engaged design. Later systems may include a starter relay, while older arrangements can route the control signal differently. Always use the wiring diagram and service information for the particular car.
Owner experiences can still help identify patterns, provided they are treated as clues rather than diagnosis. For example, this MGB starting discussion describes clicking after electrical connections were cleaned, a symptom that still requires battery and voltage-drop testing.
Diagnosing the electrical system first
Electrical checks should come before removing the starter. They are quicker, safer, and often reveal that the motor is being starved of current rather than failing internally. Record each result instead of relying on memory, especially when a fault is intermittent.
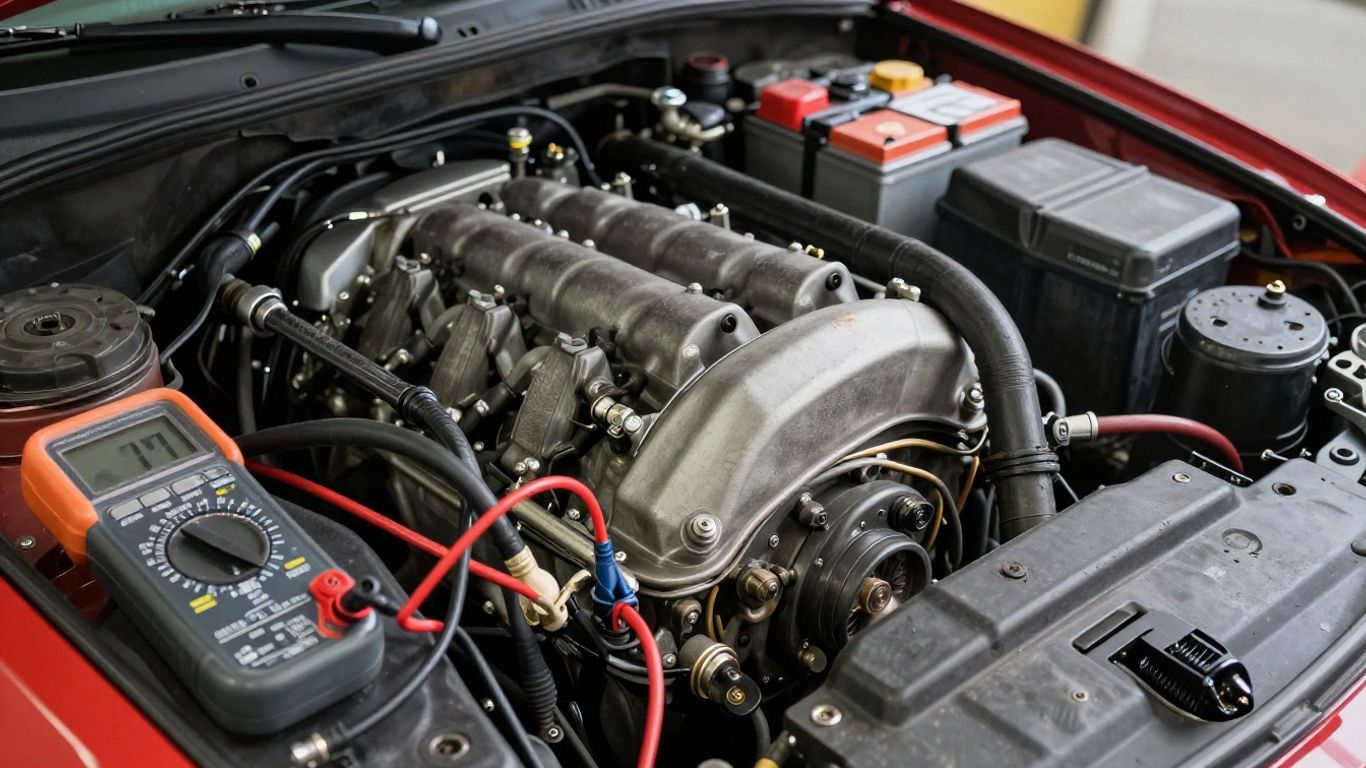
Checking battery voltage and condition
Begin with a fully charged battery and clean test probes. Measure voltage across the battery posts, not just the cable clamps, then observe the reading while the engine is cranked. A good resting reading alone does not prove that the battery can deliver starting current.
Check the battery’s age, case condition, and charging history as well. If it repeatedly needs charging, investigate the alternator and parasitic drain rather than treating the starter as the only suspect.
Inspecting battery terminals and ground connections
Remove and inspect both battery terminals, the negative cable, the engine-to-body ground strap, and the starter’s main positive cable. Corrosion can hide between a terminal and its post, while a loose ground may pass a small test current but fail under starter load.
Clean contact surfaces to bright metal where appropriate, then tighten them securely without damaging the posts. Protecting the finished connection is useful, but coating should not be placed between the mating metal surfaces.
Testing the starter solenoid and ignition circuit
The solenoid needs a reliable control signal as well as a strong battery feed. With the car safely secured, check whether the solenoid receives voltage when the key is held in the start position. A missing signal shifts attention to the ignition switch, relay, fuse, wiring, or security interlock.
A faint click and a heavy clunk do not mean the same thing. A faint click may indicate relay action, while a heavy clunk may show that the solenoid moves but the motor circuit or battery supply cannot carry current.
Measuring voltage drop under load
Voltage-drop testing is often more revealing than an open-circuit continuity check. Measure across the positive cable while cranking, then across the ground path from the starter housing to the battery negative post. Excessive voltage in either test identifies resistance in that path.
Keep the test leads on the actual connection points and compare results with the vehicle’s service specifications. This method avoids replacing a starter when the real fault is a cable, clamp, or ground strap.
Identifying common starter motor faults
Once the battery and cables have been checked, the starter’s behavior becomes easier to interpret. The same sound can have more than one cause, so confirm it with measurements and a visual inspection. Avoid repeated attempts while a mechanical fault is suspected.
Clicking without engine cranking
A single click with no crank can come from a weak battery, high resistance in the cables, burned solenoid contacts, or a seized starter motor. Rapid clicking usually indicates that voltage is falling away as the solenoid engages and releases. Test battery voltage and voltage drop before deciding which component is at fault.
If the starter receives full battery voltage and a proper control signal but does not turn, internal wear becomes more likely. Removal and bench testing may then be justified.
Slow or intermittent cranking
Slow cranking can be caused by low battery state of charge, poor connections, excessive engine resistance, worn brushes, or damaged internal bushings. An intermittent starter often responds to vibration or temperature changes, which makes the fault easy to dismiss after one successful start.
Compare cold and hot behavior and listen for changes in speed. A repeatable test result is more useful than a single successful start after the car has been left to sit.
A spinning starter that does not engage
A starter that spins without turning the engine may have a failed drive gear, overrunning clutch, solenoid movement problem, or incorrect installation. The motor is operating, but its torque is not reaching the flywheel. Continuing to crank can worsen damage to the drive components.
Confirm that the solenoid plunger moves correctly and inspect the drive gear when the starter is removed. The starter type must also match the flywheel and its ring gear.
Grinding, whirring, or unusual starter noises
Grinding often indicates poor gear engagement, incorrect alignment, a damaged drive gear, or worn ring-gear teeth. A high-pitched whir may mean the starter motor is spinning without engaging. A starter that stays engaged after the engine fires can damage itself and the ring gear.
Stop testing if the noise is harsh or continues after releasing the key. The starter fault guide offers a useful sound-based way to distinguish clicks, clunks, rattles, and other starting symptoms, but the vehicle still needs direct inspection.
Troubleshooting MG-specific starting problems
Model-specific starting problems usually involve the way the wiring, relays, security system, and starter hardware interact. The broad diagnostic logic remains the same, but component locations and circuit designs vary. Work from the vehicle’s wiring diagram rather than assuming every MG uses the same arrangement.

Wiring, relays, and connection failures
Look for overheated terminals, stretched wires, damaged insulation, loose relay sockets, and previous repairs that were poorly crimped. A relay may click yet fail to pass enough current, and a switch may work intermittently because its contacts are worn.
Trace the starting signal from the ignition switch through any relay or interlock to the solenoid. The starter circuit overview is useful background on different starter arrangements and common electrical failure points, while the specific MG diagram remains the final authority.
Immobilizer and security-system interference
If the engine does not crank, or if the security indicator behaves unusually, consider an immobilizer or interlock issue alongside ordinary electrical faults. Check the owner’s manual for the normal indicator sequence and try the approved spare key or reset procedure if one is provided.
Do not bypass security wiring casually. A fault scan or qualified auto-electrician may be needed, particularly when the starter signal is intentionally being withheld.
Heat-related starter problems
A starter that fails after a hot drive but works again when cool may have increased internal resistance, heat-soaked cables, worn solenoid contacts, or a marginal ground. Note the temperature and waiting time each time the fault occurs. That pattern can save considerable diagnostic time.
Test voltage at the starter while the fault is present if possible. Heat shielding, cable routing, and exhaust proximity should also be inspected after the electrical cause has been established.
Faults involving the flywheel or starter ring gear
Damaged ring-gear teeth can cause a starter to engage in some crankshaft positions but not others. A repeated grinding spot or a single position where the engine will not turn over is a valuable clue. Turn the engine by hand only with the ignition disabled and the vehicle secured.
Inspect the ring gear through the starter opening or during removal. If teeth are badly damaged, replacing the starter alone may provide only a temporary improvement.
Repair and replacement options
The best repair depends on what testing finds, not on how dramatic the symptom sounds. A dirty terminal may need minutes of work, while a damaged ring gear may require substantial mechanical labor. Compare the part’s condition, availability, and expected service life before choosing.
When cleaning or repairing connections is enough
Cleaning and tightening are appropriate when voltage-drop tests identify resistance at a terminal, ground strap, cable lug, relay socket, or solenoid connection. Replace a cable if its strands, crimp, insulation, or lug are damaged rather than relying on surface cleaning.
After the repair, repeat the same load test. A connection repair is complete only when the starting voltage and cranking behavior improve consistently.
Rebuilding the original starter motor
A rebuild may involve brushes, bushings, bearings, solenoid contacts, or a drive assembly. It can make sense when the original unit is serviceable, correctly matched to the engine, and repair parts are available. The armature, commutator, field components, and housing should be inspected rather than replaced blindly.
A rebuild also gives an opportunity to clean internal dust and check for heat damage. Use a specialist when testing equipment or correct assembly procedures are not available.
Choosing a replacement starter
Match the replacement by model, engine, transmission, mounting pattern, tooth count, electrical connection, and physical clearance. Confirm whether the car requires an inertia or pre-engaged design and whether the solenoid is integral or separate.
A visually similar starter can still be wrong. Compare the old unit and the replacement before installation, and resolve discrepancies with a parts catalogue or workshop manual.
Comparing original, remanufactured, and high-torque units
An original unit preserves the factory specification, while a remanufactured unit can be a practical option when its testing and warranty are clear. A high-torque unit may help in a suitable application, but it must still match the mounting, gearing, wiring, and available clearance.
The least expensive part is not always the least expensive repair. Consider return terms, rebuild quality, and whether the battery and cables are healthy enough to support the chosen starter.
Replacing and testing the starter motor
Starter removal is a high-current electrical job with awkward access on some MG models. Support the vehicle correctly, keep tools away from the battery feed, and follow the model-specific procedure. Take photographs before disconnecting cables so routing and heat protection can be restored accurately.
Preparing the MG safely for starter removal
Park on a level surface, apply the parking brake, chock the wheels, and disconnect the negative battery cable before touching the starter wiring. If the car must be raised, use approved stands on sound support points rather than relying on a jack.
Allow hot components to cool and keep the key away from the vehicle. The MGB starter replacement guide is a useful reference for the general sequence, but access and fastener details must be checked for the exact model.
Removing and installing the starter
Label the main battery cable and the smaller solenoid wire before removal. Support the starter as its final fastener comes out, then compare the replacement’s drive gear, mounting face, and terminals with the original. Clean the mounting surfaces without removing material that establishes alignment.
Install the starter squarely and start every fastener by hand. Do not force a mismatched unit into place or use the bolts to pull it against an incorrect mounting pattern.
Verifying cable routing and torque
Route cables away from exhaust heat, moving belts, shafts, and sharp edges. Tighten mounting bolts and electrical terminals to the vehicle’s specified torque, since both loose and overtightened connections can create trouble.
Reconnect the battery only after the wiring has been checked. A final visual inspection should confirm that no cable can rub or contact a hot component during engine movement.
Confirming reliable starting after installation
Test first with a brief crank, then allow the starter to rest between attempts. Listen for clean engagement and verify that the engine cranks at a consistent speed. Check for warning lights, smoke, cable heating, and unusual sounds.
Repeat the test after a cold soak and, when practical, after the engine has reached operating temperature. A repair is more convincing when it works across both conditions rather than only in the workshop.
Preventing future starter motor problems
A starter is affected by the condition of the entire starting and charging system. Preventive work is mostly basic maintenance, but it is much cheaper than repeated replacement. Keep records of battery tests, cable repairs, and symptoms so gradual changes are visible.
Maintaining the battery and charging system
Keep the battery charged and have it load-tested when cranking slows. Check charging voltage and investigate repeated low-charge conditions, because an alternator problem can leave a new starter working under difficult conditions.
Use the correct battery specification and secure it firmly. Excessive vibration can damage the case, terminals, and internal connections over time.
Protecting terminals and ground points
Inspect battery posts, cable ends, engine grounds, body grounds, and starter terminals during routine servicing. Keep mating surfaces clean and tight, then use suitable protection on exposed finished connections. Do not hide a loose connection beneath a layer of corrosion inhibitor.
Ground straps deserve the same attention as positive cables. A replacement strap should be appropriately sized, securely mounted, and protected from exhaust heat and abrasion.
Recognizing early warning signs
Take action when the starter turns more slowly, clicks occasionally, behaves differently when hot, or makes a new mechanical noise. These changes may appear weeks before a complete no-start condition. A short inspection at the first warning is usually easier than roadside diagnosis.
Keep symptom notes precise. Even a general starter troubleshooting reference can be easier to apply when the exact temperature, sound, and recent repair history are recorded.
Avoiding repeated cranking and heat damage
Long cranking sessions overheat the starter and cables, especially when the engine has another fault preventing it from starting. Use short attempts with cooling pauses, and stop when the sound changes or the starter remains engaged. Diagnose fuel, ignition, and engine faults rather than repeatedly stressing the starting circuit.
Clear records matter in every repair process, much as Google Business Profile guidance stresses accurate details for a different kind of system. The comparison is simple: precise information makes troubleshooting more useful, while unrelated references such as Simple Oahu Wedding, Type 1 hair routine, or a prompt engineering guide should remain separate from the vehicle diagnosis.
Conclusion
MG starter motor issues are best handled as a system problem: verify the battery and cables, interpret the starter’s sound, test the control circuit, and inspect mechanical engagement before buying parts. Careful installation and regular charging-system maintenance then reduce the chance of another starting failure.
Frequently Asked Questions
What is the most common cause of a starter clicking?
A weak battery or high resistance in a battery cable or ground is common, although a faulty solenoid or starter motor can produce the same single-click symptom. Voltage testing under load is the quickest way to separate these possibilities.
Can a bad battery damage a starter motor?
Repeated attempts with a weak battery can increase heat in the starter and cables, especially when the motor turns slowly. The battery and charging system should be tested before continued cranking.
Why does a starter work when cold but fail when hot?
Heat can increase resistance in worn windings, brushes, solenoid contacts, and cables. Exhaust heat or a marginal ground can make the pattern worse, so testing while the fault is present is valuable.
What does rapid clicking mean during starting?
Rapid clicking usually means the solenoid is engaging and releasing as voltage falls. Common causes include low battery charge, a failing battery, or excessive resistance in the high-current connections.
Can a starter spin without turning the engine?
Yes. A failed drive gear, overrunning clutch, solenoid mechanism, or incompatible starter can allow the motor to spin without engaging the flywheel or ring gear.
Should starter terminals be cleaned before replacement?
Yes, if corrosion or looseness is present. Clean and tighten the connections, then repeat voltage-drop testing; replace damaged cables or terminals rather than cleaning them indefinitely.
How long should a starter crank before resting?
Use short cranking attempts and allow cooling time between them. If the engine does not start after a few sensible attempts, investigate the underlying fuel, ignition, security, or mechanical fault instead of continuing to heat the starter.