

Key Takeaways
A radiator replacement is easiest when diagnosis, parts selection, and cooling-system testing are treated as one job rather than separate tasks.
- Confirm that the radiator is the source of the cooling problem before buying parts.
- Match the replacement to the MG model, year, dimensions, and mounting arrangement.
- Work only on a fully cool engine and capture coolant for proper disposal.
- Replace tired hoses, clamps, or hardware while access is available.
- Bleed, inspect, and road-test the system before considering the job complete.
1. When your MG radiator needs replacement
A radiator can fail gradually through corrosion or suddenly after impact, but the warning signs are usually visible or repeatable. Coolant loss, rising temperature, and wetness around the core deserve attention before they become an engine problem. The goal is to identify the failed component accurately, then choose the least disruptive sound repair.
Recognizing leaks, corrosion, and physical damage
Look for dried coolant staining, fresh colored fluid, damp hose connections, and white or green deposits around seams. Bent fins reduce airflow, while a cracked tank, split outlet, or badly corroded core can make replacement more sensible than continued patching. A pressure test is useful because small leaks may appear only when the system is warm or pressurized.
A radiator should also be checked for damage caused by loose supports or contact with nearby parts. The practical MGB replacement guide is a useful reminder that the radiator’s supports and shroud can be part of the failure story, not merely installation hardware.
Understanding overheating symptoms
A temperature gauge that climbs in traffic, steam from the engine bay, a sweet coolant smell, or coolant pushed from the overflow are all reasons to stop and investigate. Do not keep driving while the gauge is approaching the hot zone; an apparently minor leak can quickly leave the system unable to control engine temperature.
Overheating can also be intermittent. If the car cools at speed but warms while stationary, airflow, the fan, or a restricted radiator may be involved. Record when the symptom occurs, how much coolant is lost, and whether the heater produces warm air, since those details help separate possible causes.
Distinguishing radiator problems from thermostat or water pump faults
A blocked radiator may have uneven temperature across its core, while a thermostat problem can prevent coolant from circulating correctly as the engine warms. A failing water pump may produce bearing noise, pulley movement, or leakage near the pump, and a damaged belt can create a similar overheating result without a radiator fault.
Use a visual inspection, temperature comparison, and pressure test rather than replacing parts by guesswork. If the radiator remains full and dry but the engine overheats rapidly, broaden the diagnosis before ordering a replacement.
Deciding between repair, recoring, and full replacement
A specialist may be able to repair a small tank or outlet, while a restorable original radiator can sometimes be recored. Full replacement is generally the cleaner choice when the core is extensively blocked, the tanks are deteriorated, or several repairs have already failed.
Consider originality, availability, cost, and the car’s intended use. The cheapest initial fix is not always the least expensive path if it requires repeated draining and removal.
2. Choosing the right replacement radiator
Radiators that look similar can differ in height, width, thickness, inlet position, outlet size, and mounting points. Start with the exact car and compare the old unit before placing an order. This is especially important for older MGs, which may have received modified cooling systems during their lives.

Matching the radiator to your MG model and production year
Record the model, production year, engine, transmission arrangement, and any cooling-system modifications. Catalog listings should be treated as a starting point, not proof that a part will fit your particular car.
The aluminum MG radiator listing illustrates why application and dimensions matter: its description identifies a specific MGB year range, mounting arrangement, and core measurements. Use that kind of detail to compare against your own radiator rather than relying on the word “universal.”
Comparing original-style and aluminum radiators
An original-style radiator may preserve the appearance and mounting arrangement expected on a restored car. An aluminum unit may offer a different construction and finish, but its suitability still depends on fit, coolant requirements, fan clearance, and the way the car is used.
Do not choose material alone. A correctly sized radiator with secure mounts and suitable airflow is more useful than a visually impressive unit that cannot connect cleanly or leaves the fan poorly positioned.
Checking core dimensions, hose connections, and mounting points
Measure the old radiator once it is accessible, including the core, tanks, hose outlets, filler neck, and mounting tabs. Check whether the fan shroud attaches to the radiator or to the body, and verify that nearby oil-cooler lines or brackets will not interfere.
A simple comparison table helps prevent an expensive mismatch before installation:
| Check | Original unit | Replacement requirement | Why it matters |
|---|---|---|---|
| Core height and width | Measure directly | Same usable envelope | Prevents body interference |
| Core thickness | Measure at the core | Compatible with fan clearance | Avoids fan or shroud contact |
| Hose outlets | Note position and diameter | Same routing and size | Prevents stretched hoses |
| Mounting points | Count tabs and brackets | Same attachment arrangement | Keeps the radiator supported |
After comparing these points, inspect the replacement’s fittings and mounting hardware in person. A small bracket difference is easier to resolve before the old radiator has been removed.
Evaluating cooling capacity for traffic, touring, and performance use
A car used mainly on open roads may have different airflow demands from one that spends long periods in slow traffic. Consider the condition of the fan, shroud, grille, and air path alongside the radiator’s core design; capacity cannot be judged by thickness alone.
For a modified engine or frequent high-load driving, ask a cooling specialist to confirm the complete system rather than selecting the largest available core. Extra capacity is useful only when the radiator fits and the rest of the system can move air and coolant effectively.
3. Preparing for an MG radiator replacement
Preparation makes the removal cleaner and reduces the chance of damaging old fittings. Gather the replacement, coolant, seals, clamps, and tools before opening the system. A few minutes spent identifying fasteners and hose routing can save a long interruption halfway through the job.
Gathering tools, replacement parts, and safety equipment
You will typically need sockets, wrenches, screwdrivers, pliers, a drain pan, rags, gloves, eye protection, and a suitable means of lifting the vehicle if access underneath is required. Have replacement hose clamps and any specified mounting rubbers available, because old hardware may not reseal reliably.
Keep the service manual nearby for torque values and model-specific removal details. The radiator replacement discussion also reflects a practical concern: draining can be messy when a radiator has no convenient drain tap, so plan for more fluid and splash protection than expected.
Allowing the engine to cool and protecting the work area
Park on a stable, level surface, apply the parking brake, and allow the engine to become completely cold. Never remove a pressurized radiator cap from a hot engine; hot coolant can escape violently and cause serious burns.
Cover painted surfaces and place a wide drain pan beneath the lower hose or drain point. Keep absorbent material close by, and prevent pets and children from reaching spilled coolant.
Draining and storing the old coolant safely
Open the cap only after the engine is cold, then drain through the radiator drain point if fitted or through the lower hose when the design requires it. Loosen the cap carefully to help air enter as the coolant flows, and move the pan as needed to catch the stream.
Transfer the used coolant to a sealed, labeled container and take it to an approved recycling or disposal location. Never pour it onto soil or into a drain; its color and smell do not make it safe for people or animals.
Inspecting hoses, clamps, belts, and surrounding components
With the system empty, squeeze the hoses and look for soft spots, cracking, swelling, or oil contamination. Inspect the belt driving the water pump, the fan, shroud, radiator supports, and nearby wiring before the replacement blocks access.
Replacing a brittle clamp or hose during the same repair is often sensible, but change only parts that are genuinely worn or incompatible. Photographing hose routing and bracket positions before removal can be more helpful than memory.
4. How to remove the old radiator
Removal varies with MG model and equipment, so treat the following as a careful sequence rather than a substitute for the factory service information. Label connectors and place fasteners in separate containers as they come out. The radiator is often heavier and more awkward than it first appears, particularly when the shroud or cooler lines remain attached.
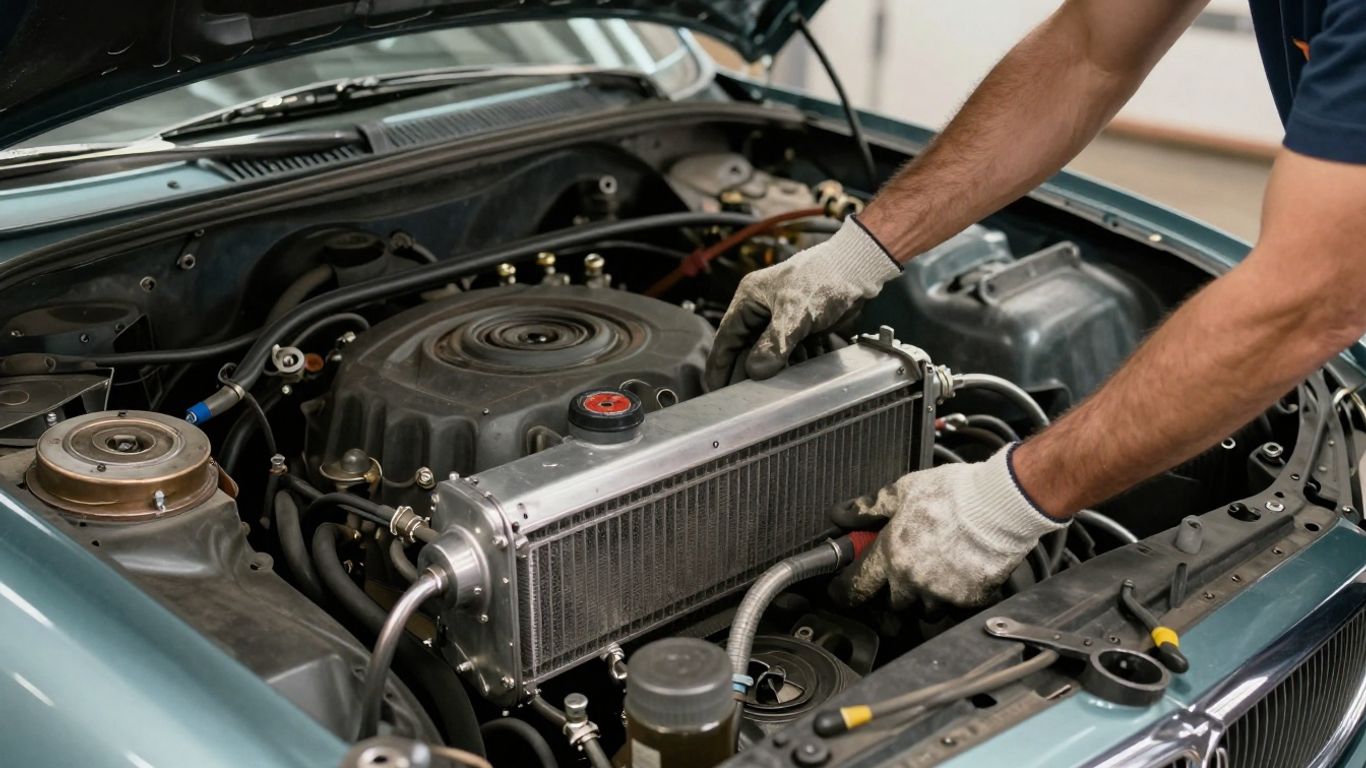
Disconnecting the battery and removing nearby components
Disconnect the battery before working near the electric fan, wiring, or starter-area connections, following the vehicle’s electrical precautions. Remove only the grille panels, intake pieces, brackets, or other nearby components that actually obstruct access, and label electrical connectors as you go.
If an oil cooler or auxiliary lines are connected to the radiator area, identify them before loosening anything. Cap or protect open lines as appropriate and avoid bending tubing simply to create clearance.
Detaching the upper and lower radiator hoses
Release the clamps and twist each hose gently to break the seal before pulling it from the outlet. If a hose has bonded to the metal, cut it lengthwise only when replacement is planned; prying aggressively can damage a radiator neck.
Expect residual coolant in the lower hose and radiator tanks. Keep the drain pan positioned under the connection and plug or cover open hose ends to keep dirt out.
Removing the fan shroud, grille, and mounting hardware
Remove the fan shroud and grille hardware in the order that gives the safest access to the radiator supports. Support the shroud or fan assembly as its final fasteners come out so it does not hang from wiring or nearby components.
Before removing the radiator bolts, note the location of spacers, rubber cushions, and longer bolts. These small pieces control alignment and vibration, and losing one can create a leak or rattling after reassembly.
Lifting out the radiator without damaging connected parts
Once the hoses, hardware, and attachments are clear, lift the radiator vertically and slowly. Have a second person steady the shroud or guide the lower edge if the engine bay is tight.
Pause if the unit catches. A hidden bracket, cooler line, or wiring clip is more likely than a need for extra force. Set the old radiator on a protected surface, then compare it with the replacement before disposing of it.
5. How to install the replacement radiator
Installation is the reverse in broad terms, but it deserves its own checks. The replacement should sit squarely without being forced into position, and every hose should reach its outlet without twisting or stretching. Clean mounting faces and sound rubber supports help prevent vibration-related damage.
Comparing the new radiator with the original unit
Lay the units side by side and compare outlets, filler necks, mounting tabs, drain points, fan-shroud holes, and overall depth. Transfer only hardware that is sound and confirmed to be required; do not assume every old bracket belongs on the new unit.
This is also the last easy moment to inspect the new core for bent fins or shipping damage. Resolve any discrepancy before adding coolant or tightening the installation.
Fitting mounts, brackets, hoses, and the fan assembly
Set the radiator into its lower supports first, then loosely fit the upper brackets so the unit can settle into alignment. Reattach the shroud and fan assembly with adequate clearance from the core and blades before reconnecting the hoses.
Route hoses naturally, without a sharp bend or contact with a belt, pulley, sharp bracket, or hot exhaust component. If a hose will not align without force, stop and recheck the radiator’s orientation or the part number.
Securing connections without overtightening
Tighten mounting fasteners evenly and use the service manual’s torque guidance where available. Hose clamps should seal firmly without cutting into the rubber; excessive force can deform a neck or split an aged hose.
Reconnect electrical plugs and secure wiring away from moving or hot parts. A final hand check of every clamp and bracket is worthwhile before the system is filled.
Refilling the cooling system with the correct coolant
Use the coolant type and mixture specified for the vehicle and radiator materials, and follow any supplier restrictions. Pour slowly to reduce trapped air, then leave room for the level to change as coolant enters the engine and heater circuit.
Do not mix incompatible coolant chemistries merely because the colors appear similar. If the system has been contaminated or its history is unknown, a proper flush may be preferable to topping up with an uncertain mixture.
6. Testing the cooling system after installation
A new radiator is not proven simply because it is bolted in place. The system must be filled, purged, warmed, inspected, and then checked under normal driving conditions. Keep tools and coolant nearby during the first heat cycle in case the level drops.
Bleeding trapped air from the system
Follow the model-specific bleeding procedure, opening the designated bleed point if the car has one. With the cap arrangement specified for the vehicle, run the engine and watch the level as the thermostat opens, adding coolant only as required and keeping clear of moving parts.
Heater output, bubbling, and a changing level can provide clues that air remains. Once the system stabilizes and the engine is cool again, recheck the level and install the cap securely.
Checking for leaks at operating temperature
Inspect the upper and lower hose connections, drain point, radiator seams, filler neck, and nearby components during warm-up. Use a light and mirror if access is limited, but never place hands near a hot fan or pressurized leak.
A dry cold inspection is not enough because some leaks appear only after thermal expansion. Shut the engine down and allow it to cool before tightening or touching any connection.
Confirming thermostat and electric fan operation
The upper hose should warm as the thermostat opens, and the temperature should settle rather than continue climbing. If the car uses an electric fan, confirm that it starts at the expected temperature or when its control circuit is tested according to the service information.
No fan operation, persistent cold running, or rapid overheating calls for diagnosis rather than repeated topping up. The radiator may be sound while the thermostat, relay, sensor, pump, or wiring is not.
Monitoring engine temperature during a test drive
Begin with a short drive near home and watch the gauge continuously. Include a period of idle and, if conditions allow, modest traffic or an incline so the system is observed under more than one airflow condition.
After parking, inspect for fresh coolant and listen for unusual fan, belt, or pump noises. Recheck the level only when the engine is fully cool, then record any change over the next several drives.
7. MG radiator replacement costs and maintenance
The price of an MG radiator replacement depends on the radiator itself, the condition of surrounding parts, and how much access the car requires. A straightforward installation can become more involved when fasteners are seized or the cooling system has been modified. Request a written estimate that separates parts, labor, coolant, flushing, and any additional repairs.
Estimating parts and labor costs
Parts pricing varies with construction, availability, originality, and application. Labor reflects draining, removal, cleaning, installation, refilling, bleeding, and testing rather than simply the time spent undoing bolts.
Ask whether the estimate includes new clamps, hoses, mounting rubbers, coolant, and disposal. For perspective on a broader cooling-system service, MG radiator service can help frame the kinds of inspections and faulty-part checks a specialist may include, without treating any quoted price as universal.
Identifying factors that increase installation expenses
Costs can rise when the radiator is difficult to access, support hardware is damaged, the fan or shroud needs repair, or a hose has seized to an outlet. A modified engine bay may also require custom brackets or additional clearance work.
Older vehicles frequently contain fasteners that need careful cleaning or replacement. A shop should explain these contingencies before work begins rather than presenting every possible repair as certain.
Extending radiator life with regular inspections
Check the coolant level and condition at service intervals, look for staining around joints, and keep the grille and fins clear of debris. Inspect supports and hoses during oil changes, since vibration, rubbing, and age can damage a sound radiator.
Use the specified coolant and maintain the correct mixture. Small leaks should be investigated promptly instead of masked with repeated additives, which can complicate later diagnosis and flushing.
Knowing when to seek professional cooling-system service
Professional help is appropriate when overheating persists after installation, the cooling system will not bleed, a pressure test shows an internal leak, or access requires specialized lifting or fabrication. It is also sensible when you are unsure whether the radiator or another component caused the original symptom.
Stop driving if coolant is being lost rapidly, the gauge reaches the danger zone, or steam appears. Careful diagnosis is cheaper and safer than turning a radiator problem into engine damage.
Conclusion
A successful MG radiator replacement begins with accurate diagnosis and ends with a verified, leak-free cooling system. Match the part carefully, work on a cold engine, protect the environment from used coolant, and take time to inspect the surrounding components before and after installation.
Frequently Asked Questions
How do I know if my radiator needs replacement?
Persistent coolant leaks, severe corrosion, blocked or damaged fins, uneven core temperatures, and repeated overheating can indicate replacement is appropriate. A pressure test and broader cooling-system diagnosis help confirm the radiator is the source.
Can a leaking radiator be repaired instead?
A small, accessible leak may be repairable, and a specialist may be able to recore a restorable original unit. Extensive corrosion, damaged tanks, or repeated failed repairs generally make full replacement more practical.
Should I replace hoses when replacing the radiator?
Replace hoses that are cracked, swollen, soft, hardened, contaminated, or unable to seal reliably. Sound hoses can remain in service if they match the outlets and show no signs of deterioration.
How long does a radiator replacement take?
Time varies by MG model, access, fastener condition, and additional work discovered during removal. A simple job may be completed in a few hours, while seized hardware or modified components can extend the work.
What coolant should I use after replacement?
Use the coolant type and mixture specified for the vehicle and replacement radiator. Avoid mixing unknown chemistries, and follow the radiator manufacturer’s instructions where they differ from general practice.
Why is the engine still overheating after a new radiator is installed?
Possible causes include trapped air, a faulty thermostat, water pump trouble, an inoperative fan, restricted passages, a damaged belt, or an unresolved leak. Recheck the complete system rather than assuming the new radiator is defective.
Is it safe to drive immediately after installation?
Only after the system has been filled, bled, checked for leaks, and warmed to confirm stable operation. Start with a short test drive, monitor the gauge, and inspect the coolant level again when the engine is cold.