

Key Takeaways
Good underbody care is mostly about preparation, suitable materials, and regular inspection rather than one thick coat applied once. These practical points will help you decide whether MG underbody rust proofing makes sense for your car.
- Corrosion begins where moisture, salt, dirt, and damaged coatings meet exposed metal.
- Inspect and repair existing rust before applying wax, oil, or underseal.
- Choose a treatment that suits the surface, climate, vehicle age, and intended use.
- Electric and hybrid vehicles need extra care around high-voltage equipment and battery areas.
- Recheck the underbody regularly, especially after winter driving, beach trips, or gravel-road use.
Why MG underbody rust proofing matters
Rust rarely appears all at once. It develops quietly beneath road grime, around seams, and behind components that are difficult to see during an ordinary wash. A sensible protection plan can slow that process, but it cannot replace inspection or proper corrosion repair.
Common causes of underbody corrosion
Underbody corrosion needs metal, moisture, and oxygen, with salt and grime making the process more aggressive. Water can sit in seams, drain poorly from boxed sections, or remain trapped under mud after a wet drive. Stone impacts also matter because they chip protective coatings and expose fresh metal.
Short trips can add to the problem. The underside may collect condensation without becoming warm and dry for long enough to evaporate it. Coastal air, muddy roads, and leaking fluids create further opportunities for moisture to remain against the chassis.
Areas of an MG most vulnerable to rust
Pay close attention to the floor pan edges, jacking points, subframes, suspension mounting areas, wheel arches, and brake-line brackets. Seams and folded metal deserve particular attention because a small opening can hold water beyond the reach of a casual rinse. Fasteners and exposed suspension hardware may also show surface corrosion before larger structural concerns become visible.
A flashlight and a small inspection mirror are useful. Do not rely on appearance alone: soft underseal, bubbling paint, flaking scale, or a damp layer of dirt can hide more serious deterioration.
How climate and road salt accelerate damage
Road salt lowers the barrier between water and metal, so winter driving can be hard on a vehicle even when the body panels look clean. Humid coastal air and frequent rain create similar conditions, while hot weather can bake grime onto surfaces and make later cleaning more difficult.
After salted-road use, rinse the underside when practical, giving particular attention to wheel wells and crossmembers. A measured approach is better than blasting every connector and seal at close range, especially on newer vehicles with electrical equipment underneath.
Early warning signs to look for
Rust-colored streaks, bubbling coatings, loose flakes, and damp dirt that keeps returning are all reasons to investigate. Listen for unusual rattles as well; a damaged heat shield or weakened bracket may not look dramatic from outside. If a jacking point feels soft or a structural seam is visibly perforated, stop treating it as a cosmetic issue and arrange a professional inspection.
Photographing the underside during each inspection creates a useful record. Comparing images over time helps distinguish harmless surface discoloration from corrosion that is spreading.
Choosing the right rust-proofing method for your MG
The best treatment depends on what is already underneath the car. A penetrative product may suit seams and cavities, while a tougher coating can protect a sound, exposed surface from impacts and splash. The rustproofing guide offers another useful overview of corrosion causes, treatment types, and common exclusions to consider.
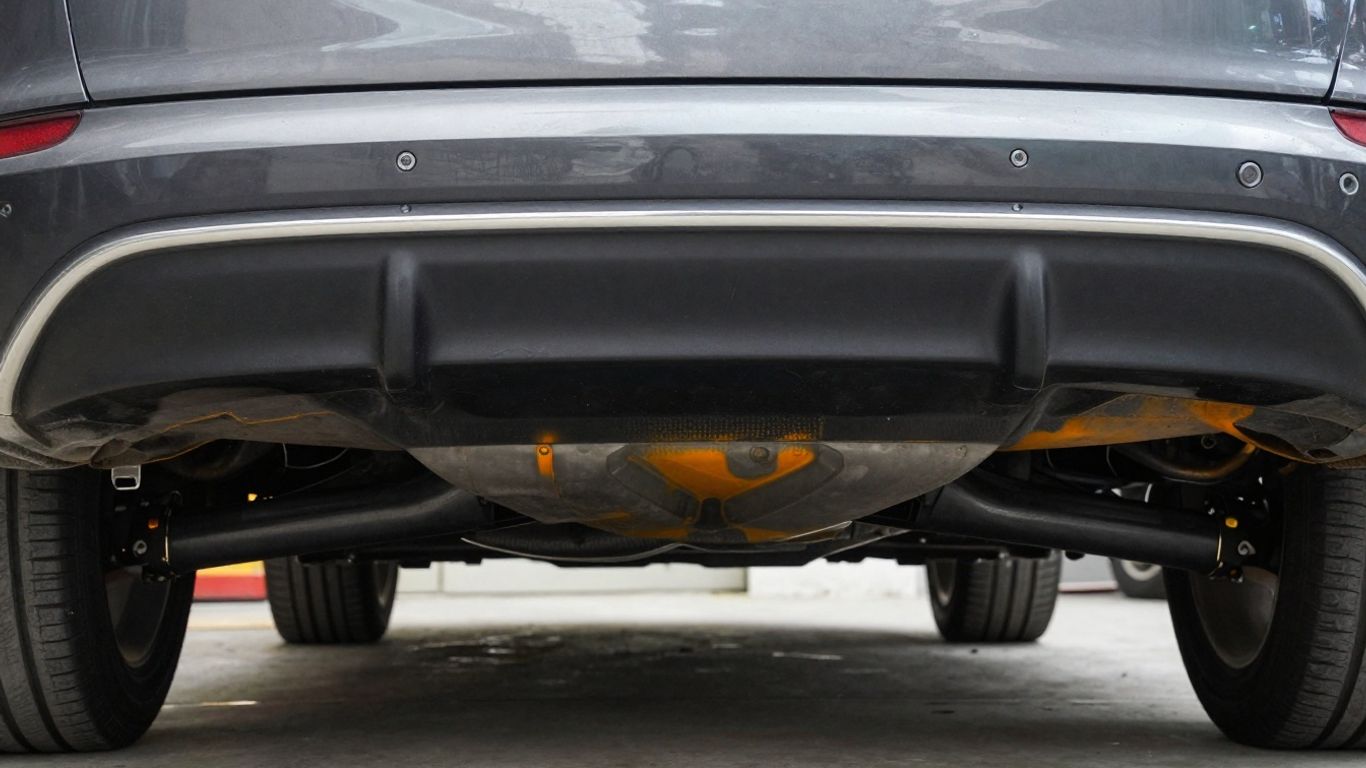
Oil- and wax-based rust inhibitors
Oil- and wax-based inhibitors can creep into seams and leave a moisture-resistant film. They are especially useful where a flexible coating is preferable to a hard shell, though they may attract dust and need periodic checking. Application should be controlled so drain holes remain open and moving parts stay clean.
The product should be selected for automotive use and applied only to clean, dry surfaces. Spraying over active scale can conceal deterioration rather than stop it.
Rubberized undercoating and underseal
Rubberized undercoating can provide a thicker barrier against water, dirt, and small impacts. Its weakness is poor preparation: if moisture or rust is sealed underneath, corrosion may continue out of sight. It can also make future inspections and repairs more difficult when applied indiscriminately.
Use it selectively on appropriate, sound surfaces rather than treating every visible component as a target. The underseal rust protection guide is helpful when weighing coverage, application, cost, and the condition of vulnerable chassis areas.
Lanolin and cavity-wax treatments
Lanolin-based products and cavity wax are flexible options for seams, boxed sections, and internal cavities. They can reach places a thick underseal cannot, but access points, drainage paths, and manufacturer instructions still matter. A cavity treatment is not a substitute for repairing holes or replacing weakened metal.
Some owners compare methods in forums, including discussion of MG5 EV rustproofing, but anecdotal experience should not override the vehicle’s service information or a careful inspection.
When factory coatings are enough
A sound factory coating may be adequate for a newer vehicle used in a mild climate and washed regularly. Extra treatment becomes more reasonable when the coating has been chipped, the car sees salted roads, or inspection reveals exposed seams and metal. Avoid adding material simply because the underside looks unfinished; the goal is targeted protection, not maximum thickness.
Before deciding, check whether an added product could interfere with inspections, repairs, drainage, or warranty conditions. A conservative treatment applied well is usually preferable to a heavy layer applied everywhere.
Preparing an MG for underbody rust proofing
Preparation determines whether a treatment bonds, penetrates, and remains inspectable. The process starts with an honest assessment of existing damage, followed by careful cleaning and complete drying. Rushing these stages is one of the easiest ways to turn a protective job into a hidden corrosion problem.
Inspecting for existing rust and damage
Raise the vehicle safely or use a qualified workshop so the underside can be viewed from several angles. Look for scale, perforation, scraped coating, bent shields, damaged clips, leaking fluids, and blocked drains. Pay attention to areas where road debris strikes repeatedly, such as the front underside and wheel-well edges.
A written condition report with photographs makes the decision clearer. It also helps separate work that is needed now from preventative treatment that can wait.
Cleaning away mud, salt, and old coatings
Remove loose mud, salt, grease, and flaking material before applying anything new. A suitable degreaser and controlled pressure wash can help, but water should not be directed carelessly at vulnerable electrical connections or seals. Old coating that is detached or blistered should be removed rather than buried.
Allow time for dirt to soften before scrubbing. Cleaning in several gentle passes is often safer and more effective than one aggressive blast.
Drying the chassis before treatment
Water trapped in seams or behind shields can undermine even a well-chosen inhibitor. Let the vehicle drain, use compressed air where appropriate, and allow additional drying time in a warm, ventilated area. Inspect shaded cavities again before treatment because they often remain damp after visible surfaces appear dry.
This is also a good point to confirm that drain holes are open. A coating that blocks drainage can create the very moisture pocket it was meant to prevent.
Repairing corrosion before applying protection
Active corrosion should be stabilized or repaired before protective material is added. Surface rust may be cleaned and treated according to the product instructions, while perforated metal, weakened mounts, and damaged structural sections require qualified repair. Coating over loose scale only hides the evidence and complicates later work.
A treatment should leave important inspection points visible. The objective is a maintainable underside, not a smooth appearance at any cost.
How professional underbody rust proofing is applied
Professional work is more than spraying a product from below. The vehicle must be supported correctly, sensitive components masked, and the treatment applied with enough control to reach seams without contaminating brakes or exhaust parts. A good workshop should also explain what was treated and what was deliberately left clear.
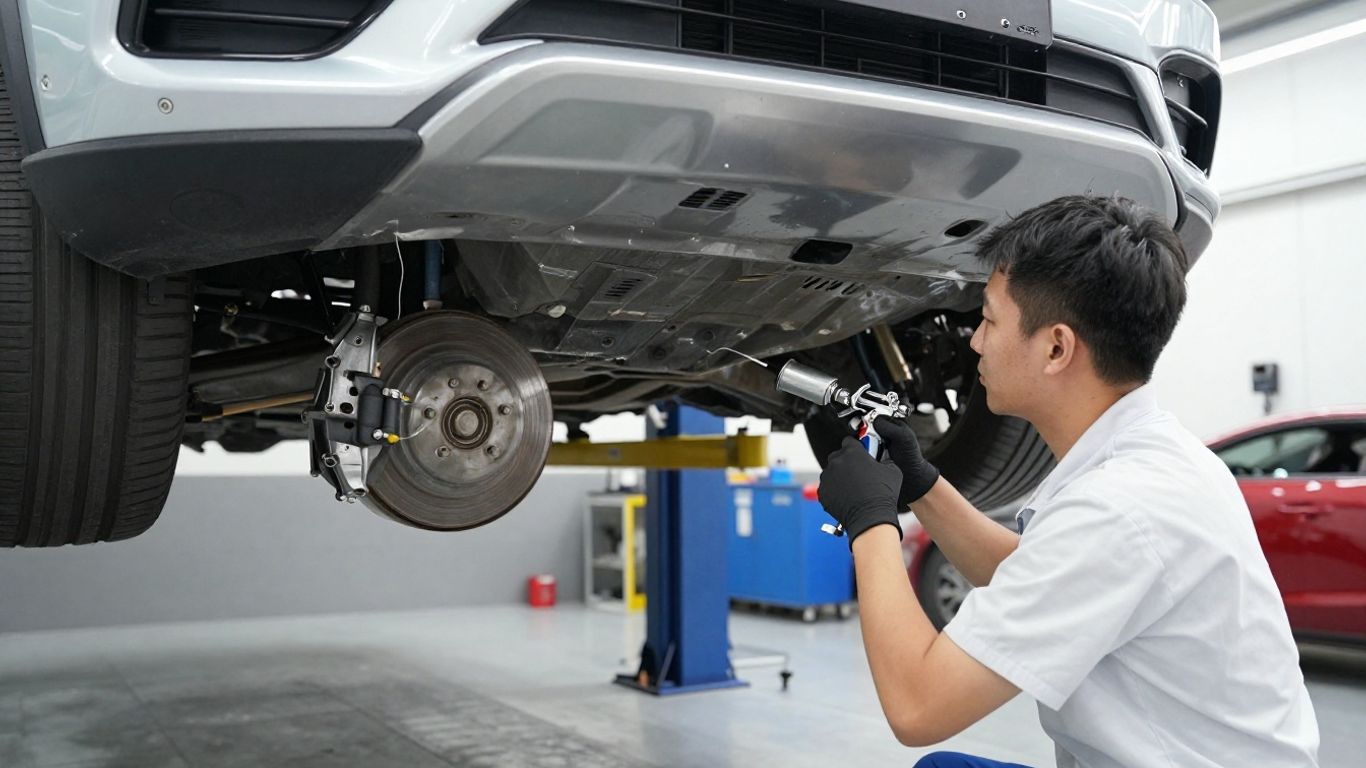
Lifting and safely supporting the vehicle
The vehicle is lifted at approved points and secured with suitable stands or workshop equipment. Wheels, shields, and selected panels may be removed when access is necessary. Never rely on a jack alone while working underneath a car.
Adequate height improves visibility and reduces the temptation to spray blindly. It also allows the technician to check the coating afterward rather than treating the job as finished when the product leaves the nozzle.
Masking brakes, exhaust components, and sensors
Brake discs, pads, friction surfaces, exhaust outlets, belts, and moving joints must remain free of coating. Sensors, connectors, cameras, and other electrical parts may also need protection from overspray. Masking takes time, but contamination can create safety problems and expensive diagnostic work.
A careful operator identifies drainage paths before masking and removes coverings only after the treatment has been applied where intended. The result should be neat around edges, not simply thick in the middle.
Treating seams, subframes, and exposed metal
Application normally proceeds from cleaned, dry surfaces toward seams, joints, cavities, and exposed areas identified during inspection. Flexible material is useful where panels move slightly or where a penetrative film is needed; tougher coatings may suit sound surfaces exposed to impact. Coverage should remain even enough for later checks.
Keep a record of products and areas treated. That information helps a future technician avoid drilling, welding, or servicing through an unknown layer.
Allowing proper curing and ventilation
Curing time varies by product, temperature, humidity, and film thickness. The vehicle should remain in a ventilated area while solvents or odors dissipate, and it should not be driven through heavy water or dirt until the manufacturer’s stated interval has passed. A rushed handover can damage a coating before it has formed a stable film.
Ask when the car can safely be driven and washed. Clear aftercare advice is part of a professional treatment, not an optional extra.
Special considerations for MG electric and hybrid models
Electric and hybrid vehicles add equipment beneath the floor, so an underbody treatment must be planned around high-voltage systems and battery enclosures. The basic corrosion principles remain the same, but access, isolation, drainage, and warranty requirements deserve more attention. When in doubt, use a technician trained for the specific vehicle system.
Protecting high-voltage components and wiring
High-voltage cables, connectors, battery housings, and protective covers should not be treated casually. Do not pierce, remove, flood, or coat components unless the vehicle documentation and trained technician specifically permit it. Visual inspection is safer than improvising access around orange cables or sealed housings.
Before work begins, identify the vehicle’s safe lifting points and required isolation procedure. A rustproofing job is never a reason to handle high-voltage equipment without the right training.
Avoiding battery-pack drainage and vent areas
Battery housings and nearby drainage routes need to remain clear. Blocking a drain or vent can trap water and create a separate problem inside or around the enclosure. The treatment should follow the manufacturer’s boundaries rather than being applied for maximum visual coverage.
The same caution applies to underbody aerodynamic panels. Removing or coating them without understanding their role can affect cooling, drainage, or future service access.
Keeping brakes and regenerative systems clear
Regenerative braking does not make friction brakes irrelevant. Discs, pads, calipers, and wheel-speed sensors still need to remain clean and functional. Overspray near these parts can create immediate safety concerns, regardless of the vehicle’s powertrain.
A final inspection should include the wheels, brake assemblies, sensor wiring, and any panels removed for access. The car should not leave with masking residue or loose fasteners.
Checking manufacturer and warranty requirements
Read the owner’s documentation and ask an authorized service provider about approved lifting points, coatings, and warranty conditions. Keep invoices, product information, photographs, and notes about the work completed. These records are useful when the vehicle is serviced or sold later.
Do not assume that a generic treatment is automatically compatible with an electric or hybrid model. Compatibility is a question for the manufacturer or a suitably trained technician.
Maintaining rust protection over time
Rust proofing is a maintenance decision, not a permanent shield. Films wear away, coatings chip, and new dirt can hold moisture against areas that were clean on the day of application. A simple inspection routine keeps small defects from becoming expensive surprises.
How often to inspect the underbody
Inspect at least annually, and more often if the car sees salted roads, coastal air, frequent rain, gravel, or off-road conditions. An inspection after winter or a long wet season is particularly useful. Combine it with routine servicing so the underside is not forgotten.
Look at the same reference points each time and compare photographs. Consistent records make gradual change easier to spot.
When to refresh wax or underseal
Refresh intervals depend on the product, film condition, climate, and amount of driving. Reapply when the coating has thinned, cracked, washed away, or lost coverage—not simply because a calendar date has arrived. Clean and dry the area first, and remove failed material where necessary.
Applying a new layer over damp or detached material can trap contamination. If the surface condition is uncertain, have it assessed before refreshing.
Washing salt and road grime from the chassis
Rinse salt and mud from the underside after exposure, using enough pressure to clean without damaging seals or connectors. Give wheel wells, suspension areas, and crossmembers attention, then allow the vehicle to dry. Frequent light cleaning is generally easier on coatings than months of accumulated grime followed by aggressive pressure washing.
A clean underside also makes the next inspection more meaningful. You can see chips and leaks instead of guessing what lies beneath the dirt.
Monitoring chips, scrapes, and trapped moisture
Repair small coating breaks before they become channels for water. Check after contact with deep snow, road debris, ramps, or rough tracks, and look for damp patches that remain after surrounding areas dry. Scrapes near jacking points deserve prompt attention because those locations are repeatedly exposed during servicing.
Maintenance should preserve access to drains, fasteners, and inspection areas. Protection works best when it remains visible and serviceable.
Evaluating the cost and value of MG underbody rust proofing
The value of treatment depends on the vehicle’s condition, local climate, expected ownership period, and repair risk. A careful inspection may show that a targeted job is enough, while an older or heavily exposed car may need cleaning and corrosion repairs first. Consider the cost of preparation, not only the price of the product.
Typical factors that affect the price
Labor, access, cleaning, removal of panels, rust repair, product type, drying time, and workshop equipment all affect the final quote. A low price may exclude preparation or follow-up inspection, while a higher quote may include documentation and cavity treatment. Ask for a written scope so different estimates can be compared fairly.
Common cost factors include:
- The amount of mud, salt, grease, and old coating to remove.
- The number of panels, shields, cavities, and seams requiring access.
- Any welding, surface preparation, or replacement of damaged hardware.
- The treatment material, application method, curing time, and inspection record.
That list helps separate a genuine difference in work from a difference in wording. It also gives you useful questions to ask before authorizing the job.
Professional treatment versus DIY application
DIY treatment can be practical for an owner with safe lifting equipment, suitable ventilation, careful preparation habits, and a clear understanding of the product. Working underneath a vehicle is physically awkward, however, and poor masking or incomplete drying can create problems. Professional work may be worthwhile when access is limited or the underside already shows corrosion.
If you choose to do it yourself, follow the label, use protective equipment, keep drains clear, and never work under an unsupported vehicle. For parts, repairs, and maintenance planning, a nationwide car parts network can also be useful when you need to identify the correct replacement hardware, although its linked material focuses on dealership marketing rather than rustproofing.
How rust proofing can support resale value
A clean, documented underside can reassure a prospective buyer that the car has been maintained. It does not guarantee a higher sale price, and heavy or poorly applied coating may do the opposite if it conceals damage. Keep photographs, invoices, product details, and dates so the work can be understood rather than merely claimed.
The value is usually strongest when protection forms part of broader care: timely repairs, regular washing, and complete service records. Transparency matters more than a glossy description.
When treatment may not be worthwhile
Treatment may have limited value when structural corrosion is already advanced, the vehicle is near the end of its usable life, or repairs cost more than the car justifies. It may also be unnecessary for a sound vehicle that lives in a dry climate and receives consistent inspections. A professional opinion can prevent spending money to disguise a problem that needs a different solution.
Set a sensible limit before work begins. If treatment cannot leave the vehicle safe, inspectable, and repairable, corrosion repair or replacement may be the more responsible choice.
Conclusion
MG underbody rust proofing works best as part of a wider maintenance routine: inspect first, clean and dry carefully, choose a compatible treatment, protect sensitive components, and keep checking the result. Thoughtful preparation and honest records will do more for long-term value than applying the thickest possible coating.
Frequently Asked Questions
Does every car need underbody rust proofing?
No. The need depends on climate, road salt, vehicle age, factory protection, storage, and existing damage. Regular inspection is the best way to decide whether additional treatment is justified.
Can rust proofing stop existing rust?
It can slow corrosion on suitable, properly prepared surfaces, but it cannot restore perforated or structurally weakened metal. Existing rust should be assessed and repaired before protective material is applied.
Is underseal better than wax?
Neither is universally better. Wax or oil can suit seams and cavities, while underseal may suit sound exposed surfaces. The correct choice depends on preparation, access, drainage, and the product’s intended use.
How often should a treated underbody be checked?
Check it at least once a year and after severe winter, coastal, gravel-road, or off-road exposure. More frequent checks are sensible when the vehicle has known coating damage or persistent dampness.
Can I apply rustproofing at home?
Yes, if you have safe lifting equipment, proper ventilation, suitable protective gear, and enough time for cleaning and drying. Never work beneath a vehicle supported only by a jack.
Should the underside be washed after winter driving?
Yes. Rinsing salt and road grime from the chassis, wheel wells, and suspension areas can reduce the time corrosive deposits remain in contact with metal. Use care around electrical connections and seals.
Is rustproofing safe for electric vehicles?
It can be, but the treatment must respect high-voltage components, battery housings, wiring, drainage, sensors, and manufacturer requirements. Use a technician with appropriate training when the vehicle’s underbody contains unfamiliar electrical equipment.