

Key Takeaways
A successful mirror replacement starts with identifying the exact part and choosing a repair that matches the damage. Take time to check fitment, follow vehicle-specific instructions, and test every function before driving.
- Confirm the vehicle’s model, year, trim, mirror side, connector, and features before ordering.
- Replace only the glass or cover when the rest of the mirror is sound; choose a full assembly if mounts or functions have failed.
- Use trim-safe tools, protect the door, and consult model-specific service instructions.
- Compare the replacement with the original, secure it carefully, and test all fitted functions.
- Check stability, visibility, calibration needs, and the total cost before deciding whether to do the job yourself.
Identify the correct replacement mirror
A mirror can look right in a listing and still be the wrong fit for your vehicle. The MG mirror replacement guide begins with a close match to the vehicle details, followed by a check of the mirror’s side, wiring, and equipment. A little time spent confirming those details can prevent delays and returns. Use the vehicle’s documentation and the original part as references wherever possible.
Find your MG’s model, year, and trim
Start with the model name, model year, and trim shown in the vehicle documents or on the vehicle identification label. Similar-looking vehicles can have different mirror shapes, connectors, or equipment across years and trim levels. If you are uncertain, share the VIN and a clear photo of the existing mirror with the parts supplier so they can help verify the match. Don’t rely on appearance alone when selecting a replacement.
Match the mirror to the vehicle’s side and configuration
Check whether the damaged mirror is on the driver or passenger side, and confirm that the replacement listing describes the same side. Then compare the mirror’s shape, mounting base, connector, and any visible indicators with the original. If you still have the old mirror, a photo of its connector and mounting points can help resolve questions that a product image cannot. A general door-mirror replacement guide can also help you understand the steps involved before you choose a part.
Check for power adjustment, heating, folding, and blind-spot features
List the features fitted to the existing mirror rather than assuming every version includes them. Depending on the vehicle configuration, this may mean checking for electrical adjustment, heated glass, power folding, an indicator, or a blind-spot warning element. Confirm that the replacement listing and connector match the equipment actually present on your vehicle. A mirror that fits physically may still leave a function unavailable if its wiring or components differ.
Compare OEM and aftermarket part numbers
A part number is a more useful cross-check than a similar-looking photo. Compare the number on the original mirror, if accessible, with the replacement listing, and ask the supplier to confirm compatibility when numbers differ. The table below shows which details are worth checking before you buy.
| Detail to check | Where to look | Why it matters |
|---|---|---|
| Vehicle model, year, and trim | Registration documents or vehicle records | Narrows the fitment to the correct configuration |
| Mirror side | Existing mirror and parts listing | Avoids ordering the opposite side |
| Part number | Original component or supplier listing | Helps confirm whether the part is a match or an approved alternative |
| Connector and features | Original mirror and replacement details | Reduces the chance of losing an equipped function |
If you cannot confirm a number, provide the supplier with the vehicle details and clear photos rather than guessing. That extra check is especially useful when an aftermarket part differs in appearance from the original but is listed as compatible.
Choose between replacing the glass, cover, or full assembly
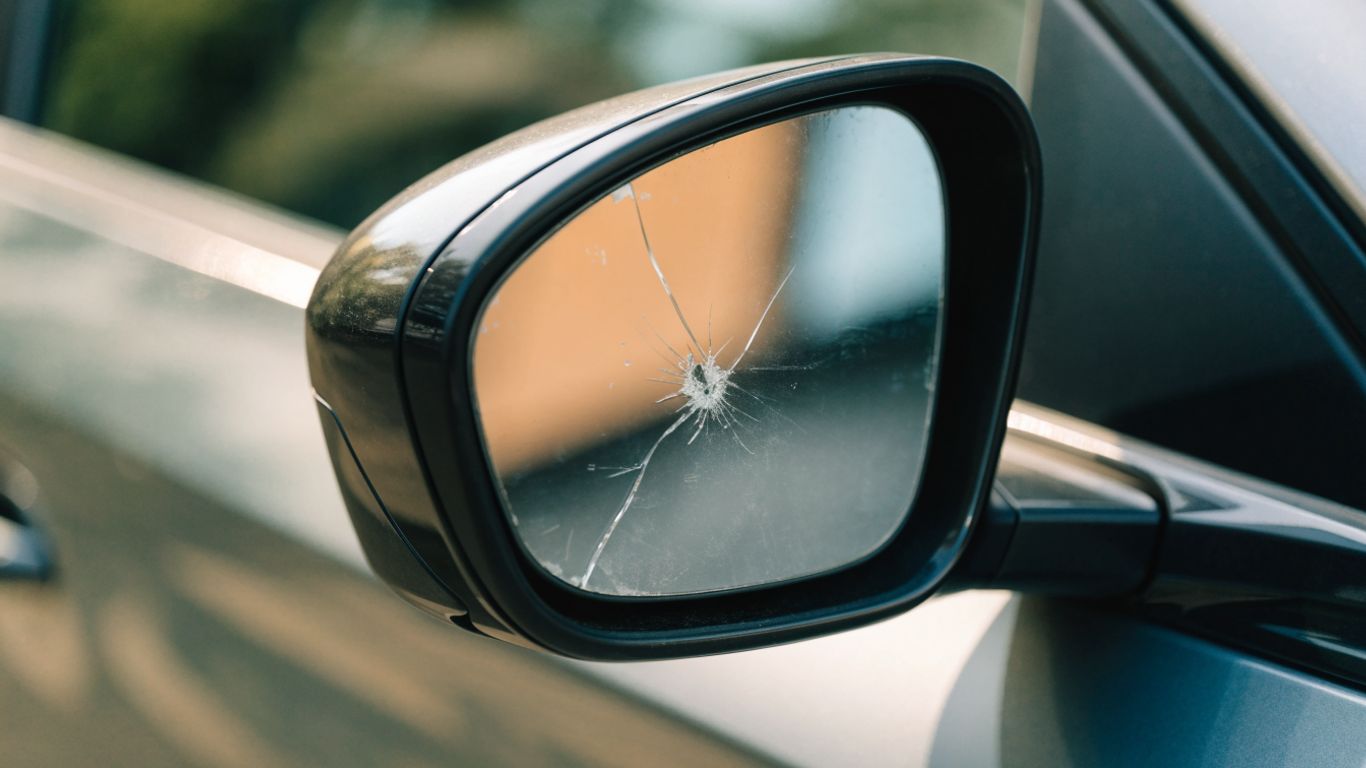
The right repair depends on what is damaged and what still works. A cracked mirror surface does not automatically require replacing the entire assembly, while a broken mounting point is unlikely to be solved by fitting new glass. Look closely at the housing, adjuster, wiring, and mounting base before choosing a part. The photo below illustrates the main components to inspect.
Replace the glass when the housing and adjuster are intact
Glass-only replacement can make sense when the housing is secure, the adjuster moves properly, and damage is limited to the reflective surface. Check how the glass attaches before ordering, including any clips or electrical connections for heating. Use a replacement specified for the vehicle rather than assuming a universal panel will fit. This glass replacement walkthrough offers a general look at removing mirror glass and reconnecting heater wires.
Replace the cover to address cosmetic damage
A cover replacement may be enough when the shell is scratched or cracked but the mirror remains firmly mounted and its functions work. Confirm that the new cover is designed for your mirror version and that its clips and shape match the original. Take care not to force a retaining clip; it can break or damage the surface underneath. For one model-specific example, this MG ZS EV mirror-cap guide discusses cap removal and refitting, but your own vehicle’s service instructions should take priority.
Choose a complete assembly for broken mounts or failed functions
A complete assembly is worth considering if the mirror mount is broken, the housing is badly damaged, or an adjustment or electrical function has stopped working. Before ordering, compare the connector, mounting points, and feature list with the original. It may also be sensible to have a technician inspect damage to the door or wiring rather than treating the mirror as an isolated part. For glass-only repairs, a heated-mirror glass guide explains why checking clips and wiring matters.
Check whether painted parts need to be color-matched
Replacement parts may arrive unpainted or with a finish that does not match the vehicle. Check the listing and ask whether the cover or assembly is supplied in the required color before placing an order. If painting is needed, consider whether the cost and time of preparation, paint, and fitting make a cover-only repair worthwhile. A correct fit and secure attachment matter more than a perfect color match, but it is better to know what the job includes up front.
Gather tools and prepare the vehicle
Good preparation reduces the chance of scratching the door or losing small fasteners. Park on level ground, switch off the vehicle, and make sure you have a clean place to set the trim and hardware. The tools and access points vary by model, so use these suggestions as a starting point rather than a universal procedure. Read the vehicle-specific instructions before taking anything apart.
Collect basic hand tools and trim removal tools
Most jobs call for hand tools that fit the mirror fasteners and a non-marring trim tool for interior panels. Some vehicles use concealed covers or clips that need a particular approach, so check the service instructions before choosing a tool. Gather everything first, including a small container for fasteners, to avoid leaving an exposed door while searching for equipment. A typical preparation set may include:
- A socket or wrench set suited to the mirror fasteners.
- A plastic trim-removal tool for clips and interior panels.
- A small container or magnetic tray for screws and fasteners.
- Clean cloths and painter’s tape to protect nearby surfaces.
Keep metal pry tools away from painted surfaces and use only the force needed to release a clip. A tidy work area makes it easier to see which fasteners and connectors belong to each panel.
Protect the door paint and interior trim
Apply painter’s tape around the mirror base and any nearby painted edge that could be touched while removing the assembly. Set removed panels on a clean surface instead of on the ground, where grit can scratch the finish. Work patiently around clips rather than pulling a panel outward all at once. These small precautions help preserve trim that may be difficult or costly to replace.
Disconnect the battery when working with electrical connectors
If the repair requires handling electrical connectors, consult the owner’s manual or service instructions to determine whether the battery should be disconnected and how to do so safely. Follow any specified waiting period or procedure, and be aware that disconnecting power may affect settings or systems. Never pull on wires to separate a connector; release its locking tab as directed. If the wiring or connector looks damaged, stop and seek qualified help.
Review model-specific service instructions before removing panels
Door-panel fasteners and access points vary, even among vehicles that look similar. Check the model-specific instructions for the order of trim removal, hidden screws, connector releases, and any stated fastener requirements. A DIY mirror-replacement overview is useful for general context, but it cannot replace the service information for a specific vehicle. If instructions are unclear or unavailable, have a repair professional handle the removal.
Remove the damaged MG mirror
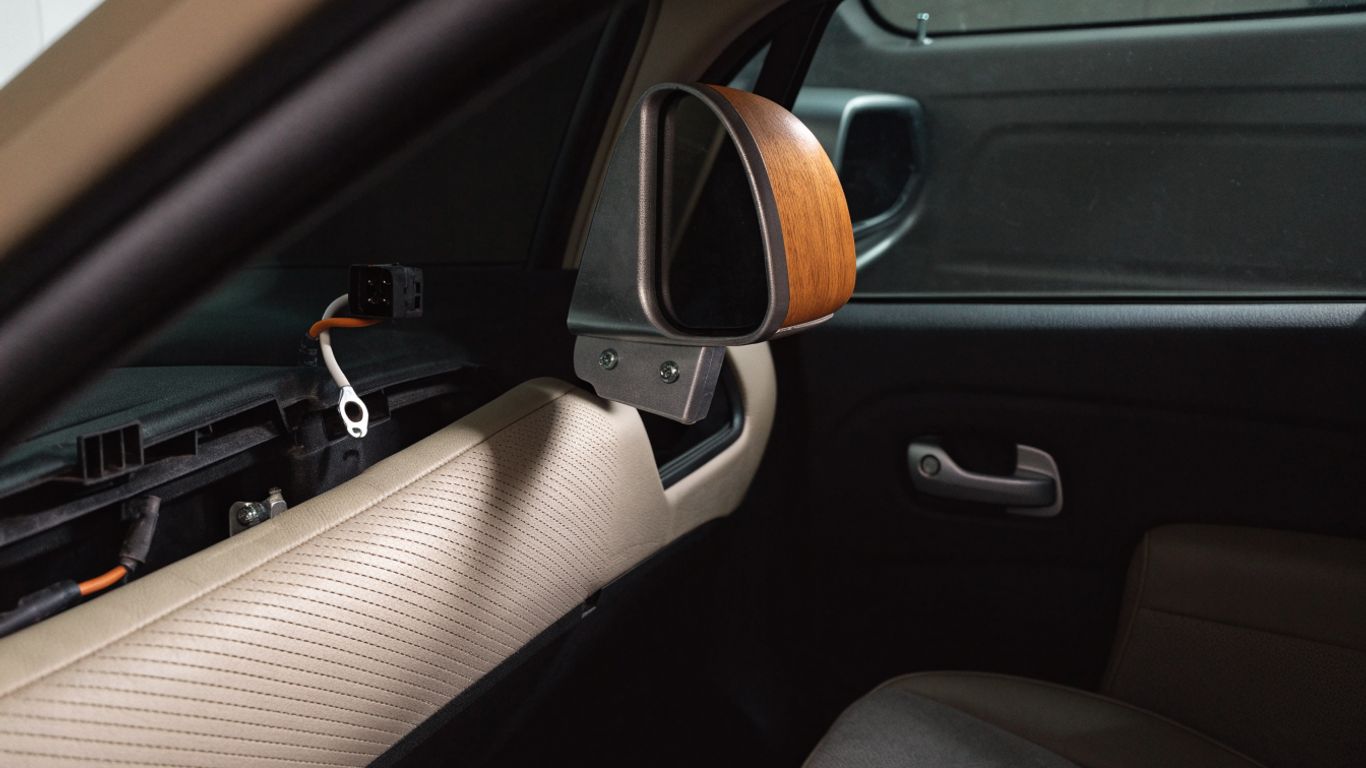
Removing a mirror usually means reaching its mounting fasteners from inside the door, which may require taking off an interior trim panel. The exact sequence varies, so avoid treating generic steps as a model-specific procedure. Keep the mirror supported as the last fasteners come free, and protect the paint around the opening. The image below shows the kind of access area to examine before starting.
Remove the interior door trim carefully
Follow the service instructions to locate and remove the trim fasteners, then release the panel clips with a suitable trim tool. Some panels have wiring for switches or other equipment, so do not pull the panel far away from the door until you can see whether anything remains connected. Set the panel somewhere clean and stable. If a clip resists, check for a missed fastener rather than forcing it.
Disconnect the mirror wiring harness
Once the mirror connector is accessible, identify its locking tab and release it as instructed. Hold the connector body rather than pulling on the wires, which can damage the harness or terminals. Compare the connector with the replacement part before moving on, and take a photo of the original routing if that will help during reassembly. If the connector is corroded, melted, or damaged, pause and have the wiring assessed.
Support the mirror while removing its mounting fasteners
Hold the mirror from outside the door as you loosen its fasteners so it cannot drop or swing against the paint. Keep track of any washers, seals, or spacers and note their positions. Remove the last fastener only when the mirror is fully supported. Once the assembly is free, set it on a padded surface rather than on the floor.
Inspect the connector, mounts, and door for damage
Before fitting anything new, inspect the mounting surface, connector, and door opening for broken plastic, bent metal, water intrusion, or damaged wiring. Check whether the gasket or seal has torn and whether any loose fragments remain inside the door. A replacement mirror cannot correct damage to the door or harness, so resolve those issues before reassembly. If anything looks unsafe or unfamiliar, have a qualified technician inspect it.
Install and test the replacement mirror
Take a moment to compare the new part with the removed one before attaching it. Confirm that the base, connector, wiring, and visible features line up, and check that any seal or gasket is present and correctly positioned. Follow the service instructions for the installation sequence and fastener requirements. A careful dry comparison can catch a mismatch before the new part is secured.
Compare the new part with the original before fitting
Place the parts side by side and compare their overall shape, mounting points, connector, and equipment. Check the glass and cover for damage from shipping, and make sure the wiring is not trapped or stretched. If something differs, do not assume it will work simply because the listing described it as compatible. Confirm the difference with the supplier before continuing.
Secure the mirror without overtightening the fasteners
Position the mirror and any seal squarely against the door, then install the fasteners in the order specified by the service instructions. Tighten them evenly and use the stated torque value if one is provided; excessive force can damage the mounting point or door. Keep supporting the assembly until it is secure. If the mirror does not sit flush, stop and check for a misplaced gasket or obstruction rather than tightening harder.
Reconnect the wiring and refit the door trim
Reconnect the harness by pressing the connector together until its lock engages, then check that the wiring follows its original route and cannot be pinched. Test any functions that can be checked before reinstalling the trim. Refit the panel using the prescribed sequence, making sure clips and fasteners are seated without gaps or rattles. The panel should sit naturally; forcing it into place may conceal a missed connector or misaligned clip.
Test adjustment, heating, folding, and indicator functions
With the vehicle safely stationary, test only the features fitted to that mirror. Confirm adjustment in each direction, heating if equipped, power folding if equipped, and any indicator or warning feature present. If a function fails, recheck the connector and part compatibility before assuming the component is defective. A video on the general process can help you picture the work, but always follow the instructions for your particular vehicle.
Check fitment, safety, and replacement costs
Finishing the installation means checking more than whether the mirror is attached. Confirm that it remains stable, gives a clear view, and does not interfere with the door or window. Consider whether the vehicle has a camera or driver-assistance feature that needs attention after replacement. The total cost can also change if the part needs painting, calibration, or professional fitting.
Confirm the mirror stays firmly positioned
With the vehicle parked, gently check that the mirror housing does not shift at its base and that the glass remains secure. Look for uneven gaps, loose trim, or a seal that has folded out of position. Do not drive if the assembly is unstable or visibility is compromised. If it moves after installation, recheck the mounting points or ask a professional to inspect it.
Set the viewing angle before driving
Adjust the mirror while parked so you can see the appropriate area beside and behind the vehicle without leaning away from your normal driving position. Confirm that the view stays steady when you close the door. Never try to make adjustments while moving. If the replacement’s shape or position differs noticeably from the original, verify the part and installation before using the vehicle.
Check for camera or driver-assistance calibration needs
Some vehicle configurations may use a camera or driver-assistance equipment associated with the mirror or nearby bodywork. Check the vehicle’s service information or ask a qualified repairer whether replacement calls for inspection, setup, or calibration. Do not assume that a warning light or function is unrelated to the repair. If any system reports a fault, have it diagnosed before relying on it.
Compare DIY expenses with professional installation quotes
A DIY estimate should include the part, any paint or finishing work, tools you need to buy, and the time required. A professional quote may include fitting and checks that are not part of a parts-only price, so compare like with like. The MG ZS mirror cost comparison is a model-specific example of how repair and quote information may be presented; its figures or availability should not be assumed to apply to another vehicle. For unrelated research, Google Gemini, Sol scanners, USCIS, Lluis Law, and a serralharia checklist cover different subjects and should not guide mirror fitment decisions.
Get a written breakdown if the job involves additional work, such as painting, wiring repair, or calibration. Then weigh the total against your confidence with trim removal and electrical connectors; professional installation can be the better choice when access or fitment is uncertain.
Conclusion
A sound mirror replacement is less about choosing the first part that looks right and more about matching the vehicle, damage, and equipment carefully. Check the part before fitting, follow model-specific instructions, and verify visibility and every equipped function while parked. If the connector, mounts, or calibration needs are unclear, a qualified repairer can help finish the job safely.
Frequently Asked Questions
How do I know which side mirror fits my vehicle?
Match the model, year, trim, mirror side, connector, and equipment against the original part and the supplier’s fitment information. If details remain uncertain, provide the VIN and photos of the mirror and connector for confirmation.
Can I replace only the mirror glass?
Often, glass-only replacement is an option when the housing and adjuster are intact. Check how the glass attaches and whether it has electrical connections before ordering a matching replacement.
Should I replace the whole mirror assembly?
A complete assembly may be appropriate when the mounting base or housing is broken, or when a function has failed. Confirm that the replacement has the correct connector and features before fitting it.
Do I need to disconnect the battery to replace a mirror?
That depends on the vehicle and the work involved. Consult the owner’s manual or service information before handling connectors, and follow its battery-disconnection procedure if one is specified.
How long does a side mirror replacement take?
Time varies with vehicle design, access, and whether the repair involves only glass or a complete assembly. Hidden fasteners, electrical features, or damaged wiring can add time, so treat general estimates as approximate.
Does a replacement mirror need calibration?
A basic mirror may not require calibration, but a vehicle with a camera or driver-assistance equipment may have additional requirements. Check the vehicle-specific service information or ask a qualified repairer.
Is it safe to drive with a damaged side mirror?
Do not drive if the mirror is loose, the view is seriously obstructed, or the damage affects safe visibility. Check the local rules that apply to your vehicle and arrange a repair promptly if you cannot see adequately.