

Key Takeaways
A window that slows, tilts, or drops may have a regulator problem, but the motor, switch, wiring, or fuse can produce similar symptoms. A careful diagnosis helps avoid replacing parts unnecessarily.
- Note whether the problem affects one window or several.
- Listen for motor noise and watch how the glass moves.
- Support the glass securely before releasing its mounts.
- Match replacement parts to the exact MG model, door, and configuration.
- Test the window through its full travel before refitting the door trim.
Common symptoms and causes of window regulator failure
A window regulator guides the glass as it moves up and down, while the motor provides the force in a power-window system. When either part is worn or damaged, the symptoms can overlap, so pay attention to both the sound and the glass movement. The pattern often points toward the next useful check, but it does not confirm which component has failed.
Window moves slowly, unevenly, or not at all
A window that creeps, pauses, or moves unevenly may be binding in its tracks or struggling against a worn regulator. Cold weather, dirt, or damaged seals can also add resistance, so a slow window does not automatically mean the mechanism has failed. If it stops completely, first note whether there is any motor sound when you press the switch.
A quick comparison of symptoms can help narrow down what to inspect, though it cannot replace testing the circuit and mechanism directly.
| What you notice | Possible area to inspect | Useful next check |
|---|---|---|
| Slow or uneven travel | Regulator, guides, or window seals | Watch for binding or changes in speed |
| Motor sound but no glass movement | Regulator or glass mounting points | Check whether the glass has slipped |
| No sound from one window | Switch, wiring, fuse, or motor | Compare with other windows and test the circuit |
| Glass drops or tilts | Regulator, clips, or mounts | Stop operating the switch and support the glass |
If the glass binds or shifts, avoid repeatedly cycling it to see whether it will “work itself loose.” Continued operation can put more stress on the mechanism or leave the glass unsecured.
Clicking, grinding, or snapping sounds inside the door
A click or snap can come from a broken clip, a cable problem, or a loose component inside the door. Grinding may mean that moving parts are rubbing or no longer tracking correctly. Sound alone is not a diagnosis: the motor may still run even when the regulator cannot move the glass properly. For a general comparison of the symptoms, see this regulator and motor guide.
If the noise is sudden or the window changes position at the same time, stop using the switch until the glass can be checked. A small clip or cable fault can turn into a more difficult repair if the mechanism is driven while misaligned.
Glass slips, tilts, or drops into the door
Glass that leans, slips in its channel, or drops into the door suggests that its support or attachment has failed. Do not pull the glass upward by hand while operating the switch; it may move unpredictably or break. Keep hands clear of the mechanism and arrange support for the glass before removing any door components.
A window left partly open also exposes the interior to weather and makes the glass more vulnerable to movement. If you cannot secure it safely, have the vehicle inspected rather than driving with loose glass.
Wear, corrosion, and impact damage that affect MG window regulators
Repeated use gradually wears cables, rollers, guides, and mounting points. Moisture inside a door can contribute to corrosion, while a door impact or prior repair may leave the mechanism bent or out of alignment. The exact design varies across MG models and production years, so the visible symptom should guide diagnosis rather than assumptions about a particular regulator layout.
How to diagnose the regulator, motor, and switch
Before removing the door trim, check whether the fault appears limited to one window and whether the system makes any sound. These observations help distinguish a local mechanism issue from a broader electrical problem. For a general explanation of regulator operation and repair considerations, see this window regulator overview.

Check whether the fault affects one window or several
If only one window is affected, the fault may be local to that door, such as its switch, wiring, motor, or regulator. If several windows stop working together, a shared fuse, power supply, or control issue becomes more plausible. Compare the affected window with the others, and note whether any switches operate it.
This simple comparison does not prove which part has failed, but it helps decide whether to start at the door or check a shared electrical supply first.
Listen for motor noise when operating the switch
With the vehicle safely parked, briefly press the window switch and listen near the door. A quiet motor with no movement can point toward a regulator or glass attachment problem, while silence may indicate an electrical fault or a failed motor. A motor that strains, clicks, or runs intermittently still needs further testing; sound by itself cannot confirm the cause.
Avoid holding the switch down for long periods if the glass is jammed or the mechanism is making a harsh noise. Repeated attempts may add strain without providing better diagnostic information.
Inspect the fuse, wiring, and switch before opening the door
Check the owner’s manual for the correct fuse location and rating, then inspect the relevant fuse if the vehicle’s instructions allow it. Do not substitute a fuse with a higher rating. If the fuse is intact, look for obvious switch damage or signs of a loose connection, but avoid probing wiring without the right equipment and wiring information.
These preliminary checks can prevent unnecessary door disassembly. If several windows are affected, or a replacement fuse blows again, further electrical diagnosis is safer than repeatedly changing parts.
Distinguish a failed motor from a damaged regulator
A motor may be at fault when it does not operate despite receiving the correct power and ground. A damaged regulator is more likely when the motor can be heard but the glass is stuck, tilts, or moves unevenly. These are clues, not guarantees: a seized regulator can load the motor, and a failed motor may leave the glass in an awkward position.
A proper test checks the electrical supply and the condition of the lifting mechanism separately. That distinction helps avoid replacing a working motor or overlooking a regulator that has jammed.
Repair or replace the window regulator
Whether a regulator can be repaired depends on which component has failed and how much damage has spread through the assembly. Some faults are limited to a replaceable clip or mounting point, while a frayed cable or bent track may make a full assembly the more dependable choice. Inspect the mechanism before ordering parts, and confirm fitment for the exact vehicle.
When a cable, clip, or guide can be repaired
A repair may be reasonable when a single clip or guide is available separately, the track is straight, and the rest of the mechanism moves smoothly. A loose fastener may also be repairable if its mounting point is undamaged. The glass must still be held securely, and any replacement component needs to match the regulator design.
A repair that only temporarily restrains a damaged cable can fail again without warning. If the cable is frayed, tangled, or partly detached, inspect the full assembly rather than treating the visible break as an isolated issue.
Signs the regulator assembly needs replacement
Replacement is often the practical route if a cable has snapped, a track is bent, multiple guides are damaged, or the mechanism binds through its travel. A regulator that has pulled away from its mounting points also needs careful inspection for damage to the door itself. If the motor is still serviceable, check whether it can be transferred to the replacement assembly before buying parts.
For a broad, vehicle-generic sequence of tools and safety checks, consult this regulator replacement guide. Its general steps are not a substitute for instructions specific to the vehicle.
Factors that affect the choice for your MG model
The choice depends on the failure, the regulator’s construction, parts availability, and whether the motor is supplied separately or as part of an assembly. Door configuration and model year matter, so verify the fitment details rather than relying on the make alone. Some owners have described similar window faults in an MG ZS EV discussion, but an individual report does not establish the cause or repair for another vehicle.
A qualified inspection can help confirm what needs replacing before parts are ordered. Avoid choosing between repair and replacement solely by comparing the initial price of the components.
Tools, parts, and safety preparation
Preparation matters because the glass can move or fall once its supports are released. Set aside time to identify the right part, protect the door trim, and understand how the window will be secured during the work. If the vehicle’s service information calls for a particular procedure, follow that guidance over generic instructions.
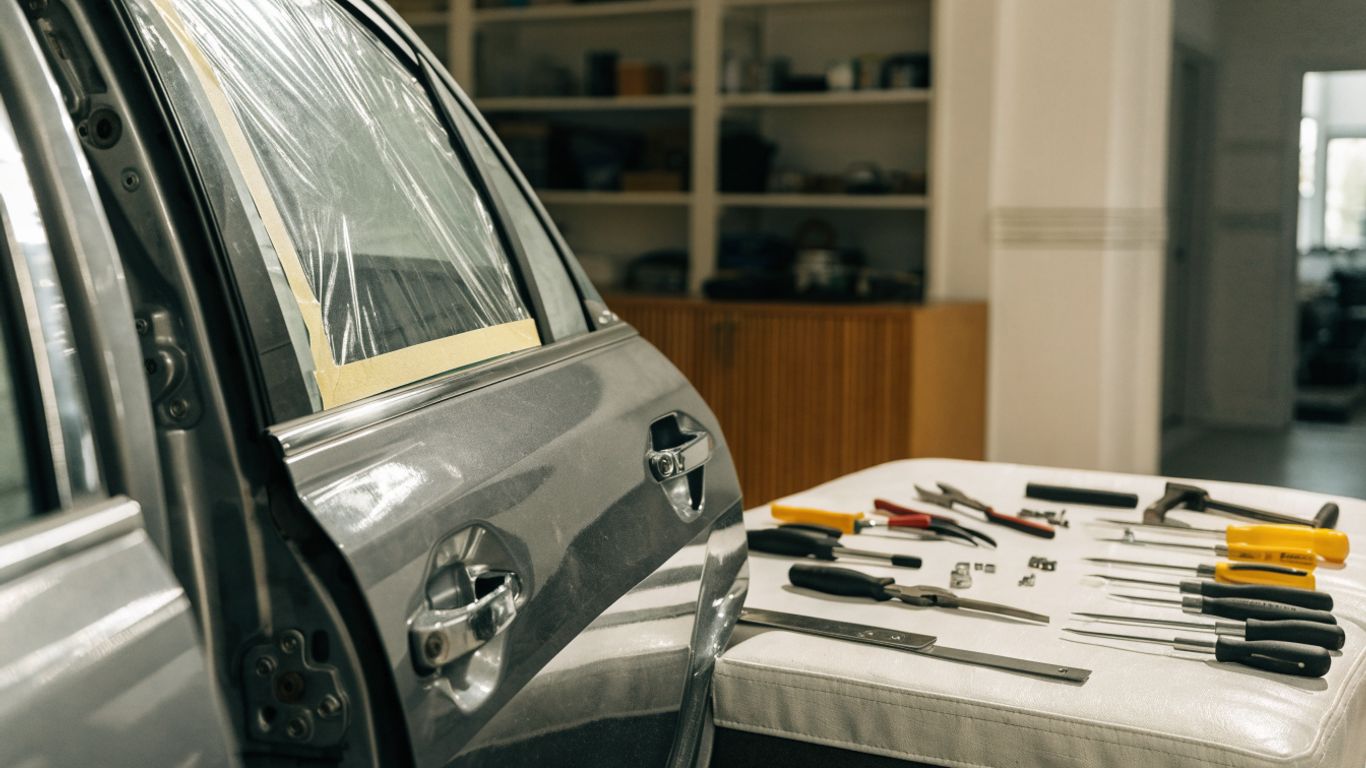
Confirm the correct regulator for the MG model and door
Check the model, year, door position, and any relevant vehicle identification details against the part listing. Confirm whether the motor is included, whether the assembly is side-specific, and what fasteners or clips are supplied. Similar-looking regulators are not necessarily interchangeable.
If you are unsure, compare the old part’s connector and mounting points with the replacement information before starting the repair. A mismatched part can leave the vehicle apart while you wait for the correct one.
Gather trim tools, hand tools, and replacement fasteners
Use suitable panel tools to reduce the chance of marking the trim, alongside the hand tools needed for the fasteners on that vehicle. Keep a container for screws and clips, and have replacement fasteners available if the existing ones are damaged or specified as single-use. Safety glasses and gloves are sensible when handling glass or working around sharp edges.
A short preparation list keeps small but important items from being overlooked:
- Check the repair information and part fitment before disassembly.
- Gather trim tools, hand tools, eye protection, and gloves.
- Prepare masking tape or another suitable way to support the glass.
- Keep fasteners and electrical connectors organized as they come off.
With the tools laid out, pause to check that the replacement part and the support method are ready before exposing the mechanism.
Protect the glass and disconnect the battery when appropriate
Protect painted surfaces and the door trim, and keep the glass from contacting hard tools. Follow the vehicle’s service guidance on battery disconnection, especially if the repair involves electrical connectors or the motor could operate unexpectedly. Disconnecting the battery may affect settings on some vehicles, so check the manual first and observe any required precautions.
Never assume the switch is safe to use while hands are inside the door. Keep the controls out of reach during mechanical work, and reconnect power only when it is safe to test the assembly.
Support the window before releasing its mounting points
Raise the glass to a position where it can be secured, if it is still movable. Use an appropriate support method that will hold it steadily without stressing the glass or its edges. Check that it cannot slide before loosening the mounting points that connect it to the regulator.
If the glass has already dropped or is cracked, do not improvise a support that could let it fall. Professional assistance may be the safer choice.
Steps for MG window regulator repair or replacement
The broad sequence is similar across many vehicles, but access, fasteners, and electrical connections vary. Use repair information for the exact model, work patiently, and keep the window supported whenever it is detached from the regulator. Stop if you encounter an unfamiliar restraint, connector, or mounting arrangement.
Remove the door trim without damaging clips
Locate the trim fasteners and remove them with the appropriate tool, checking for concealed screws before prying. Work around the panel gradually rather than pulling one edge sharply; clips can break if the panel is forced. Disconnect any switches or courtesy-light connectors only after the panel is loose enough to access them safely.
Set the panel on a clean surface and keep its clips together. If the trim does not release with gentle, even pressure, look for another fastener instead of increasing force.
Locate and access the regulator and motor
Once the trim is removed, identify the access cover, moisture barrier, wiring, motor, and regulator. Peel back any barrier carefully so it can be resealed, and do not cut or tear it unnecessarily. Take note of connector routing and fastener positions before moving anything.
Some doors have limited access or a mechanism that must be positioned before its fasteners can be reached. Follow the vehicle-specific procedure and keep fingers clear of moving components.
Secure the glass and remove the faulty assembly
Confirm that the glass is firmly supported before disconnecting it from the regulator. Unplug the motor connector and remove the regulator fasteners in the sequence specified for the vehicle. Keep the glass steady as the mechanism comes free, and guide the assembly out through the access opening without levering against the glass.
A step-by-step repair can be easier to follow visually, but demonstrations may show a different model or door layout. Use this video as general context, not as a substitute for model-specific service instructions.
If the assembly catches or the glass shifts, stop and restore support before continuing. Forcing a jammed part can damage the door, wiring, or glass.
Fit the replacement and reconnect the glass
Position the replacement assembly through the access opening and secure it using the specified fasteners. Reconnect the glass at its mounting points, checking that it sits level and is held securely before removing its support. Reconnect the motor and route wiring away from the regulator’s path.
Before closing the access area, check for loose hardware, pinched wiring, or a moisture barrier that will not reseal. Correct any alignment problem now rather than trying to compensate by forcing the window through its travel.
Test window travel before refitting the door panel
When it is safe to restore power, operate the window briefly and watch its movement from a clear position. Test the full travel only if the glass is secure and the mechanism moves smoothly. Listen for scraping or clicking, and stop immediately if the window binds, tilts, or makes a new noise.
Once movement is even and the connections are secure, refit the barrier and door trim in reverse order. If you need a local price comparison for an MG Motor window regulator replacement, you can compare repair quotes; confirm what each quote includes before agreeing to the work.
Repair costs and ways to prevent repeat problems
The total cost depends on the failed part, the design of the door, and how much access the repair requires. Diagnosis can matter as much as the part price: a regulator fault and a motor fault may feel similar from the driver’s seat but call for different repairs. Ask what has been tested and what work is included before authorizing replacement.
What influences parts and labor costs
Parts vary depending on whether the motor is included, the regulator design, and availability for the exact model and door. Labor can change with access, the condition of the glass mounts, and whether broken fasteners or damaged wiring need attention. A repair estimate should make clear whether it covers diagnosis, parts, labor, and any additional work found during disassembly.
Online information can provide a starting point, but published costs may not apply to a different model, location, or repair scope. A quote for an MG Motor repair can be requested through this window regulator quote page, with the vehicle details checked before comparing prices.
When a DIY repair may not be practical
A repair may be better left to a professional if the glass is cracked or unstable, the door has been damaged, wiring faults are unclear, or the necessary service information is unavailable. The same applies if you cannot support the glass securely or do not have a safe way to handle the regulator. A low-cost part is not a bargain if the repair risks breaking the glass or leaving the door incorrectly sealed.
If the motor or regulator diagnosis is uncertain, consider paying for an inspection before ordering parts. That can prevent avoidable replacement and help establish whether the problem is electrical, mechanical, or both.
Reduce strain on the regulator with careful window use
Avoid operating a window that is visibly crooked, binding, or making a harsh noise. Clear ice or debris around the glass rather than forcing it downward, and do not hold the switch after the window reaches its stop. If movement becomes slower or noisier, investigate early instead of waiting for the glass to drop.
These habits cannot prevent every failure, but they may reduce unnecessary strain on the mechanism. Prompt attention to a change in movement is often easier than dealing with a window that has become unsupported.
Conclusion
A careful diagnosis is the best starting point for MG window regulator repair: observe the glass, listen for the motor, and check the basic electrical supply before opening the door. If the mechanism needs to come out, match the replacement to the exact vehicle and keep the glass securely supported throughout the work. When the fault or repair procedure is uncertain, an inspection can help prevent damage and unnecessary parts replacement.
Frequently Asked Questions
What does a window regulator do?
A window regulator guides and supports the glass as it travels up and down. In a power-window system, the motor drives the regulator to move the glass.
Can a window regulator fail while the motor still works?
Yes. The motor may still make noise even if a cable, guide, clip, or track can no longer move the glass correctly. Testing the motor and mechanism separately helps identify the failed part.
Why does a car window move slowly?
Slow movement can result from binding, worn regulator parts, damaged seals, or an electrical problem. The cause should be checked rather than assumed from the speed alone.
Is it safe to drive with a window that has dropped into the door?
A dropped or loose window can shift unexpectedly and leave the vehicle exposed to weather. Avoid operating it and have the glass secured safely before driving if its position is unstable.
Should I replace the motor and regulator together?
Not always. The motor may be serviceable when only the regulator is damaged, but the correct choice depends on the test results, assembly design, and parts availability.
Do I need to disconnect the battery before replacing a regulator?
Follow the vehicle’s service instructions. Battery disconnection may be appropriate when working with electrical connectors or a motor that could operate unexpectedly, but it can also affect vehicle settings.
How can I prevent a window regulator from failing again?
Avoid forcing a window that binds, clear ice or debris before operating it, and stop using the switch when movement becomes uneven or noisy. Early inspection may help limit further damage.