

Key Takeaways
A timing belt service is preventive maintenance, but it is also precision work. The correct interval depends on the engine, model year, belt kit, and the quality of the installation.
- Check both mileage and elapsed time, using whichever limit comes first.
- Confirm the engine code and production year before ordering parts.
- Replace the tensioner, idler components, and usually the water pump while access is available.
- Set the engine accurately, tension the belt to specification, and rotate it by hand before starting.
- Keep invoices and mileage records so the next replacement is not left to guesswork.
Understanding MG timing belt replacement
MG timing belt replacement is not simply a matter of removing an old rubber belt and fitting a new one. The belt synchronizes the crankshaft and camshafts, so a small alignment error can affect how the engine runs. Access can also be awkward on mid-engine cars such as the MGF and MG TF. Before choosing a service interval or buying parts, identify the exact engine and model year.
Which MG models use a timing belt
Many MG cars fitted with Rover K-Series engines use a timing belt, including the MGF and MG TF. Related K-Series applications can include the MG ZR, MG ZS, and MG ZT, although the precise belt and tensioner arrangement can vary by production date and engine version. Older MGs with different engines may use a different timing system, so the badge alone is not enough to identify the required service.
The practical starting point is the vehicle identification number, engine code, and service documentation. If those details disagree, pause before ordering a kit. A parts catalog that lists only the model name may group together cars with different belt widths, tensioners, or camshaft arrangements.
How the K-Series engine timing system works
The timing belt transfers the crankshaft’s rotation to the camshaft or camshafts. This keeps valve opening and closing synchronized with piston movement. On some K-Series versions, including VVC engines, the timing arrangement has additional components that require careful positioning and may call for a specific locking procedure.
The belt itself is only one part of the system. Tensioners and idlers keep it tracking correctly, while the water pump may be driven in the same area. That is why a belt inspection should not be treated as an isolated check of the rubber surface.
Why belt failure can cause severe engine damage
If the belt breaks or jumps several teeth, the crankshaft and camshafts can lose synchronization. On an interference engine, valves and pistons may occupy the same space at different points in the cycle, causing bent valves or more extensive internal damage. Failure can occur without much warning, even when the visible belt does not look badly worn.
This is the reason a missed interval can become a major repair rather than a routine service. A belt that has reached its age limit should be replaced on schedule instead of being judged only by appearance.
Timing belt versus timing chain terminology
A timing belt and a timing chain perform a similar synchronization job, but they are not maintained in the same way. A belt is a reinforced rubber component with a defined replacement interval. A chain is metallic and may have a different inspection and replacement approach, but it is not automatically maintenance-free.
Owners sometimes use “cambelt,” “timing belt,” and “cam belt” interchangeably. In this guide they refer to the belt that synchronizes the crankshaft and camshaft, not an accessory belt such as the alternator belt.
Knowing when your MG needs a new timing belt
The replacement date should come from reliable service information, not from the belt’s appearance alone. Mileage matters, but so does time: rubber, backing material, and adhesive bonds age while the car is parked. The following guidance is a starting point for MGF and MG TF owners, while the handbook or workshop information for the exact engine remains the final reference.
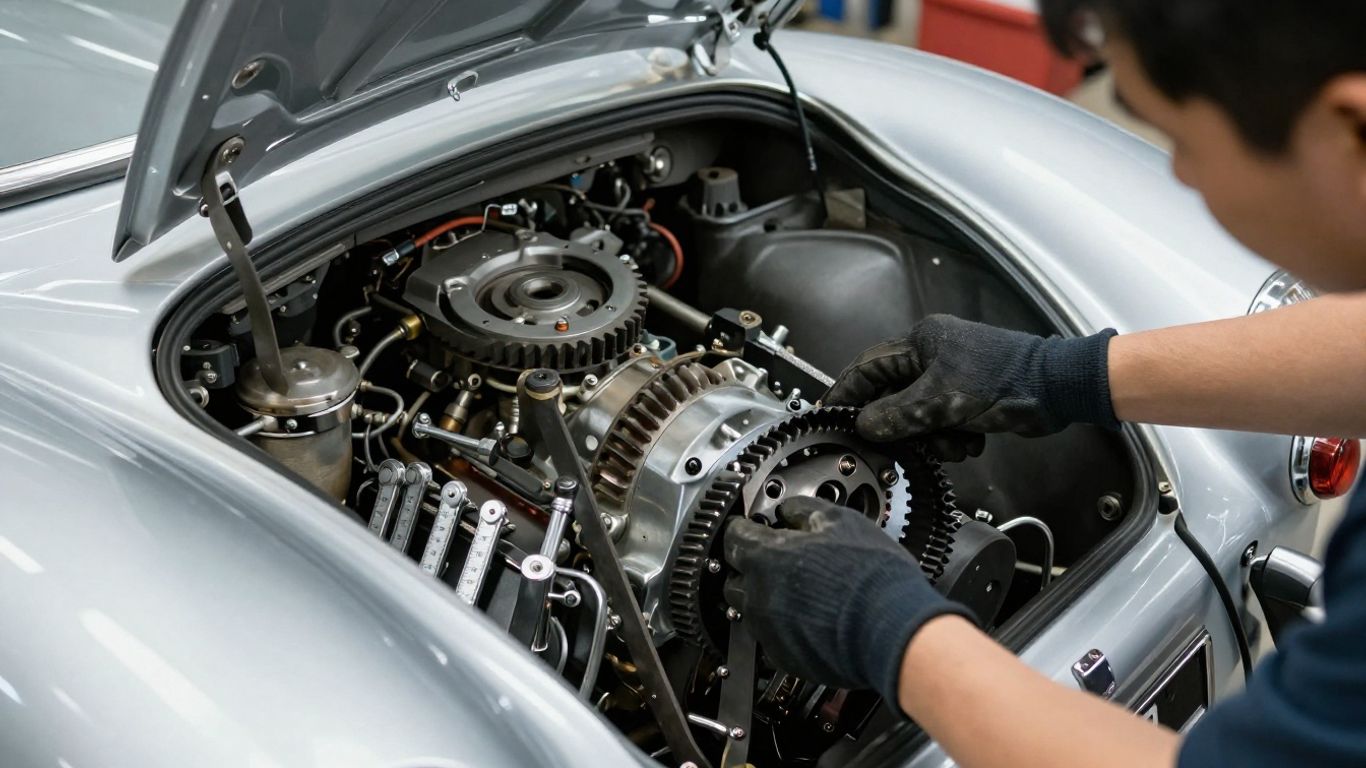
Recommended replacement intervals by model and engine
For the MGF K-Series, commonly cited guidance is 60,000 miles or five years, whichever comes first. For the MG TF, a four-year or 60,000-mile limit is commonly given. Some technical service information uses four years for both cars, so owners should verify the interval that applies to their model year and engine rather than treating one number as universal.
A replacement history should include the date and mileage of the last belt service. If the car has covered only a few thousand miles since then but the time limit has passed, the low mileage does not reset the clock. Conversely, a high-mileage car may reach the mileage limit well before the calendar limit.
How age and mileage affect belt condition
Mileage adds repeated bending, tooth loading, and heat cycles. Age brings a different set of stresses, including long periods under tension and exposure to temperature changes. A car used seasonally can therefore need a belt service even if its odometer reading seems reassuring.
Storage conditions also matter. Oil contamination, coolant leakage, and incorrect belt tension can shorten service life. These factors do not create a reliable alternative interval, but they do make an overdue belt a poor gamble.
Warning signs of belt wear or tensioner failure
A timing belt may not announce its condition clearly. Cracks, fraying, missing teeth, glazing, or oil contamination are reasons to stop and investigate, but a clean-looking belt can still be beyond its recommended age. A failing tensioner or idler may produce a rough bearing noise, wobble, or inconsistent tracking.
Possible running symptoms such as difficult starting, misfiring, uneven idle, or a sudden loss of power can have many causes. They should not be used to diagnose a belt problem by themselves. If a belt has jumped or the timing marks no longer agree, avoid repeated attempts to start the engine until the timing has been checked.
Why service history matters when buying a used MG
A stamped service book is useful, but an invoice is better because it may identify the parts changed, the mileage, and whether the water pump and tensioner were included. If the seller cannot show when the belt was replaced, treat the service as due rather than assuming it was done.
A sensible inspection also looks for coolant traces, oil near the belt covers, damaged fasteners, and signs that the covers have previously been removed. The goal is not to judge a repair from one visual clue; it is to build enough evidence to decide whether the car needs immediate maintenance.
Preparing for the timing belt job
Preparation prevents many timing belt problems before the first fastener is removed. Read the workshop procedure for the exact engine, check the parts against the vehicle identification details, and make sure the car can remain safely supported for the entire job. Rushing because the engine bay is already open is how small uncertainties become expensive mistakes.
Choosing the correct belt and water pump kit
K-Series timing belt kits can differ by production year, belt width, tensioner type, and engine configuration. Some kits are listed for early MGF applications, while later MGF and non-VVC MG TF applications may use a different arrangement. VVC versions may also require an additional rear camshaft belt, depending on the engine.
A bundled kit can simplify purchasing, but it still has to match the car. The MG timing belt kits reference describes three specific variations and includes the belt, tensioner, and water pump in its listed kits. Compare those details with the engine and production year before placing an order.
Essential tools and engine timing equipment
Ordinary metric sockets and wrenches are necessary, but they are not the whole tool list. Camshaft locking equipment, a crankshaft locking tool, and a suitable pulley-holding tool can make the difference between controlled work and improvised force. A torque wrench is also needed for fasteners that have specified tightening values.
Plan where removed bolts will go, especially if the covers use different lengths. Keep the belt-routing diagram, timing marks, and tensioning instructions visible. If access is restricted, additional extensions, a low-profile tool, or a method for supporting the engine may be required.
Replacement parts to install at the same time
The belt, tensioner, idler components, and water pump are normally considered together because much of the labor is shared. An accessory belt is also worth inspecting closely and replacing if it is worn, contaminated, or due by the maintenance schedule. New seals or gaskets may be sensible where the procedure requires their removal.
The exact parts list depends on the engine. Do not replace a component merely because it appears in a generic kit description; confirm that it belongs to the particular timing layout.
Safety precautions for working on an MG engine
Work on a cold engine where possible, disconnect the battery when appropriate, and support the car with properly rated stands on a firm, level surface. Never rely on a jack while reaching into the wheel arch or working beneath the vehicle. Keep loose clothing and hands away from rotating parts, and use eye protection when cleaning debris or releasing tension.
Before turning the crankshaft, remove tools from the belt path and make sure the transmission is in the correct position for the procedure. If the engine must be supported after a mount is removed, use a stable support method specified for the car rather than improvising with weak contact points.
Replacing the timing belt on an MG
The sequence below explains the logic of the job, not a substitute for the workshop manual. Fastener locations, access steps, locking procedures, and torque values vary between engines. On an MGF or MG TF, the transverse mid-engine layout can make access slower than the belt itself suggests, so allow enough time to work methodically.

Removing covers and accessing the timing components
Begin by creating a clear path to the timing end of the engine. Depending on the car, this may involve opening or moving the rear service access, removing the relevant wheel and inner arch liner, and shifting nearby components that obstruct the covers. Keep the removed hardware organized because a misplaced bolt can damage a cover or interfere with a pulley.
Remove the upper and lower timing covers according to the manual. Inspect the exposed area for oil, coolant, belt dust, loose fasteners, or a water pump that feels rough. Do not continue simply because the belt is visible; access and inspection are part of the diagnosis.
Setting the engine to top dead center
Turn the crankshaft in the specified direction until the timing marks align at the engine’s top-dead-center reference. The crankshaft and camshaft marks must agree with the correct reference points, not merely appear close. If a locking tool is specified, fit it as instructed rather than relying on paint marks made by a previous repair.
Take a photograph of the original alignment only as a secondary record. It cannot correct an earlier error. If the marks do not line up as expected, investigate before loosening the belt.
Releasing belt tension and removing the old belt
Once the engine is secured at the correct timing position, release the tensioner using the prescribed tool and method. Avoid levering against delicate pulleys or allowing the camshafts to rotate suddenly. Remove the belt carefully, then inspect its teeth and the surfaces of the pulleys for contamination or damage.
This is a useful point to compare the old and new components. A polished belt edge, uneven tooth wear, or a noisy bearing can explain why the old system should not be reused. Clean contamination from the surrounding area without forcing debris into seals or bearings.
Installing the new belt with correct alignment
Fit the replacement belt in the specified order, keeping the tensioned side tight and leaving slack only where the procedure permits. The timing marks should remain aligned while the belt is installed. Never force a belt over a pulley by prying against the teeth; if it does not fit, recheck the routing and tensioner position.
Set the tensioner using the manufacturer’s method and reference marks or measuring procedure. A belt that is too loose can jump, while one that is too tight can overload bearings and the water pump. The installation is not complete until the alignment and tension have both been checked.
Reassembling the covers and related components
Reinstall the covers only after the timing checks have passed. Replace damaged gaskets or seals where required, clean mating surfaces, and route accessory belts so they cannot rub against the timing cover. Refit the wheel-arch liner, service panels, coolant bottle, engine mount hardware, and other removed parts in the correct order.
Before starting the engine, confirm that no locking tools, sockets, rags, or temporary supports remain in the engine bay. A final fastener and routing check is tedious, but it is much easier than diagnosing a new noise caused by something left behind.
Checking timing, tension, and engine operation
The final checks deserve as much care as the installation. A belt can look correctly fitted and still be one tooth out, incorrectly tensioned, or affected by a component that was disturbed during access. Complete the mechanical checks before reconnecting everything that would make another adjustment difficult.
Verifying camshaft and crankshaft alignment
Rotate the crankshaft through the required number of complete revolutions by hand, then return it to the timing reference. The marks should realign without resistance that suggests valve-to-piston contact. If they do not, stop and correct the installation rather than compensating with a new paint mark.
Use the manual’s marks and locking points as the authority. The edge of a pulley or a nearby casting may look like a reference but may not be one.
Setting the correct belt tension
Tension must be set with the engine in the specified position and the tensioner adjusted in the specified direction. Some arrangements use a manual tensioner and others an automatic design, so a general “twist the belt until it feels right” method is not reliable. A belt can feel acceptable to the hand and still be outside its intended setting.
Check the tensioner indicator or measurement method after the crankshaft has been rotated and the marks have been confirmed again. If the indicator moves unexpectedly, find out why before the engine is started.
Rotating the engine by hand before starting
Hand rotation is a simple safeguard against an immediate mechanical mistake. It confirms that the crankshaft can complete its cycle and gives you a chance to feel for a hard stop. Turn slowly and evenly with the correct socket on the crankshaft, keeping clear of pinch points.
Do not use the starter motor as a test. It rotates the engine too quickly to detect a developing interference problem and can turn a correctable setup error into serious damage.
Checking for leaks, noise, and abnormal operation
After reassembly, check coolant and oil levels, reconnect components, and start the engine only when the timing checks are complete. Listen for slapping, chirping, grinding, or a new bearing noise, and watch for coolant or oil leaks around the serviced area. Let the engine reach operating temperature while monitoring its behavior.
A brief road test should be followed by another inspection. Any warning light, misfire, overheating, or unusual belt noise deserves attention before normal driving resumes.
MG timing belt replacement costs and service options
The price of a timing belt service varies widely because labor access and the parts included in the quote are not always the same. A low headline price may cover only the belt, while a more complete service may include the tensioner, water pump, accessory belt, coolant, and related seals. Ask for an itemized estimate before comparing numbers.
Typical parts and labor costs
There is no single reliable price for every MG. Parts quality, engine configuration, local labor rates, and whether the water pump is changed all affect the total. Mid-engine access can add time, while a straightforward front-engine layout may be quicker.
When requesting estimates, ask whether the quote includes taxes, disposal, coolant replacement, and post-installation checks. Some booking services publish fixed-price quotes that include parts and labor; the MG TF replacement quote page is an example of that format, though the actual price still depends on the vehicle details and provider.
Comparing a DIY replacement with professional service
DIY work can reduce labor cost if you already have the correct tools, a safe workspace, and experience with engine timing. It also transfers the risk of a missed mark or incorrect tension setting to the owner. Professional service costs more upfront but may be worthwhile when access is difficult or the car’s timing layout is unfamiliar.
A forum discussion about MGF and MG TF belt changes illustrates why owners often focus on pulley alignment and tool access when considering the job themselves. Shared experiences can help identify questions to ask, but they should not replace the vehicle’s workshop procedure.
Factors that increase the total repair price
The final bill can rise when the water pump is leaking, a crank seal is contaminated, fasteners are seized, or an engine mount and access panel require extra work. VVC engines may have additional belt-related components. A car with no usable service history may also need inspection before the technician can confirm the correct parts.
The following items are worth asking about before authorizing the repair:
- The exact belt and tensioner specification for the engine.
- Whether the water pump and coolant are included.
- Whether accessory belts and seals are inspected or replaced.
- How timing alignment and tension will be verified after installation.
These questions make two estimates easier to compare. They also reduce the chance that a necessary part appears later as an unexpected add-on.
When a complete timing belt kit offers better value
A complete kit is often sensible when it bundles the belt, tensioner, and water pump that would otherwise be purchased separately. The saving is not just the parts price: replacing a water pump later may require much of the same access work again. The kit still must match the car’s production year and engine version.
A repair page should describe its scope just as clearly as a parts listing. For example, Home Team Luxury Rentals describes a full-service property-management scope rather than leaving individual tasks vague; automotive estimates benefit from the same plain separation of included and excluded work. The comparison is about clear scope, not about the services themselves.
Avoiding common timing belt replacement mistakes
Most timing belt failures after a repair come from process errors rather than from the new belt suddenly becoming defective. Rushing the alignment, reusing questionable hardware, or skipping the hand-rotation check can undermine an otherwise good kit. A written checklist and a second look before startup are inexpensive safeguards.
Reusing old tensioners or idler pulleys
A new belt running over a worn tensioner or idler can create noise, poor tracking, or premature failure. Bearings may feel smooth when unloaded and become rough once the belt is tensioned. Replace components that are included in the service kit or that show play, noise, leakage, or damaged surfaces.
Do not assume a pulley is reusable merely because it turns. Compare the old and replacement parts, confirm the correct orientation, and tighten the fastener to the specified value.
Failing to replace the water pump when accessible
If the water pump is driven by or located behind the timing belt, replacing it during the belt service can avoid paying for similar access work again. A pump can develop a leak or bearing problem after the new belt has been installed, even if it appeared acceptable during a quick inspection.
Use the correct gasket or sealing method and clean the mounting surface carefully. After filling the cooling system, bleed it according to the vehicle procedure and check the level again after the first heat cycle.
Skipping post-installation timing checks
The marks should be checked before tensioning, after tensioning, and again after hand-rotating the engine. This repetition may feel excessive, but it catches a belt that has settled onto the pulley teeth or a tensioner that moved during adjustment. Starting the engine is not a substitute for these checks.
If the engine runs poorly after the service, shut it down and recheck timing, connectors, vacuum lines, accessory routing, and sensor wiring. Avoid driving in the hope that the problem will correct itself.
Keeping accurate records for future maintenance
Record the date, mileage, engine identification, parts fitted, and workshop that performed the job. Keep the invoice and, if available, the kit information. These details make the next interval straightforward and improve the car’s appeal when it is sold.
Maintenance records are useful beyond timing belts. A generator maintenance checklist is an unrelated example of how recurring inspections can be organized by frequency and task; the same record-keeping principle applies here without making the systems comparable. For broader planning, unrelated financial guidance such as long-term life planning also reinforces the value of recording future obligations, but it is not automotive advice. Fire-safety guidance, including a workplace fire safety guide, belongs to a different risk category entirely and should not be confused with vehicle maintenance.
Conclusion
A careful MG timing belt replacement starts with identifying the correct engine and interval, then continues through matched parts, accurate alignment, controlled tensioning, hand rotation, and a thorough final inspection. Whether the work is done at home or by a professional, a complete written record protects the next owner and helps prevent an overdue belt from becoming an engine failure.
Frequently Asked Questions
How often should an MG timing belt be replaced?
The interval depends on the model, engine, and production year. MGF and MG TF guidance is commonly expressed as a mileage limit combined with a time limit, with the first one reached triggering replacement.
Can a timing belt be judged by visual inspection?
No. A belt can look clean while being beyond its recommended service age or affected by internal deterioration. Inspection can reveal obvious contamination or damage, but it cannot replace the scheduled interval.
Should the water pump be replaced with the timing belt?
It is often sensible when the pump is driven by the timing belt or requires the same access work. Confirm the arrangement for the exact engine before ordering parts.
Is a timing belt replacement suitable for a beginner?
It can be challenging because it requires accurate timing, correct tension, safe access, and suitable locking tools. Anyone without those tools or experience should consider professional service.
What happens if the timing belt jumps a tooth?
The camshaft and crankshaft become out of synchronization. The engine may run poorly or fail to start, and an interference engine may suffer valve or piston damage.
How can I compare repair estimates?
Ask each provider to list the belt, tensioner, idlers, water pump, coolant, seals, labor, and post-installation checks. Comparing the scope is more useful than comparing a single headline number.
What records should be kept after the repair?
Keep the invoice, date, mileage, engine details, parts fitted, and any notes about related work. Those records establish when the next time- or mileage-based service is due.